The Quick Answer
Builder gel before base coat is the wrong order in 95% of cases. The correct sequence for a typical builder gel set is: prep → base coat → cure → slip layer of builder gel → apex → cure → refine → top coat.
But "builder gel before base coat" is a question people ask because of three real scenarios where the reverse makes sense:
- BIAB-style brush-on builders that are formulated as both base + builder in one bottle
- Repair work where you spot-apply builder gel directly to a damaged area before base-coating the whole nail
- One-coat starter kits that legitimately skip the separate base coat
Outside those three, base coat first. Reversing the order weakens the bond between gel and natural nail, and lifting starts within days.
What's in the Kit Matters
Kits where base + builder are bundled correctly
Builder gel kits where the base coat is included and clearly labeled in the application order. Use the base coat first, then the builder gel.

Morovan Professional Natural Nail Prep Dehydrate and Acid-Free Primer, Dehydrator for Acrylic and Gel Nail Polish, Non Acid Primer for UV Gels Fast Dry Superior Bonding Agent Gift Box Set
$6.99
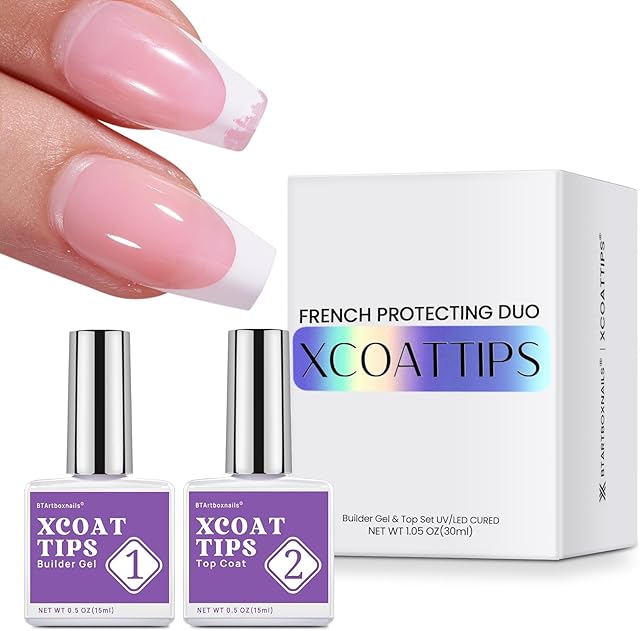
BTArtboxnails XCOATTIPS French Protecting DUO Builder Gel and Top Coat Set - Protect French Tips, No More Chipping
$16.99

modelones Builder Nail Gel, 7-in-One Clear Builder for Nails, LED Lamp Cured Color Rubber Base Gel Polish Coat Strengthener Thickening Extension Rhinestone Glue in a Bottle for DIY Home Salon Gifts
$7.64

Beetles Builder Gel for Nails-Cover Nude Translucent 8 in 1 Nail Thickening Strengthening Building Instant Apex for Beginner DIY Salon at Home,Natural Nude Builder Nail Gel, UV & LED Lamp Cured Needed
$8.99
Scroll →
Why Base Coat Goes First
Base coat is a thin primer layer designed to do three things:
- Bond with the natural nail keratin — chemistry optimized for adhesion
- Provide a cure-friendly surface for the next layer — slightly textured, slightly tacky after cure
- Block moisture migration between natural nail and builder gel
Builder gel, by contrast, is designed to bond with a CURED gel surface — meaning the base coat AFTER it has been cured under LED. The builder gel chemistry is not optimized for bonding directly with raw keratin. It will adhere, briefly, but the bond is weaker.
Skipping base coat or reversing the order results in:
- Lifting at cuticle and sidewalls within 3-7 days
- Free-edge peeling
- Visible separation when you look at the nail in profile
- Faster removal under acetone (sometimes a "feature" but usually unwanted)
The right order is base coat → cure → builder gel → cure. Every time. With the three exceptions below.
The 3 Exceptions
Exception 1 — BIAB and All-in-One Builders
Some brush-on builder gels are formulated as combination base + builder. The GelBottle BIAB™ is the most famous example. These products are designed to apply directly to the natural nail without a separate base coat.
How to identify these:
- Label specifies "base + builder" or "no base coat required"
- Application instructions skip a separate base coat step
- Product is brush-on bottle (polish-style), not jar-and-brush
If your kit explicitly says no base coat needed — believe the label. These formulas have base-coat chemistry baked in. Adding a separate base coat is redundant and can actually weaken the bond.
What this looks like in practice: prep → BIAB layer → cure → second BIAB layer (apex) → cure → top coat. Three steps fewer than traditional builder gel application.
Exception 2 — Spot Repair
If you have a crack in an existing set and want to repair without removal, the order changes:
- Clean the cracked area with alcohol
- Apply builder gel directly across the crack (NO base coat in the spot)
- Cure
- File flush
- Apply top coat over the repair
In repair work, the builder gel is bonding with EXISTING CURED GEL, not raw natural nail. Base coat would just insert an unnecessary layer between two compatible surfaces. Skip it for spot repair only.
For full crack-repair protocol, see builder gel cracking fixes.
Read next
Builder Gel Cracking? Diagnose the Crack Type and Fix It Without Removal (2026)
Builder gel cracks come in four distinct types — and each one tells you exactly what went wrong. Diagnose the crack first, then apply the right fix without redoing the whole set.
Continue readingException 3 — One-Coat Starter Kits
A small subset of beginner kits ship with a single builder gel that is designed to function as both base AND structural layer. These are usually labeled "all-in-one" or "single-step builder gel."
If your kit only includes ONE builder gel bottle and no separate base coat, that is by design — do not buy a separate base coat. The formula is calibrated for direct-to-nail application.
Common in budget kits at the $15-25 price point. Performance is acceptable for occasional use but does not match the bond strength of a true two-step base-then-builder system.
What Happens If You Reverse the Order Anyway
If you apply builder gel first, then try to apply base coat on top, two things happen:
- The base coat will not bond properly with the cured builder gel surface. Base coat is designed to bond with keratin, not cured gel.
- The next layer (color polish, top coat, whatever) will sit on top of a layer that has weakened adhesion to everything around it. The set will look fine for 2-3 days, then start lifting.
You will see this fail in the form of "sandwich lifting" — the base coat layer separates from both the builder gel below it and the top coat above it, creating a visible gap in profile view.
There is no recovery from this without removal. The structural failure has already happened.
The Correct Order — Visual
For a standard builder gel set:
- Prep — push cuticles, light buff with 240-grit, alcohol wipe
- Base coat — thin layer, cure 30-60s LED
- Slip layer of builder gel — very thin (1-2mm wide tracks), do NOT cure
- Apex placement — small bead at the natural apex point, tilt to flow
- Cure — 60-90s LED for full set, 90+ seconds for thumbs
- Refine — light file to shape if needed
- Top coat — thin layer over whole nail
- Final cure — 30-60s LED
If your kit comes with both base coat and top coat (most do), use them. Skipping them to "save a step" almost always costs you wear time.
For full application detail with timing per step, see how to use builder gel.
Read next
How to Use Builder Gel: Salon-Tested 8-Step Application for Beginners (2026)
The exact 8-step builder gel routine I use on clients — prep, base, slip layer, apex placement, cure, refine, top coat, finish. With timing, common mistakes, and per-step troubleshooting.
Continue readingHow to Tell If Your Kit Needs Base Coat
Decision flowchart:
- Does your kit include a separately-labeled base coat bottle? → Yes: use it first. No: continue.
- Does the bottle say "no base coat required" or "all-in-one"? → Yes: apply builder gel directly. No: continue.
- Is your builder gel a brush-on bottle (BIAB-style)? → Yes: check brand instructions; many BIABs skip base coat. No: assume you need a base coat.
- Are you doing a spot repair on an existing set? → Yes: skip base coat in the repair zone. No: use base coat.
Default if uncertain: USE the base coat. It is the safer bet — base coat almost never hurts a set, but skipping it often does.
Brand-Specific Notes
| Brand | Base coat needed? | Notes |
|---|---|---|
| Modelones 3-pc kit | Yes (included) | Standard 2-step process |
| Beetles 3-piece sets | Yes (included) | Standard 2-step process |
| Beetles HEMA-Free 8-in-1 | Yes (included) | Standard process |
| OPI GELement | Yes (included) | Premium 2-step with extended cure |
| The GelBottle BIAB™ | No (built-in) | BIAB is base+builder combined |
| Aprés Extend Gel | Sometimes | Depends on prep — see kit instructions |
| Light Elegance | Yes (separate bond) | Pro firmware uses a bond gel before builder |
| Mia Secret Formagel | Yes (separate primer) | Two-step with primer |
When in doubt, default to your kit's instructions. The brand knows their formula best.
Common Mistakes Related to Base Coat Order
Mistake 1: Skipping base coat to "save time." Saves 60 seconds, costs 2 weeks of wear. Not a good trade.
Mistake 2: Applying too thick a base coat. Base coat should be thin — a single brush stroke per nail, no flooding. Thick base coats trap uncured monomer underneath the builder layer.
Mistake 3: Not curing base coat fully. Cure 30-60 seconds depending on lamp wattage. Wiping the base coat before cure removes it. Cure FIRST, then apply builder gel directly to the cured surface.
Mistake 4: Using regular polish base coat under builder gel. Regular nail polish base coats (the kind for non-gel polish) do not work under gel. They never cure under LED and trap moisture. Use a GEL base coat — the one your kit shipped.
Mistake 5: Confusing primer with base coat. Some kits include both — a dehydrator/primer that dries on contact (no cure needed) AND a base coat that cures under LED. Apply primer first, dry, then base coat, cure, then builder gel. Skipping either weakens the bond.
Frequently Asked Questions
Do you put base coat under builder gel? Yes, in standard application. Prep → base coat → cure → builder gel → cure → top coat. Skip base coat only if your kit is BIAB-style or labeled all-in-one.
What happens if I apply builder gel before base coat? The bond between gel and natural nail will be weaker. Lifting starts within 3-7 days, usually at cuticle or free edge. Standard builder gel chemistry expects to bond with cured base coat, not raw keratin.
Does BIAB need a base coat? No — BIAB™ is formulated as base + builder in one bottle. Adding a separate base coat is redundant. Some BIABs benefit from a dedicated bonder/primer first (dehydrator), but not a separate base coat.
Can I skip base coat with budget builder gel? Only if the kit's instructions explicitly say so. Most budget kits include a base coat for a reason. If unsure, use it — base coat almost never hurts a set.
What if my kit doesn't include base coat? Either the formula is all-in-one (intentional), or the kit is incomplete. Check the bottle label and brand instructions. If no base coat is included AND the label doesn't say all-in-one, buy a compatible gel base coat separately.
Do I need to wipe base coat before applying builder gel? No. Cure the base coat under LED, then apply builder gel directly on the cured (slightly tacky) surface. The inhibition layer of cured base coat actually HELPS the builder gel bond.
Can I use a different brand's base coat under builder gel? Generally yes, as long as both are LED-cure soak-off gels. The chemistry is compatible across most major brands. Mix-and-match works in practice.
Cross-References
For technique deeper context: how to use builder gel covers the full 8-step application. The Builder Gel Atlas covers what builder gel is and when to use which system. For BIAB-specific application, see best builder gel in a bottle. For repair scenarios where order changes, see builder gel cracking fixes.
A Safety Note
Builder gel and most base coats contain acrylates that can sensitize skin over repeated exposure. The American Academy of Dermatology covers acrylate contact dermatitis in detail. Apply both layers with rigorous no-skin-contact discipline — getting either layer on cuticles is the most common sensitization pathway.
Final Notes from Sara
The order matters because each layer's chemistry assumes the layer underneath it has the right surface. Base coat assumes raw keratin. Builder gel assumes cured base coat. Top coat assumes cured builder gel. Reversing any of these inserts a chemistry mismatch that the manufacturer did not design for.
For 95% of users, the answer is: base coat first, builder gel second. Stick with the order on the bottle. If your bottle says otherwise (BIAB, all-in-one), follow the bottle.
Last updated May 2026. This article uses AI assistance for research and structure; all application observations come from my own salon work and at-home testing of the brands listed.