Editor Picks — Amazon
Top picks for builder gel vs polygel
Curated from current Amazon ratings and review counts.
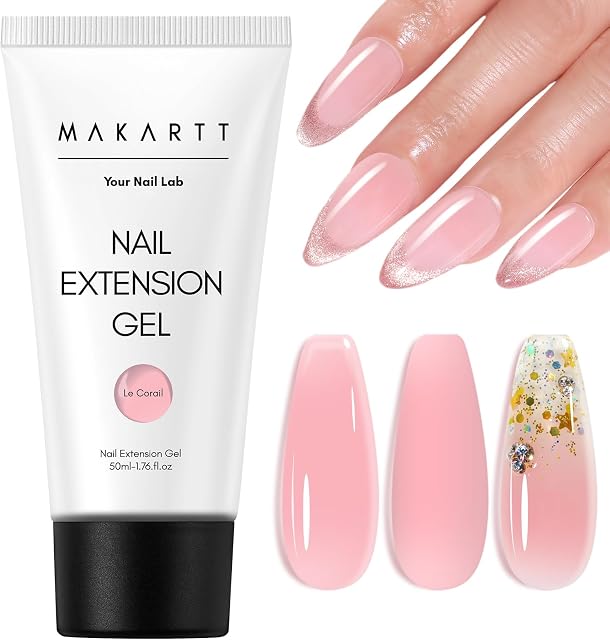
Makartt Hema-Free Poly Nail Gel Natural Pink 50ML Gel Builder for Nail Extension Nail Strengthener Beauty Gift 3D Gels Molder Nail Art Easy DIY at Home Salon
$7.99

modelones Builder Nail Gel, 7-in-One Clear Builder for Nails, LED Lamp Cured Color Rubber Base Gel Polish Coat Strengthener Thickening Extension Rhinestone Glue in a Bottle for DIY Home Salon Gifts
$7.64

Beetles Builder Gel for Nails,0.51 oz 8 in 1 Strengthening Nails Enhancement Building Apex for Beginners & DIY Salon Manicure,Clear Builder Nail Gel,LED & UV Lamp Needed,Gifts for Women
$7.99

Beetles 3D Gel Nail Art Kit-1oz Clear Solid Builder Nail Gel,5 in 1 Non-Sticky Hand Sculpting Building 3D Nails for Beginner DIY Salon at Home,UV & LED Lamp Cured Needed,Crystal Orb Gifts for Women
$12.99
Scroll →
The 30-Second Answer
If you want fast, smooth overlays with minimal filing, builder gel wins. If you want maximum work time and total control over shape, polygel wins. They both end up at similar durability and similar wear time on the nail — the difference is entirely in how the product behaves in your hand while you apply it.
In my own client work, builder gel sets faster (about 35% less chair time) but has a steeper learning curve for placement. Polygel forgives bad bead placement because the putty does not flow, but every set takes longer because of the filing and refining work after.
Round-by-Round Showdown
Eight categories, head-to-head. Builder gel and polygel split most of these, but the margins matter when you are choosing one for your own routine.
Round 1 — Texture & Application Format
Builder gel: Self-leveling jellied gel. Pickup with a brush from a jar (or a brush-on bottle). Flows slightly when placed.
Polygel: Putty-like consistency. Pickup with a metal spatula. Shaped with a wet brush dipped in slip solution. Does not flow at all.
Edge: No edge — different beasts. Polygel feels more like sculpting clay, builder gel feels more like advanced polish.
Round 2 — Work Time (Open Time Before Cure)
Builder gel: ~30-60 seconds before the gel sets in place. Self-leveling means it keeps flowing slightly until you cure it.
Polygel: Effectively unlimited until you cure. No air-cure. You can pause, eat lunch, come back, and keep working.
Edge: Polygel by a wide margin. This single factor is why most beginners prefer polygel for their first sculpted extension.
Round 3 — Control Over Shape
Builder gel: Flow-based. Where you place the bead is approximately where it stays, but minor flow happens. You correct with bead size, finger angle, and timing.
Polygel: Total control. The putty stays exactly where you push it. You shape with brush pressure, not with flow.
Edge: Polygel for first-time sculptors. Builder gel once your placement gets accurate.
Round 4 — Durability and Wear Time
Builder gel: 18-25 days on natural-nail overlays, 14-21 days on extensions. Soak-off formulas wear slightly less than hard formulas.
Polygel: 14-21 days on extensions. Polygel is rigid when cured and resists impact well, but it is also more brittle — chips happen at the corners and tips.
Edge: Roughly tied. Builder gel has the slight edge on overlays; polygel has the slight edge on impact resistance for long extensions.
Round 5 — Cure Behavior
Builder gel: LED 60 seconds, UV 2 minutes, typical. Pro firm gels can cure in 20-30 seconds. Sticky inhibition layer normal after cure.
Polygel: LED 60 seconds, UV 2 minutes. Slightly more lamp dependence — under-cured polygel is rubbery, not just tacky.
Edge: Builder gel — slightly faster cure on average and more forgiving of weak lamps.
Round 6 — Filing and Refinement After Cure
Builder gel: Light file pass to refine apex and free edge. Most sets need 5-10 minutes of file work.
Polygel: Heavier file pass. Slip solution leaves uneven texture; the cure shape rarely matches the final shape. 15-25 minutes of file work is normal.
Edge: Builder gel by a clear margin. The smoother out-of-cure surface saves real time.
Round 7 — Removal
Builder gel (soak-off variant): File 80%, soak in pure acetone 15-20 minutes, gently push off. Total removal time about 25-30 minutes.
Polygel (most variants): File mostly off. Soak rarely fully removes polygel — it is engineered to be more rigid than soak-off gels. Total removal time 30-45 minutes, mostly filing.
Edge: Builder gel for nail health. Less filing means less natural-nail damage.
Round 8 — Cost Per Set
Builder gel: Budget jar around $10-$15, lasts 60-100 sets. Cost per set ~$0.15-$0.25.
Polygel: Budget tube around $15-$25, lasts 30-50 sets. Cost per set ~$0.30-$0.83.
Edge: Builder gel — about half the cost per set on a budget kit, since polygel uses more product per nail.
Polygel vs Builder Gel — The Reverse View
Most pages frame this comparison from "builder gel's perspective." Here is the same matchup viewed from polygel's side:
If you are coming from polygel and considering builder gel, the adjustment is mostly about losing your unlimited work time. Your hand needs to move faster, your beads need to be smaller, and you need to commit to placement instead of pushing the product around.
What you gain: less filing, faster sets, smoother finish, lower cost per set, and a more flexible final feel on the nail.
What you lose: the safety of a putty that does not flow, and the ability to walk away mid-set.
For most home users who already feel comfortable with polygel, builder gel is a worthwhile upgrade once you do 5-10 practice sets.
Hybrid Approach — When to Use Both
Pros sometimes use both systems on the same nail:
- Polygel for sculpting the extension (because of unlimited work time on the form)
- Builder gel for the overlay over the natural nail bed (smoother, faster, lighter)
This is uncommon at home but worth knowing. The systems are chemically compatible. Cure both fully and you get the structural benefits of polygel where you need control plus the smooth finish of builder gel where you do not.
Cost-Per-Set Math (Real Numbers)
| Scenario | Builder Gel | Polygel |
|---|---|---|
| One DIY set per month, budget kit | ~$2.40/year on product | ~$8/year on product |
| One pro set per week, mid-tier | ~$15/year on product | ~$45/year on product |
| Pro tech, daily client work | ~$0.20/client | ~$0.65/client |
Polygel is structurally more expensive because each nail uses 2-3x the product volume of a builder gel bead.
Application Tools — What Each System Actually Needs
The tool kits look different. If you have one system's tools and want to switch, you will need to buy more than just the new gel.
Builder gel application tools:
- LED/UV lamp (48W+)
- Synthetic flat or oval brush (size 4-8)
- Cuticle pusher
- 100/180 grit file for prep, 220 for refining
- Lint-free wipes + 91% isopropyl alcohol
- Optional: dappen dish for slip-application
Polygel application tools:
- LED/UV lamp (same as builder gel)
- Slip solution (rubbing alcohol works in a pinch but commercial slip solution is better)
- Stainless steel spatula (for picking up product)
- Wet brush dedicated to polygel only
- Dual forms or paper extension forms
- Cuticle pusher, file (same as above)
The polygel kit is more equipment-heavy by 3-4 items. If you switch systems, budget another $20-$30 for the new tools beyond the gel itself.
When Builder Gel Is the Better Choice
- You want short to medium overlays, not long sculpted extensions
- You value clean finish over forgiving sculpt
- You want lower cost per set
- You want easier soak-off removal
- You have already done 5+ gel manicures and are comfortable with timing

Modelones Builder Nail Gel Kit
Under $25

The GelBottle BIAB™ Builder In A Bottle
$50–$120
Also on Amazon
Beetles 3-Piece 15ml Builder Nail Gel Set
$11.39★ 4.6
When Polygel Is the Better Choice
- You are sculpting extensions for the first time
- You want unlimited work time
- You like the feel of clay-like sculpting
- You do not mind extra filing time
- You want maximum impact resistance for long lengths

Read next
How to Use Builder Gel: Salon-Tested 8-Step Application for Beginners (2026)
The exact 8-step builder gel routine I use on clients — prep, base, slip layer, apex placement, cure, refine, top coat, finish. With timing, common mistakes, and per-step troubleshooting.
Continue readingFrequently Asked Questions
Is polygel stronger than builder gel? Stronger in impact resistance, yes — polygel resists chipping at the tip slightly better. But "stronger" depends on the build. A correctly-built builder gel apex outlasts a thin or badly-placed polygel set. Structure matters more than which system you pick.
Is polygel or builder gel better for beginners? Polygel for first-time sculpted extensions because of unlimited work time. Builder gel for first-time overlays because of the smoother finish and forgiving cure. Both are beginner-accessible — just for different goals.
What is the difference between builder gel and polygel? Builder gel is a self-leveling jellied gel applied with a brush. Polygel is a putty-like product applied with a spatula and shaped with a wet brush. Both cure under LED/UV. Both reach similar wear time. The behavior during application is the entire difference.
Is polygel the same as builder gel? No. Different chemistry, different application format, different work time, different cost. They serve overlapping use cases but are distinct systems.
Can you use polygel as builder gel? Functionally similar but the application techniques do not transfer. If you have polygel and want a builder-gel-style overlay, you can do thin polygel layers — but you are paying more per set and getting more filing work for what builder gel does easily.
Builder gel vs polygel — which removes easier? Builder gel (soak-off formula) by a meaningful margin. Soak-off builder gel removes in 25-30 minutes; polygel typically requires 30-45 minutes mostly through filing.
What is better, polygel or builder gel for natural nails? Builder gel. Lower cost, smoother finish, easier soak-off removal — all favor builder gel for natural-nail overlays where you do not need an extension.
Hybrid gel vs builder gel? "Hybrid gel" usually refers to gel polish products that have some structural strength. Real builder gel has substantially more thickening capacity than hybrid gels. If you want structure, choose builder gel. If you want color with mild reinforcement, hybrid gel is fine.
A Note on Long-Term Nail Health
Both builder gel and polygel use acrylate-based monomers. Repeated exposure can sensitize skin over years of use — the American Academy of Dermatology covers acrylate contact dermatitis in detail. If you're using either system long-term, watch for early sensitivity signs (itching, redness around cuticles after application) and switch to HEMA-free options if symptoms appear.
Final Notes from Sara
Pick the system based on what you want to do, not which is "better." Builder gel and polygel both produce great results in capable hands, and both produce frustrating results in beginners' hands when they pick the wrong system for their goal.
Try both on short overlays first. Once you know which workflow feels right, commit to one and master it. Most home users do not need both — choose your lane.
For builder gel technique, walk through the how to use builder gel guide. For the foundation that applies to both systems, the Builder Gel Nails pillar covers prep, cure, and aftercare for any structural manicure.
If your builder gel keeps lifting, the issue is rarely the gel choice — it is prep. See builder gel lifting fixes.
Last updated May 2026. This article uses AI assistance for research and structure; all comparisons and observations come from my own client work.