Lifting is the #1 builder gel complaint I get from clients. The fix depends entirely on when the lift starts. Lifting at day 2 has a completely different cause than lifting at day 10. Get the timing right and the diagnosis is easy.
This guide walks through the four lifting timelines, the three lift locations (cuticle, sidewall, free edge), and the salon-grade rebalance fix that saves a set without full removal in most cases.
Re-Bond Toolkit
Builder gels I reach for during a lift rebalance
Thin-viscosity, fast-cure builder gels that flow under a lifted edge without trapping bubbles — the Amazon-stocked picks I refill for spot rebonds.

Morovan Professional Natural Nail Prep Dehydrate and Acid-Free Primer, Dehydrator for Acrylic and Gel Nail Polish, Non Acid Primer for UV Gels Fast Dry Superior Bonding Agent Gift Box Set
$6.99

Young Nails Protein Bond - Non-Acidic Nail Primer, Enhanced Adhesion for Gel Polish & Acrylic, Nail Dehydrator, PH Bonder for Gel Nails, 0.25 oz
$14.95
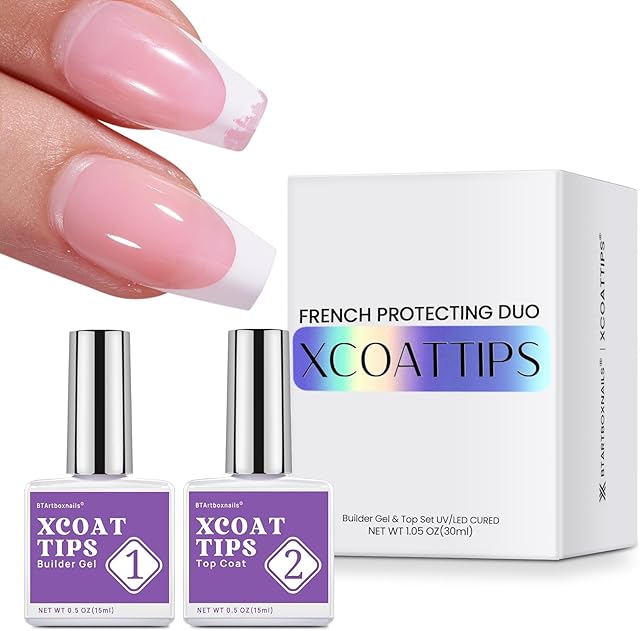
BTArtboxnails XCOATTIPS French Protecting DUO Builder Gel and Top Coat Set - Protect French Tips, No More Chipping
$16.99

modelones Builder Nail Gel, 7-in-One Clear Builder for Nails, LED Lamp Cured Color Rubber Base Gel Polish Coat Strengthener Thickening Extension Rhinestone Glue in a Bottle for DIY Home Salon Gifts
$7.64
Scroll →
The Lifting Timeline — When It Lifts Tells You Why
| Lift starts | Almost certainly | Less likely |
|---|---|---|
| Day 1-3 | Prep failure | Allergic reaction (rare) |
| Day 4-7 | Cure failure or placement (gel touching skin) | Bad product |
| Day 8-14 | Impact damage or no top coat refresh | Gradual prep failure |
| Day 15+ | Regrowth — normal, time to refill | Set just expired |
If you can identify which window your lifting falls into, you have already narrowed the cause to a small set of possibilities. The rest is matching the specific failure to the timing.
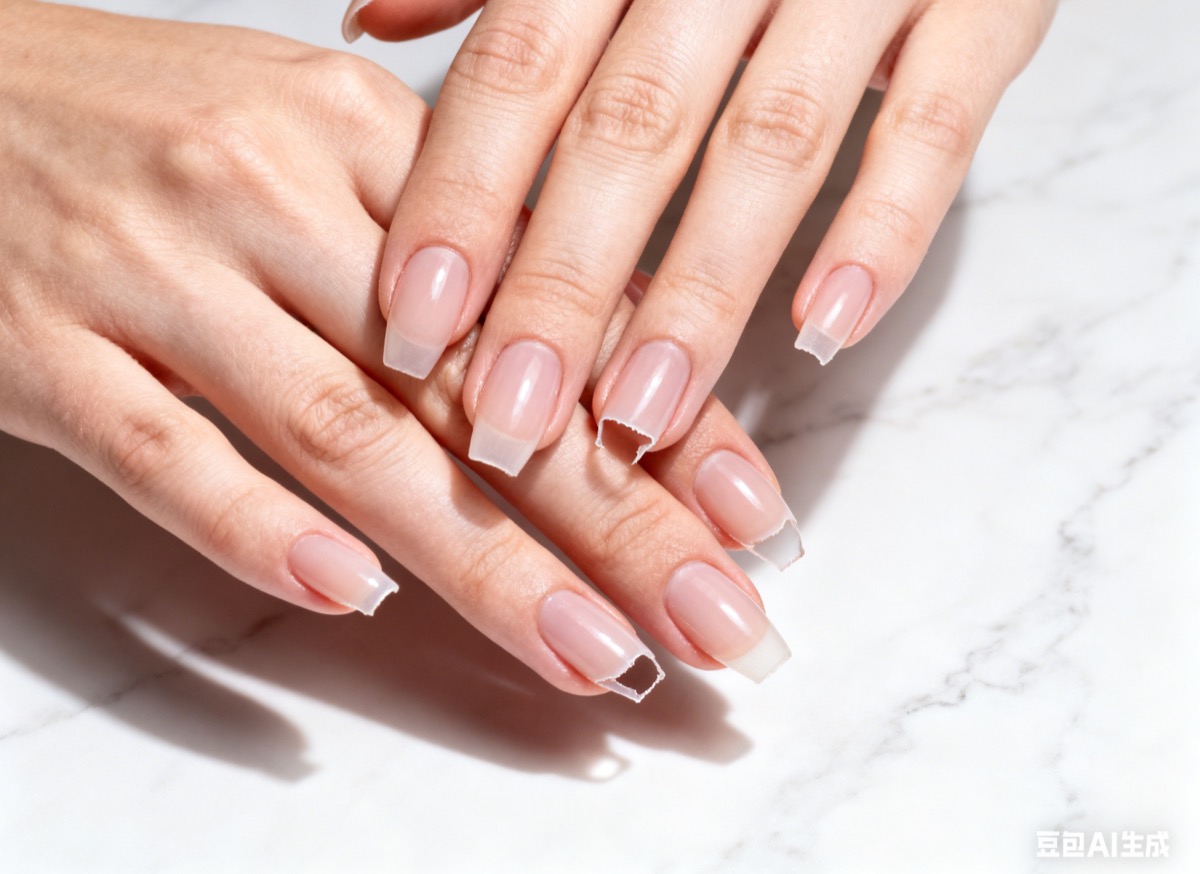
Day 1-3 Lift — Prep Failed
If the gel lifts within the first three days, prep is almost always the culprit. Builder gel needs a clean, dehydrated nail plate to bond. If anything was left on the surface during application, the bond fails fast.
The four prep failures I see most:
-
Invisible cuticle residue on the plate. When you push cuticles back, a thin layer of dead skin (eponychium) often stays stuck to the nail surface. You cannot see it. Builder gel will not bond to it. The lift starts within hours.
-
Oil residue from cuticle oil, hand cream, or natural oils. If you applied any oil-based product within 30 minutes of starting the set, the nail surface is contaminated.
-
Skipped dehydration. Even "dry" hands have surface moisture. Without a dehydrator (91% isopropyl alcohol minimum), water trapped under the gel triggers immediate lift.
-
Buffing too aggressively or not at all. No buff means the nail surface is too smooth for chemical bond. Aggressive buff thins the plate and creates micro-tears.
The fix: Remove the lifted set and re-do with proper prep. Day 1-3 lifts almost always indicate ALL nails are at risk — the whole prep was wrong, not just one finger. Watch other nails carefully.
For the proper prep routine, see how to use builder gel.
Read next
How to Use Builder Gel: Salon-Tested 8-Step Application for Beginners (2026)
The exact 8-step builder gel routine I use on clients — prep, base, slip layer, apex placement, cure, refine, top coat, finish. With timing, common mistakes, and per-step troubleshooting.
Continue readingDay 4-7 Lift — Cure or Placement Failed
If the gel held for 4-7 days then started lifting, prep was probably fine. The cause is either incomplete cure or product placement that touched skin.
Cure failure: Under-cured gel has weaker structural integrity. Once normal hand use (washing, gripping) starts flexing the nail, the under-cured layer separates from the next layer or from the natural nail. Most often shows up at thumbs (which under-cure most easily).
For full cure diagnostics, see builder gel not curing.
Skin contact: If gel touched the cuticle skin or sidewall skin during application, that contact point becomes a peel start. As skin moves with normal hand use, it tugs at the gel and the lift propagates inward. This is the most common cause of cuticle-zone lifting at the day 4-7 mark.
The fix:
- For cure failure: file the lifted area down, apply slip layer of fresh gel, cure 90+ seconds, refine
- For skin contact: file off the flooded section, leave a hairline gap (0.5-1mm) from skin on rebuild
Day 8-14 Lift — Impact or No Top Coat Refresh
Lifting that starts after day 7 is usually not a prep or cure issue — those would have shown up earlier. By day 8+, the cause is mechanical wear.
Impact damage: Specific events you may not even remember — banged a nail on a doorframe, jammed a finger, accidentally caught something. The micro-fracture starts and slowly propagates into a visible lift.
No top coat refresh: Top coat wears off over time. By day 10-12, the protective seal on top of the builder is thin. UV exposure, hand sanitizer, and washing dehydrate the gel surface and create lift conditions.
The fix:
- For impact lift: rebalance the affected nail with a fresh bead (5-10 min repair)
- For top-coat aging: file the entire surface lightly, apply fresh top coat across all 10 nails. Buys another 7-10 days.
This is the easiest lifting category to fix. Repairs work, no full removal needed.
Day 15+ Lift — Probably Normal Regrowth
By day 15, your natural nail has grown out about 1.5-2mm. The gel that was at the cuticle line is now further out, and the new nail is exposed. This is normal. Time for a fill.
If lifting is happening only at the original cuticle line, you have just hit the natural regrowth point. Schedule a refill. Not a problem.
Lift Location Tells You Where the Failure Happened
Cross-reference timing with location:
Cuticle-Zone Lifting
Lift starts where the gel meets the cuticle. Almost always one of three things:
- Cuticle residue not cleaned (Day 1-3)
- Gel flooded onto skin during application (Day 4-7)
- Natural regrowth — fill needed (Day 15+)
Pro tip: When you see a client with cuticle-zone lift before day 7, ask them what oil or cream they used the morning of their appointment. Almost always there is a recent oil exposure.
Sidewall Lifting
Lift along the side of the nail.
- Over-filing the sidewall during prep, leaving the natural nail too thin (Day 1-3)
- Gel application that flooded onto sidewall skin (Day 4-7)
- Side impact — closing a drawer, gripping something (Day 8-14)
Free-Edge Lifting
Lift at the tip of the nail.
- Free edge not capped during application (Day 1-3)
- Length too long for the gel formula (Day 4+, ongoing)
- Impact at the tip (Day 8+)
If your free edge lifts repeatedly, you are over-extending past what the gel can support. Shorten by 2-3mm permanently.
The Pro Prep Routine That Stops Day 1-3 Lifting
This is the prep routine I follow before every set:
- Push cuticles back gently with a metal pusher (not aggressively — push, do not scrape)
- Use a clean cuticle pusher to remove the eponychium (the thin film of dead skin on the plate near the cuticle)
- Light buff with 180-grit buffer in 3-4 strokes — just enough to remove shine. Do not aggressive-file.
- Wipe with 91% isopropyl alcohol to remove buffing dust and surface oils
- Wait 30 seconds for any residual moisture to evaporate
- Apply primer or dehydrator if your nails are oily — this is optional for most users but mandatory for habitual lifters

This routine takes 5-6 minutes total per hand. It is not optional. Skipping any step is the most common reason builder gel lifts in the first week.
Salon-Grade Rebalance — Fix Without Full Removal
If only 1-2 nails are lifting and the rest are fine, you can rebalance instead of removing the whole set.
- File off the lifted gel completely on affected nails (220 grit, gentle)
- Wipe nail plate with alcohol — this is fresh prep on the exposed natural nail
- Apply a thin slip layer of fresh builder gel to the prepped area
- Build the apex back up with a small bead, place over the stress point
- Cure 60-90 seconds
- Refine and top coat
Total time: 8-12 minutes per nail. This restores the set for another 2-3 weeks of wear.
When to Remove the Whole Set Instead
Some sets are not worth saving. Full removal is the right call when:
- 3+ nails are lifting with the same root cause
- Lifts are at the cuticle on multiple fingers (means prep failed across the set)
- The gel feels soft or rubbery anywhere (under-cure)
- You are seeing skin reaction (redness, itching) — possible sensitization, see a dermatologist
For removal, see how to remove builder gel or how to remove builder gel without a drill.
Read next
How to Remove Builder Gel Without a Drill: The Complete File-and-Soak Method (2026)
You don't need a nail drill to remove builder gel safely at home. The file-and-soak method works with a simple hand file — and it's actually gentler on your natural nails than e-file removal in unskilled hands.
Continue readingLong-Term Prevention Strategy
Once you know your lifting pattern, fix it at the source:
- Day 1-3 lift consistently → your prep routine is the issue. Slow down, follow the 6-step prep above
- Day 4-7 cuticle lift → you are flooding the cuticle area. Use a smaller bead, leave a 0.5-1mm gap from skin
- Day 4-7 cure-related lift → your lamp is under-powered. Upgrade to 48W+ LED
- Day 8-14 lift → add a top coat refresh at day 10. Apply fresh top coat across all 10 nails, cure
- Free-edge lift, all timings → your lengths exceed what the gel supports. Shorten by 2-3mm
A correctly-applied set on a properly-prepped nail with a strong lamp should not lift before day 14. Lifting before that timeline is always fixable once you identify the cause.
Frequently Asked Questions
Why is my builder gel lifting? Identify the timeline first. Day 1-3 means prep, day 4-7 means cure or skin contact, day 8+ means impact or top-coat aging. Each has a different fix.
Why does my builder gel keep lifting at the cuticle? Cuticle-zone lift is almost always either dirty prep (Day 1-3) or gel flooded onto skin (Day 4-7). Address whichever timing matches your lifts.
How to fix lifting builder gel? Rebalance for 1-2 isolated nails (file off lifted area, fresh slip + apex, cure). Full removal for 3+ nails or systemic prep failure.
Why does my builder gel lift on my thumbs? Thumbs under-cure differently than other fingers because of the angle in the lamp. Cure thumbs separately at 90-120 seconds.
Builder gel lifting at cuticle in 2 days — what's wrong? Prep failure. Almost certainly. Likely cuticle residue on the plate or recent oil exposure. Re-do with thorough prep.
BIAB lifting — same fixes? Yes, all the same diagnostic. BIAB is a builder gel; the prep, cure, and placement rules are identical to jar builders.
Why does my builder gel keep lifting no matter what I do? If lifting is consistent across multiple sets, one of: (a) your nails are oily and need a primer step you have been skipping, (b) your lamp is under-powered, or (c) you have a contamination habit (oil, hand cream applied too close to set time). Try primer first — solves most chronic lifting.
Can builder gel lift be repaired without removing the whole set? Yes for 1-2 isolated nails — rebalance with fresh gel takes 8-12 min per nail. For 3+ nails or systemic issues, removal is faster.
A Note on Lifting and Possible Sensitization
Persistent lifting accompanied by redness, itching, or swelling around the cuticles isn't just a prep problem — it can indicate developing acrylate contact dermatitis. The American Academy of Dermatology covers this allergy pattern in detail. If you see skin reaction symptoms in addition to lifting, stop the gel and see a dermatologist before continuing.
Final Notes from Sara
Lifting is the most diagnosable builder gel problem. The timing tells you the cause. The cause has a specific fix.
If you keep lifting on the same nails repeatedly, you have a habit issue (oil exposure, prep skip, length extension) that you will need to change. The product is rarely the culprit when lifting is chronic.
For the application technique, walk through the how to use builder gel guide. For the foundation, see the Builder Gel Nails pillar.
If your gel is also under-curing in addition to lifting, see builder gel not curing — under-cure compounds lifting badly.
Last updated May 2026. This article uses AI assistance for research and structure; all troubleshooting steps come from my own client work.