Builder gel nail designs are what happen when you stop treating art as a coat of decoration on top and start treating it as part of the nail's architecture. After eight years behind the table, the single biggest thing I've learned about design longevity is this: the styles that survive three weeks of real life are the ones where the color, the glitter, the chrome, or the shape lives inside the gel structure, not on the surface of it. Painted art chips at the edges. Built-in art wears down evenly with the whole nail. That difference is the entire reason this guide exists.
For color + art builds — Amazon
The colored builder gels and tools I use for lasting designs
Pigmented builder gels and art essentials, Amazon-stocked.

Beetles Blooming Gel, 15ml Clear UV LED Nail Art Gel Polish for Aura Nails, Marble, Natural Stone, Watercolor and Floral Print Spreading Effects, Soak Off DIY Manicure Design
$7.98
Amazon price as of Oct 23, 2026

Beetles Gel Nail Polish Kit with U V Light - 80Pcs Color Enchantment 55 Colors Gel Nail Kit with Everything Base Top Coat Beginner Starter at Home Nails Kit Manicure DIY Salon Tools Gifts for Women
$28.99
Amazon price as of Oct 23, 2026

Makartt 3D Gel Nail Art, Sculpting Gel Glue for Drawing, Molding, Sculpture, Gems and Decoration, No Wipe Clear Gel Polish for DIY Nail Designs, 15g
$6.98
Amazon price as of Oct 23, 2026

modelones Builder Nail Gel, 7-in-One Clear Builder for Nails, LED Lamp Cured Color Rubber Base Gel Polish Coat Strengthener Thickening Extension Rhinestone Glue in a Bottle for DIY Home Salon Gifts
$8.49
Amazon price as of Oct 23, 2026
Scroll →
Product prices and availability are accurate as of Oct 23, 2026 and are subject to change.
Everything below is organized by style. For each one I've given you the technique the way I actually do it in salon, plus the specific reason that method holds up. If you want a broader gallery of inspiration before you commit to a look, start with builder gel nail ideas and the full Builder Gel Atlas.
French and Baby-Boomer Ombré Built Into the Structure
A structured French is the design I get asked for most, and the trick to a lasting one is building the smile line with a pigmented builder gel rather than painting a white tip over a finished nail. I lay a thin clear builder base, cure, then float a white or milky-white builder along the free edge and blend the boundary while it's still uncured. For baby-boomer, I feather the white up into the pink with a dry brush before curing so there's no hard line to chip.
Because the color is a builder layer, it becomes part of the apex-to-edge structure. A painted tip sits on top of cured gel and shears off at the smile line within a week. A built smile line wears down with the nail. That structural difference is why my French sets routinely make it to a fill without a visible chip.
Encapsulated Glitter That Never Sheds
Glitter is the design that most people give up on because it dulls and catches within days. The fix is encapsulation: you press the glitter onto a semi-cured builder layer, brush away the loose grit, then flood a clear builder dome over the whole thing so the glitter is suspended inside glass, not sitting exposed on top.
Encapsulated glitter cannot catch on fabric and cannot dull, because oxygen and skin oils never reach it. The full sequence — the trapping layer, the margin rule, the clear dome — is worth reading in detail through the builder gel encapsulation technique guide, because encapsulation is the single technique that unlocks half the designs on this page.
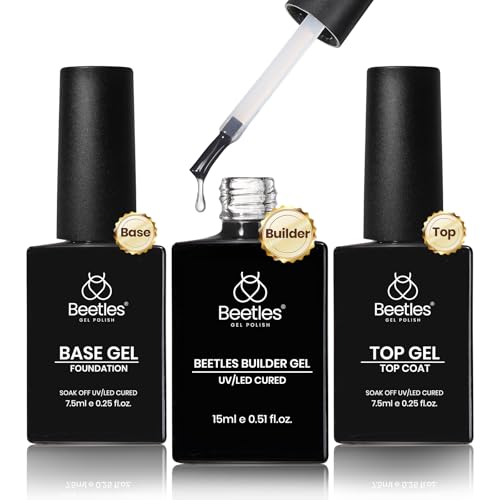
Beetles 3-Piece Clear Builder Gel with Base & Top
$9.99
Amazon price as of Oct 23, 2026
Chrome and Mirror Finishes Sealed for the Long Haul
Chrome powder gives that liquid-metal mirror look, and it's shockingly fragile if you leave it on the surface. The version that lasts gets rubbed into a cured no-wipe layer, then sealed under a thin clear builder coat and a non-yellowing top. Sealing the chrome does dull the mirror by maybe ten percent, but it stops the tarnishing and rub-off that ruins an unsealed chrome by day three.
If you want maximum mirror shine for a one-night event, leave it unsealed. If you want it to still look like metal at your two-week mark, seal it. I almost always seal, because clients remember how the nails looked at week two, not day one.
Marble and Ink-Swirl Patterns
Marble is a forgiving design because the pattern is meant to look organic, so small imperfections read as intentional. I build it by dropping thinned pigment or a marble gel onto an uncured milky builder base and dragging a fine brush or a thin needle through it to pull the veins. Cure, then encapsulate under clear builder so the swirl is locked below the surface.
The reason built marble outlasts painted marble is depth. When the veins sit under a clear dome, light passes through the layers and the pattern gains a real stone-like depth that a flat painted version never gets — and because it's encapsulated, it wears like any other builder gel set.
Milky and Jelly Sheer Builds
Milky and jelly nails are having a long moment, and they're one of the easiest builder gel design ideas for a beginner because there's no linework to mess up. A milky look is a translucent white builder applied in one or two sheer coats; a jelly is a tinted translucent builder in soft pink, peach, or lilac. You're building color and structure in the same layer.
The durability advantage here is that the color is the structure. There's no separate polish layer to chip away from a clear base, so a milky build wears as one solid, semi-transparent piece. For color builders that give this exact effect in a single confident coat, a 9-in-1 pigmented builder set is the tool I reach for.

Beetles Builder Gel 9-in-1 Clear/Nude/Pink
$18.89
Amazon price as of Oct 23, 2026
Negative Space Designs That Wear Clean
Negative space uses the bare, clear-gel nail as part of the design — a diagonal cutout, an open half-moon, a clear stripe between two blocks of color. The technique is precision placement: I build my colored builder only where the design calls for it and leave the rest as a clean clear-builder structure, so the whole nail is still fully protected even though it looks half-bare.
This style lasts because the clear negative-space zones are real builder gel with a proper apex, not thin gaps. People assume negative space is fragile because it looks like less product, but a correctly built clear zone is just as strong as the colored zones beside it. The look is airy; the structure is not.
Subtle 3D Texture and Raised Accents
Builder gel's thickness is what makes low-relief 3D possible without acrylic. I build tiny raised dots, a single sculpted bow, or a soft raised heart by placing small beads of thicker builder, shaping them, and curing each in place. Then a thin clear seal over the base of each element locks it to the nail.
The failure point on 3D is always the join between the raised element and the nail, so the sealing pass matters more than the sculpting. When I anchor the base of every raised accent under a thin clear flood, the element becomes structurally continuous with the nail and stops popping off. The building-up-in-layers approach here is the same one covered in the encapsulation guide, just applied to sculpted shapes.
Seasonal Accents Without Wrecking Durability
Seasonal designs — a single autumn leaf, a frosted winter tip, a spring floral accent nail — are best done as one or two feature nails rather than all ten, both for taste and for wear. I build the seasonal art into the structure on the accent nails using pigmented builder and encapsulation, and keep the other eight nails a clean structural neutral so the set as a whole still wears like a standard builder gel manicure.
The mistake I see is people surface-painting seasonal art on all ten nails the night before an event, then wondering why it's chipped by the weekend. Keep the art built-in and limited, keep the rest structural, and the set survives.
The Durability Difference: Why Built-In Beats Painted
Here's the through-line of every style above. Surface art — polish, decals, loose glitter, unsealed chrome — has exposed edges, and exposed edges are where every chip and lift begins. When you build the design into the gel structure and seal it under clear builder, there are no exposed edges. The design wears down evenly with the nail over three to four weeks instead of failing at a specific weak point in one.
In March 2026 I did a client's encapsulated milky-French set with tiny built-in gold flecks before she left for a two-week trip abroad with no salon access. She texted me a photo at day twenty-three: the design was intact, worn evenly, not a single chip or lifted flake — because nothing about that design was ever sitting on the surface waiting to catch. That set is the whole argument for this approach in one photo. For the buying side of getting this right, best clear builder gel covers the clarity and self-leveling properties that make a sealing dome disappear, and builder gel nail polish covers the color-in-a-bottle formats.
One honest caveat comes with the territory of longer wear. The more elaborate and long-lasting your builder gel nail designs get, the longer uncured gel and its acrylate ingredients sit against your skin during application, and the more it matters to keep gel off the surrounding skin, cure fully, and cap the free edge cleanly. Uncured acrylates are a known contact-allergy trigger, and repeated skin exposure is how sensitivities develop over time. If you ever notice itching, redness, or lifting of the skin around a nail, take it seriously rather than powering through. The American Academy of Dermatology's contact dermatitis overview explains how acrylate sensitivities present and progress. Good technique — gel on the nail only, full cure, no skin contact — is as much a safety practice as a durability one.
Read next
Builder Gel Nails Ideas: 12 Editorial Looks for 2026
Twelve builder gel and BIAB nail ideas across four aesthetic families — clean girl, editorial classic, expressive color, and seasonal — plus the technical notes for each.
Continue readingFrequently Asked Questions
What are the easiest builder gel nail designs for a beginner?
Milky and jelly builds are the most forgiving because there's no linework — you're just applying a sheer tinted builder and shaping the structure. Negative space with simple straight lines is the next step up. Save chrome, marble, and 3D for after you're confident with a basic structured overlay.
Do builder gel designs last longer than regular gel polish art?
Yes, meaningfully, when the design is built into the structure rather than painted on top. Encapsulated and built-in designs wear evenly with the nail and routinely last three to four weeks, while surface-painted art on gel polish tends to chip at the edges within a week or two.
Can I do these builder gel designs at home?
All ten are achievable at home with a decent LED lamp, a clear and a few pigmented builders, and patience. Encapsulation-based designs (glitter, marble, sealed chrome) take practice, so do a couple of practice nails on tips before committing to a full set.
What makes chrome and glitter designs stop shedding or tarnishing?
Sealing them under a clear builder dome. Exposed chrome tarnishes from skin oils and glitter dulls and catches on fabric, but once either is encapsulated under clear gel, oxygen and oils can't reach it and the finish holds for the full life of the set.
How many nails should have a seasonal or statement design?
One or two accent nails per hand, with the rest kept a clean structural neutral. Limiting the art keeps the set tasteful and, more practically, keeps most of your nails wearing like a plain durable builder gel manicure instead of chipping all at once.
Do I need special colored builder gel for these designs?
For color builds like milky, jelly, and French you want pigmented or milky builder gels rather than clear. For encapsulated designs you need a genuinely water-clear builder for the sealing dome. A multi-shade color builder set plus one good clear covers nearly every design on this page.
Why does my built-in design crack or lift after a week?
Almost always the sealing layer was too thin, the apex was placed wrong, or the design reached the cuticle or sidewall where it created a weak edge. Keep a 1-2 mm clear margin around any embedded art, place a proper apex, and seal generously. The encapsulation guide walks through each of these failure points in detail.
Seasonal versions of these techniques live on their own pages — fall builder gel colors for the autumn palette, and Halloween builder gel nails for webs, ghosts and splatter built into the structure rather than painted on top.
Last updated July 2026. This article uses AI assistance for research and structure; the design techniques here come from hands-on salon work.