The builder gel encapsulation technique is the structural move that takes loose decorations — glitter, foil, dried flowers, micro beads, sequins, even tiny pressed petals — and locks them under a transparent gel dome so they become part of the nail itself, not something glued on top. Once you understand encapsulation, you stop having to choose between durable nails and elaborate art. You can have both.
Editor Picks — Amazon
Top picks for builder gel encapsulation technique
Curated from current Amazon ratings and review counts.

modelones Builder Nail Gel, 7-in-One Clear Builder for Nails, LED Lamp Cured Color Rubber Base Gel Polish Coat Strengthener Thickening Extension Rhinestone Glue in a Bottle for DIY Home Salon Gifts
$7.64

IBD Hard Gel LED/UV Builder Gel – Clear, Nail Extension & Overlay Gels, Strong Acrylic Finish, Professional Quality, 2 oz, 1 Pack
$18.20

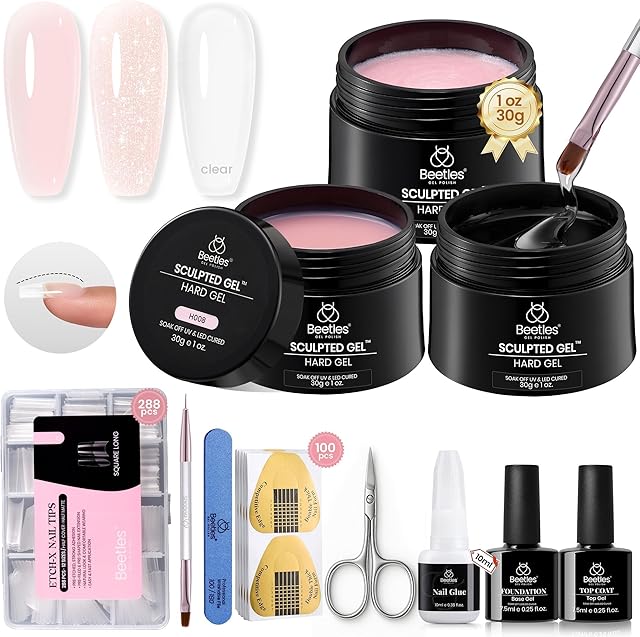
Beetles Builder Gel Low Heat,0.5 oz Clear Gel Builder for Natural Nails Building Apex & Strengthener Extension with Detachable Liner Nail Brush for Beginner DIY Salon at Home Gifts,UV&LED Lamp Needed
$9.99

Beetles 3D Gel Nail Art Kit-1oz Clear Solid Builder Nail Gel,5 in 1 Non-Sticky Hand Sculpting Building 3D Nails for Beginner DIY Salon at Home,UV & LED Lamp Cured Needed,Crystal Orb Gifts for Women
$12.99
Scroll →
This is the long-form text companion to encapsulation video tutorials. The visual language ("trap it under a dome," "flood it with clear") makes more sense if you understand what the gel is actually doing structurally — which is what this page covers.
What Encapsulation Actually Means
In the nail world, "encapsulation" means sealing decorative material between two clear layers of gel, so the decoration is suspended inside the structure rather than sitting on the surface.
Surface decoration (decoration on top of cured gel, sealed with top coat only):
- Catches on fabric, gets pulled off
- Chips at the edges where the decoration meets the natural-nail boundary
- Glitter dulls within a week as top coat wears
- Foil tarnishes from skin oils reaching the back
Encapsulated decoration (decoration sandwiched inside the gel structure):
- Cannot catch on anything — the surface is smooth clear gel
- Cannot chip at decoration edges — there are no decoration edges exposed
- Glitter stays bright for the full life of the set
- Foil stays mirror-shiny because oxygen and skin oils can't reach it
The trade-off is time. Encapsulation adds 3-4 extra cures and 10-15 extra minutes per set compared to surface decoration. The durability gain is roughly 3-4x.
The Six Decorations That Encapsulate Best
Not everything encapsulates well. Some materials interfere with cure, some absorb gel and become discolored, some are too thick.
Works perfectly:
- Fine glitter (any size up to 0.3 mm) — encapsulates without trapping bubbles
- Nail foil (gold leaf, holographic foil) — needs to be flattened before cure
- Chrome powder — already micro-scale, encapsulates beautifully
- Dried flowers (pressed and DRY) — must be completely flat and moisture-free
- Micro beads / caviar beads — small ones (under 0.5 mm) sit flat
- Mylar flakes — like foil, just need to be pressed flat
Works with care:
- Larger glitter (0.5 mm+) — encapsulates but the surface won't be flat without multiple top layers
- Stickers — need to be very thin; thick decals create cure shadows underneath
Doesn't work well:
- Anything still moist (fresh flowers, freshly stamped wet polish art)
- Anything with adhesive backing (the adhesive reacts with gel)
- Rhinestones over 1 mm thick — too tall to encapsulate flat, better surface-mounted with top coat
For ideas and inspiration, see builder gel nails ideas.
The Full Encapsulation Sequence
Step-by-step, the way it's done in salon. Total time: about 25-30 minutes per hand.
Step 1 — Standard Prep
Wash, push cuticles, dehydrate, base coat, cure 30 seconds. Standard. See builder gel application steps for the complete prep sequence.
Step 2 — First Builder Layer (The "Trapping" Layer)
This is the layer the decoration will sit on top of. Apply a thin builder gel layer — about half the thickness of a normal builder layer. Just enough to create a smooth, slightly tacky surface for the decoration to grip.
Cure for 30-45 seconds (not the full 60). You want the gel cured enough to hold its shape but not fully hardened. A semi-cure leaves the surface slightly tacky, which helps the decoration stick.
If your lamp is a standard 48W LED, 30 seconds is the right time. For other lamp wattages, check your gel's recommended cure time and use roughly 50-60 percent of it.
Step 3 — Place the Decoration
This is the artistic step. Place glitter with a small brush, foil with tweezers, pressed flowers with a damp brush tip (the moisture helps lift them).
Critical rules:
- Place decoration only in the central area of the nail. Leave 1-2 mm of clear margin at the cuticle and free edge. Decoration that reaches the perimeter will create chip-points.
- Press each piece flat with a clean silicone tool. Anything sticking up will create a bubble in the encapsulation layer.
- Don't overdo coverage. 30-40 percent coverage is the artistic sweet spot — more than that and the encapsulation layer can't seal properly between pieces.
Step 4 — Wipe Cure Trace (Critical, Often Skipped)
After placing decoration, lightly brush the surface with a clean dry brush. This removes any residual tackiness on the decoration itself.
If you skip this step, the encapsulation layer goes on with micro-bubbles trapped between gel and decoration. Those bubbles cure permanent and show as cloudy spots forever.
Step 5 — Encapsulation Layer (The Clear Dome)
Apply a generous clear builder gel layer over the entire nail, INCLUDING the decoration zone. This layer must be:
- Thick enough to fully cover the decoration (no decoration peaks poking through)
- Smooth — apply with the one-bead technique (see builder gel one bead method)
- Extending to the perimeter — sealing the decoration zone from the outside
Don't drag the brush directly over the decoration. Place the bead at the apex zone, let it flow outward over the decoration. Dragging can pull decoration out of position.
Cure for the full lamp time recommended by the gel — typically 60 seconds at 48W. The thicker layer needs the full cure.
Step 6 — Inspect
Look at the nail under a bright light. You're checking for:
- Any decoration peaks visible above the gel surface (need another thin layer if so)
- Any bubbles trapped between gel and decoration (no fix — accept or restart)
- Cloudy spots (under-cure — give the lamp another 30 seconds)
- Smooth dome — should look like decoration suspended in clear glass
Step 7 — Optional Second Encapsulation Layer
For high decoration coverage or 3D effects, a second clear layer increases dome height and seals more aggressively. Apply the same way, cure the same way.
Step 8 — Top Coat
Top coat as normal. The encapsulation is complete underneath — top coat is just for surface gloss, not for sealing the decoration.

Beetles 3-Piece Clear Builder Gel with Base & Top
$9.99
Gel Choice for Encapsulation
Three properties matter for the encapsulation layer:
Clarity — must be water-clear, no yellow tint. Yellowing gels age into "old gel" look within weeks.
Self-leveling — moderately self-leveling helps the layer settle smoothly over decoration without dragging.
Bubble-resistant — thicker gels trap bubbles. Medium-viscosity gels release bubbles during the flag/level phase.
Crystal-clear bottle brush-on formulas are the recommendation for encapsulation work:

Modelones Builder Nail Gel 3-Pack with Top Coat
$13.29
For very high-clarity professional-grade encapsulation, the harder-gel formulas hold their dome shape better but require drill removal:
Beetles Hard Gel for Nails Kit (3 Colors)
$29.99
For broader buying advice, see best clear builder gel.
Common Encapsulation Failures
Failure 1 — Bubbles trapped under the encapsulation layer. Cause: didn't brush-clean the decoration surface before encapsulating (Step 4). Fix: file the cured layer down, re-apply encapsulation with cleaner technique. Or accept and try again next set.
Failure 2 — Decoration shifted during encapsulation application. Cause: dragged the brush directly over the decoration instead of letting gel flow over it. Fix: file down, replace decoration, redo encapsulation.
Failure 3 — Decoration looks dull / "encased in fog" after a few days. Cause: under-cure of the encapsulation layer. Trapped solvents migrate into the decoration. Fix: future sets, full lamp time + a few extra seconds. Once this happens, hard to reverse — remove and redo.
Failure 4 — Cracks form over the decoration zone within a week. Cause: encapsulation layer too thin OR no second layer over heavy decoration coverage. Fix: thicker encapsulation OR add the second layer next time.
Failure 5 — Lift at the perimeter of the decoration zone. Cause: decoration extended to the cuticle or sidewall. The natural-nail boundary always lifts first when decoration reaches it. Fix: maintain the 1-2 mm clear margin rule.
For broader troubleshooting, see builder gel cracking fixes and builder gel lifting fixes.
Encapsulation on Extensions
The encapsulation technique works the same way on extensions, with one adjustment — the encapsulation layer must extend all the way to the new free edge of the extension, not just to the natural-nail free edge.
For extension application before encapsulation, see builder gel on full tips and best builder gel for nail extensions.
Maintenance and Fills With Encapsulated Sets
When encapsulated sets grow out at the cuticle, you have two options:
Option A — Fill the cuticle gap. File the grown-out area, apply base, builder, and a clear extension of the encapsulation layer over the new growth. The result has a visible "line" where the old encapsulation meets the new fill area. Cosmetic, not structural.
Option B — Full removal and redo. The cleaner-looking option but a full reset. Soak-off (if soak-off gel) or drill-down (if hard gel). Then start over from prep.
Encapsulated sets generally hold longer than non-encapsulated, so the fill cycle is often pushed to 4-5 weeks instead of the 3-4 weeks for plain builder gel sets.
For the fill technique, see how to fill builder gel.
Cited Reading
The American Academy of Dermatology covers safer-application practices for gel manicures including encapsulated art — relevant because longer wear (which encapsulation enables) increases the importance of doing the prep and cure correctly. Read their acrylate allergy resource for the long-term skin-contact considerations.
FAQ
Can you encapsulate with regular polish underneath? No, regular polish creates a cure barrier. Encapsulation has to be all-gel — base, builder, decoration, builder, top.
Does encapsulation work with hard gel as well as soft gel? Yes, and hard gel actually holds the encapsulation dome better. Trade-off is drill removal at the end of the cycle. See builder gel vs hard gel.
How thick should the final encapsulation be? About 1.5x the thickness of a normal builder gel layer at the apex zone. Thin elsewhere. The dome shape should still be visible.
Can you encapsulate the same nail more than once during a single set? Yes — that's how 3D art is built up in layers. Each "embedded layer" gets its own encapsulation cure before the next decoration is placed.
Will encapsulation affect cure time? Yes, slightly. The thicker layer needs the full recommended cure time, sometimes a few seconds more. See builder gel not curing for cure-time troubleshooting.
Is encapsulation more expensive in salon? Yes — usually $10-25 more per set because of the additional time. At home, the only added cost is the decoration itself.
Related Reading
- Builder gel nails (homepage) — topic hub
- Builder gel one bead method — the brush technique used for the encapsulation layer
- Builder gel apex placement — apex still matters under encapsulated art
- Best clear builder gel — clarity recommendations for the encapsulation layer
- Builder gel nails ideas — decoration ideas to encapsulate
- Builder gel application steps — base sequence encapsulation builds on
Last updated May 2026 — encapsulation walkthrough written from in-salon technique used across roughly 80 client sets in the last year.