Every December my chair turns into a little grotto. Last holiday season I did twenty-two festive sets between the first of the month and Christmas Eve, and the one I still have saved on my phone was a deep structured red with a single gold-flecked accent nail I did for a client heading to three back-to-back parties and then straight into hosting her whole family. She sent me a photo on the 28th: still immaculate after wrapping, cooking, and washing up for twelve. That is the whole promise of Christmas builder gel nails — a festive manicure that actually survives the most hands-on fortnight of the year, instead of chipping before the second party. This guide is a gallery of the designs I do most, each with the way I actually build it, followed by the full at-home steps for a gift-ready set.
For festive builds — Amazon
The builders and art kit behind my Christmas sets
A 3D art kit and dependable colour builders for red-and-gold, snowflake, and plaid looks.

Beetles Builder Gel for Nails, 8 in 1 Red Builder Nails Gel
$11.99
Amazon price as of Oct 8, 2026

Beetles Green Gel Polish Set, Green Picnic, 6 Colors Gel Nail Polish Set
$12.99
Amazon price as of Oct 8, 2026

Beetles Red Gel Polish - 15ml/0.51 FL.OZ, Scarlet Red Gel Nail Polish, Soak Off UV LED Nails Art, Long-Lasting Manicure Salon DIY Home
$6.59
Amazon price as of Oct 8, 2026

Mingjieus Gilding Flakes Set,Gold Foil Flakes for Resin,3 Bottles Metallic Foil Flakes for Resin Jewelry Making,Nails,Painting Art,Crafts and Slime(Gold, Silver, Copper Colors)
$6.99
Amazon price as of Oct 8, 2026
Scroll →
Product prices and availability are accurate as of Oct 8, 2026 and are subject to change.
Red-and-Gold: The Christmas Classic, Built to Last
Nothing says the season like deep red and gold, and the difference between a version that photographs beautifully and one that still looks good on Boxing Day is where the colour lives. I build the red as a pigmented builder layer rather than a polish coat, so the colour is inside the structure and wears down evenly instead of chipping at the tip. For the gold I keep it to one or two accent nails: fine gold leaf pressed onto a semi-cured clear layer, then flooded with clear builder so the flakes are sealed under glass and can't lift or tarnish.
That encapsulation is the whole trick. Loose gold foil on the surface catches on wrapping paper and peels within days; the same foil sealed under a clear dome survives the entire season. If you want the deep-red-and-gold combination as its own dedicated technique breakdown — glitter fades, foil placement, snowflake overlays — that's coming as a companion guide, but for a Christmas set, one gold accent against structured red is plenty.
A quick word on the red itself, because it's the shade people most often get wrong at home. A single thin coat of pigmented red builder almost never covers evenly — you get a patchy, streaky look and the instinct is to glob on one thick layer to fix it, which then cures gummy in the core and chips. Do the opposite: two or three genuinely thin coats, each fully cured, and let the colour build to full opacity over layers. A deep, slightly blue-toned red looks richer and more grown-up than an orange-leaning fire-engine red, and it flatters more skin tones. If your red still looks thin after two coats, the pigment load in your builder is low, and that's a product problem, not a technique one.
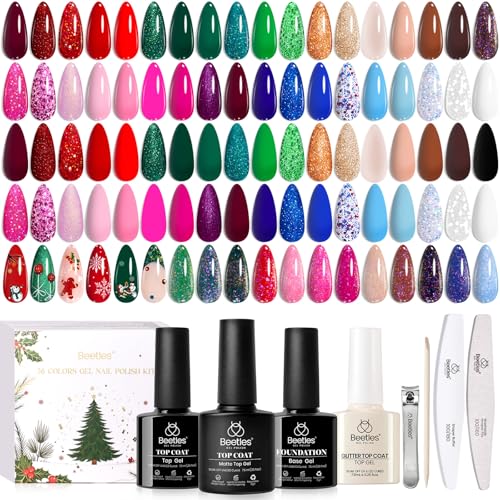
Beetles Christmas Gel Polish Set, Spectrum Red & Green Glitter
$19.99
Amazon price as of Oct 8, 2026
Snowflakes and Frosted Icy Tips
Snowflakes are the design people are most scared of and the one that's most forgiving, because real snowflakes aren't symmetrical and neither do yours need to be. On a cured base, I use a thin white gel and a striper brush or a fine detail brush: a straight line, two crossing lines to make a six-point star, then tiny ticks off each arm and a dot in the centre. Flash-cure between elements so lines don't run into each other. Seal the whole thing under a thin clear layer so the raised white linework doesn't catch.
For a softer look, skip the linework entirely and do a frosted tip: a sheer milky-white builder blended just at the free edge, up into the nail with no hard line. It reads as "first frost" and it's genuinely a beginner design because there's nothing to draw. Pair one snowflake accent nail with three or four frosted tips and you've got a whole cohesive hand from one white gel.
Plaid and Tartan Accent Nails
Christmas plaid is having a real moment and it looks far more complicated than it is. It's just intersecting lines built in layers. I lay a base colour — cream, deep green, or a muted red — cure, then use a striper to run two thin vertical lines and two thin horizontal lines in a second colour, cure. Then a single thinner "overcheck" line in gold or white crossing through, cure, and seal. The eye reads the grid as intricate tartan; your hand only ever drew straight lines.
Keep plaid to one or two accent nails against solid structured neighbours — a full hand of tartan is a lot, and the accent-nail approach also keeps most of your nails wearing like a plain durable set. Muted, slightly greyed festive tones photograph more "expensive" than bright primary red and green, if you want the grown-up version.
The one thing that makes plaid look amateur is wobbly, uneven lines, and the fix is your brush more than your hand. A dedicated striper brush — long, thin bristles that hold gel in a straight ribbon — lets you lay a clean line in one confident pass instead of dabbing and correcting. Load a little product, wipe one side of the brush so it comes to a fine edge, and pull the line in a single motion toward you. If a line goes wrong, don't cure it: wipe it off with a cleanser-dipped brush and redo it while everything's still workable. It's the curing of a bad line that traps you, so inspect before every flash-cure.
Candy-Cane French and Peppermint Swirls
This is my most-requested playful look and it's a twist on a skill you may already have. A candy-cane French is just a structured French smile line done in red instead of white, or in alternating red-and-white diagonal stripes across the tip. For peppermint swirls, I place a small spiral of red over a cured white or clear base using a fine brush, working from the centre out, then cap it. Because the French colour is a builder layer built into the free-edge structure, it wears like a normal structured French rather than chipping like painted tip art.
If your structured French smile line isn't solid yet, that's the foundation to nail first — everything festive here is a variation on a clean built tip. The base skill lives in my full walkthrough of how to do builder gel nails, and there's a wider design library in builder gel nail designs if you want to mix and match motifs across a hand.
A small styling note that clients always ask about: candy-cane and peppermint looks tip into "costume" territory fast if the red is too bright and the stripes too thick. The version I do that people actually wear to work parties uses a slightly deeper, cooler red and thin stripes with generous white space between them — restraint reads as festive, density reads as a novelty. And because the diagonal stripe crosses the free edge, capping the tip is doubly important here: an uncapped candy-cane stripe is the first thing to chip, and a red-and-white chip is very visible. Seal the edge and the whole playful look holds as long as a plain set.
The At-Home Steps for a Gift-Ready Set
Here's the full sequence I'd give a client doing this at home, start to finish. Read it once before you begin so you're not curing with wet product on a brush mid-step.
- Prep. Push back cuticles, gently buff the whole plate to a uniform matte, dust thoroughly, dehydrate, and apply primer. A clean oil-free plate is the entire foundation — skip it and the prettiest design still lifts.
- Base and structure. Apply a thin clear or colour builder base, cure. Then build your apex: a slightly thicker bead in the centre, arched so the nail is thickest at the stress point and tapers to nothing at the cuticle and free edge. Cure fully.
- Colour layer. For solid festive nails, apply your pigmented builder now and cure. This is where structured red or green becomes part of the nail rather than a topper.
- Art. Do your snowflakes, plaid, candy-cane stripes, or gold leaf on the cured coloured base, flash-curing between elements so nothing runs. Keep art to one or two accent nails.
- Seal. Flood a thin clear builder or top layer over everything, especially over any glitter, foil, or raised linework, so it's encapsulated under glass. Cap the free edge — run the seal right over the tip.
- Finish. Cure the final layer fully, wipe the tacky inhibition layer if your top requires it, and finish with cuticle oil. Full cures at every stage are what make the set gift-ready instead of gummy.
The reason I call it "gift-ready" is that a set built this way survives being used — the whole point of holiday nails is that you're wrapping, cooking, and clinking glasses in them, not protecting them.
Choosing Your Christmas Palette and Products
You genuinely don't need ten bottles. A festive hand comes from a small, well-chosen palette: one structured red, one white (for snow, frost, plaid overcheck, and candy-cane), one metallic or gold leaf, and a clear builder for the base and the sealing dome. That covers every design on this page. A pigmented multi-colour builder set plus a small 3D-and-art kit is the most economical way in, because you get your reds, greens, and creams in one purchase rather than buying single bottles you'll use once a year.
If you're building your festive kit from scratch and want it to double as a year-round design stash, browse builder gel nails ideas for looks that reuse the same few colours, and start the whole system from our builder gel guide homepage so you're buying tools you'll use long after the tree comes down.

modelones Builder Nail Gel, 7-in-One Clear Builder for Nails, LED Lamp Cured Color Rubber Base Gel Polish Coat Strengthener Thickening Extension Rhinestone Glue in a Bottle for DIY Home Salon Gifts
$8.49
Amazon price as of Oct 8, 2026
Making Festive Nails Last Through the Whole Season
A holiday set has one job that a normal set doesn't: it has to survive December, which is the hardest month for gel. Cold stiffens the overlay, dry indoor heat brittles your natural nail, and constant hand-washing and glove-wearing work at the seal. So the same care that makes any winter set last applies double here — twice-daily cuticle oil, lined gloves for cold and wet tasks, a properly capped free edge, and never picking at a lifted corner. If you want the full cold-weather durability breakdown, my winter builder gel nails guide is entirely about stopping seasonal lifting, and it's the companion to this one.
One honest caution for the season: with more elaborate festive art, uncured gel sits against your skin longer during application, and winter skin around the nails is often dry and cracked, which makes it more permeable. Keep gel on the nail plate only, cure every layer fully, and if the skin around a nail becomes itchy or red, don't power through the party season — acrylate sensitivities are real and develop from repeated skin contact. The American Academy of Dermatology's contact dermatitis overview explains how they present. Beautiful nails aren't worth ignoring a reaction.
Read next
Builder Gel Nail Designs: 10 Styles That Actually Last (2026 Technique Guide)
Builder gel nail designs last far longer when the pattern is built into the structure instead of painted on top. This 2026 technique guide breaks down ten styles and the exact steps that keep each one wearable for three weeks.
Continue readingFrequently Asked Questions
Are Christmas builder gel nails hard to do at home?
The designs are more forgiving than they look — frosted tips and snowflakes have no symmetry to get wrong, and plaid is just straight lines in layers. The part that takes practice is the structure: a clean prep, a proper apex, and a fully-sealed free edge. Get those right and even a simple red-and-gold set looks salon-quality and lasts.
How do I keep gold foil and glitter from peeling off my festive nails?
Encapsulate it. Press the foil or glitter onto a semi-cured layer, brush away loose grit, then flood clear builder over the whole thing so it's sealed under glass. Surface foil catches on wrapping paper and peels within days; sealed foil survives the entire season because nothing can lift its edges.
What colours do I actually need for a Christmas set?
Four cover everything: one structured red, one white, one gold or metallic, and a clear builder for the base and sealing dome. From those you can do red-and-gold, snowflakes, frosted tips, plaid, and candy-cane French. A multi-shade colour builder set is the cheapest way to get festive reds and greens without buying single-use bottles.
Will a festive set survive holiday cooking and wrapping?
Yes, if it's built properly — that's the whole advantage of builder gel over polish. Colour and art built into the structure and sealed under clear gel wear evenly instead of chipping. The failure points are a skipped free-edge cap and picking at lifted corners. Cap the edge, oil daily, and it'll outlast the leftovers.
Should every nail have a Christmas design?
I'd keep statement art to one or two accent nails per hand with the rest a clean structured red, green, or cream. It looks more considered, photographs more expensive, and practically it means most of your nails wear like a plain durable set — so if one accent nail does chip, the whole hand still looks intact.
Last updated September 2026. This article uses AI assistance for research and structure; the festive designs and steps here come from years of December sets at my table.