What This Roadmap Is
Editor Picks — Amazon
Top picks for how to do builder gel nails
Curated from current Amazon ratings and review counts.

modelones Builder Nail Gel, 7-in-One Clear Builder for Nails, LED Lamp Cured Color Rubber Base Gel Polish Coat Strengthener Thickening Extension Rhinestone Glue in a Bottle for DIY Home Salon Gifts
$7.64

IBD Hard Gel UV/LED Builder Gel Pink – Nail Builder Gels for Nail Extensions, Sculpting & Strengthening, 2 oz
$16.79

Orly Builder In A Bottle Soak-Off Sculpting Gel For Quick Nail Extension, Repair And Strengthening | Long-Lasting Builder Gel With Brush-On Application | Salon-Quality Nails At Home (18ml)
$17.99

200 PCS Nail Forms for Builder Gel, AHIER Self-adhesive Nail Extension Forms for DIY at Home Professional Nails Art Supplies
$4.99
Scroll →
If you want to learn how to do builder gel nails at home, you have two questions to answer first: what do I buy and what do I do with it? This guide answers both — at the planning level, with links to the technical step-by-step.
The full hands-on application tutorial lives at how to use builder gel. That's the technical playbook. This page is the strategic roadmap that comes BEFORE the playbook — which decisions to make before you buy a kit, what skill to master first, and what your first 5 sets will realistically look like.
The 4-Part Roadmap
Part 1 — Pick Your Kit
For first-time builder gel, three things matter in your kit:
- Forgiving formula — self-leveling enough to recover from imperfect bead placement
- Reliable cure — needs to fully harden under a 48 W+ LED lamp
- Soak-off (not hard gel) — for safer at-home removal
These three rule out most cheap unbranded Amazon kits (cure unreliable), pro firm formulas (unforgiving for beginners), and hard gels (require e-file removal which beginners shouldn't do).
The picks I recommend most often for first-time DIY users:

Modelones Builder Nail Gel 3-Pack with Top Coat
$13.29
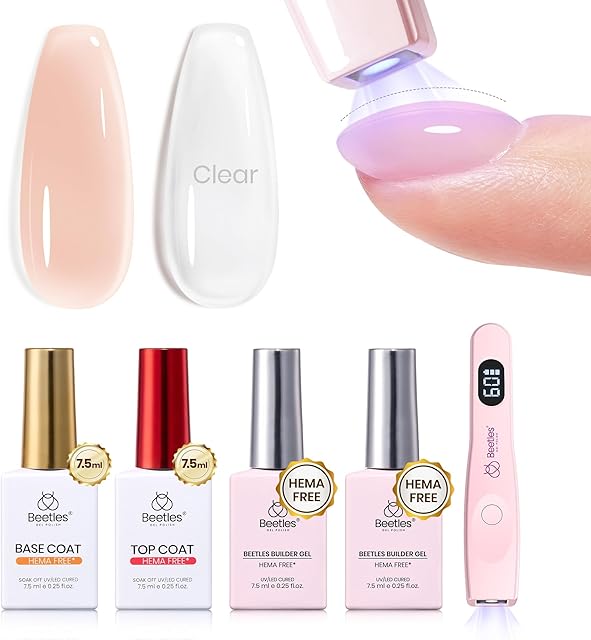
Beetles Builder Gel Nails Kit HEMA-Free 8-in-1
$21.99

Beetles 3-Piece Clear Builder Gel with Base & Top
$9.99
For the full beginners' breakdown with decision tree, see best builder gel for beginners.
Part 2 — Decide on Length Goal Before You Start
Your length ambition determines technique complexity:
- Overlay only (natural-nail length, no added length) — easiest. Skip forms entirely. Master apex placement on a flat overlay first. Most beginners get acceptable results in 3-5 attempts.
- Short extensions (1-3 mm past free edge) — moderate. Use paper forms. Adds 20-30 minutes to set time and significant practice to do well.
- Long extensions (5 mm+) — advanced. Soak-off builders are at the edge of what they can support. If you want long, consider Gel-X tips or wait until your overlay technique is solid.
Recommendation: start with overlays for your first 5 sets. Master the apex on flat sets before attempting any length. Most "I tried builder gel and it failed" stories started with someone trying extensions on set #1.
Part 3 — Master the Apex (One Skill That Matters Most)
The single most important builder gel skill is apex placement.
The apex is the highest point of the gel — the structural reinforcement point. It should sit roughly 1/3 back from the free edge, directly over the natural nail's stress point.
Apex too far back (under cuticle) → free edge has no support → cracks at tip. Apex too far forward (right at free edge) → cuticle area flexes → lifts at base. Apex correct → set holds for 3 weeks.
For visual reference of correct apex placement, see how to use builder gel — the step-by-step has profile diagrams.
Read next
How to Use Builder Gel: Salon-Tested 8-Step Application for Beginners (2026)
The exact 8-step builder gel routine I use on clients — prep, base, slip layer, apex placement, cure, refine, top coat, finish. With timing, common mistakes, and per-step troubleshooting.
Continue readingPractice tip: apply gel to a nail wheel ($5 plastic training tips) before doing your real nails. Get the apex placement right on a wheel first. Skills transfer to real nails directly.
Part 4 — Plan Removal Before You Apply
This is the part most tutorials skip. You should know how to remove the set before you apply it. If you can't remove it gently, peeling damages your natural nails.
The protocol:
- File 80 % of the bulk down (5-10 min)
- Wrap with acetone-soaked cotton + foil
- Soak 15-20 minutes
- Push softened gel off with wooden pusher
- Buff lightly + cuticle oil
Total removal time: 25-30 minutes. Mostly hands-off.
For the full protocol, see how to remove builder gel. For a no-drill workflow, see no-drill removal.
Read next
How to Remove Builder Gel at Home Safely: 3 Methods Compared (2026)
Three methods to remove builder gel — file-and-soak, file-only, and salon e-file — compared on time, safety, and nail-health impact. Plus a detailed step-by-step for the safest at-home method.
Continue readingThe Realistic 5-Set Learning Curve
What to expect from your first 5 sets:
Set 1 — The Mess
Your first set will look messy up close. Expect:
- Apex in the wrong place
- Some flooding at the cuticle
- Uneven thickness across nails
- Possibly 1-2 nails that lift in week one
This is normal. Wear time: 7-10 days probably.
Lesson from set 1: identify YOUR specific weak point — too much product, too little, bad placement, weak cure. Diagnose before set 2.
Set 2 — The Recognition
Set 2 will be noticeably better. You'll catch your own mistake in real time. Possibly still 1 nail rough.
Wear time: 10-14 days.
Lesson from set 2: consistency between nails. Try to make all 10 the same.
Set 3 — The First "Real" Set
Set 3 starts looking like a builder gel set from outside. From a distance, indistinguishable from a salon set. Up close, still some technique issues but you're getting there.
Wear time: 14-18 days.
Lesson from set 3: the free-edge cap. Adding it changes wear time dramatically.
Set 4 — The Confident Set
Set 4 looks competent. You'll have opinions about lamp time, bead size, and brush technique. Most nails wear 2+ weeks comfortably.
Wear time: 18-21 days.
Lesson from set 4: thumbs need separate cure time. If you hadn't been doing this, do it now.
Set 5 — Salon-Adjacent
Set 5 looks salon-adjacent. From this point on, you're refining nuances rather than learning fundamentals.
Wear time: 21+ days.
Lesson from set 5: maintenance > application. Day-10 top coat refresh extends every set significantly.
Tools You Need Beyond the Gel
The kit usually doesn't include everything. Confirm you have or will buy:
- 48 W+ LED lamp (kit might include; check)
- Base coat (most kits include)
- Top coat (most kits include)
- 91 % isopropyl alcohol ($3 at pharmacy)
- 100/180-grit file (most kits include)
- 220-grit buffer (some kits include)
- Lint-free wipes ($5 on Amazon)
- Cuticle pusher (kits include)
- Cuticle oil (essential aftercare; jojoba works)
If your kit is missing any, factor in $15-30 of additional purchases.
Common Beginner Mistakes (and the Fixes)
| Mistake | What it looks like | Fix |
|---|---|---|
| Apex too far back | Free edge cracks in week 1 | Move apex 1/3 back from tip |
| Bead too big | Flooding cuticles, mess | Smaller bead, work faster |
| Skipping prep | Lifts within 3 days | Push cuticles, light buff, alcohol wipe |
| Skipping free-edge cap | Tip wear at week 2 | Run brush along underside of free edge |
| Curing thumbs with hand | Soft thumbs, lifts | Separate cure, 90-120s for thumbs |
| Peeling lifted gel | Damages natural nails | Always file + soak; never peel |
For diagnostic deep-dives by symptom, see cracking fixes, lifting fixes, not-curing, and sticky after curing.
Time Investment for Your First Set
Realistic times for a beginner:
- First set total time: 90-120 minutes (about double a pro tech's pace)
- Setup + prep: 15 minutes
- Application (8 steps): 60-90 minutes (slow + double-checking)
- Removal of any mistakes during application: add 10-20 minutes
- Final cure + finish: 10-15 minutes
By set 5, you'll be at 60-75 minutes. Pros do salon-quality sets in 45-60 minutes.
How Pros Differ from Beginners
What makes a pro tech's set look better than a beginner's set with the same gel:
- Bead size discipline — pros use less product than amateurs
- Apex consistency — pros put the apex in the same spot on every nail of every client
- Free-edge cap automatic — never skipped, even when running behind
- Thumb cure separately — every single time
- Cuticle gap religious — gel never touches skin
These five habits are technique, not gear. You can develop them at home with practice. Within 10-15 sets, beginner sets become pro-adjacent.
Frequently Asked Questions
How to do builder gel nails? Buy a forgiving kit, master apex placement on overlays first, follow the 8-step technique in the how-to-use guide, and remove gently with file-and-soak. Plan a 5-set learning curve.
Can I do builder gel nails at home? Yes — most beginners do acceptable first sets within 3-5 attempts. Pick a forgiving kit (Modelones or Beetles HEMA-Free), start with overlays not extensions, and budget 90-120 minutes for your first set.
How to apply builder gel nails for beginners? Three priorities: clean prep, correct apex placement (1/3 back from free edge), and free-edge cap. Everything else is secondary. See best builder gel for beginners for kit picks.
Builder gel nails tutorial — where to start? The Builder Gel Atlas for system context, then how to use builder gel for the 8-step application, then how to remove builder gel for safe removal. Read all three before your first attempt.
DIY builder gel nails — is it cheaper than salon? Yes — significantly. Year-1 DIY cost is $45-110 (kit + replacement gel). Year-1 salon cost (every 3 weeks) is $850-2550. Per-set cost after kit purchase is roughly $1-2.
How to do builder gel nails at home for the first time? Plan 90-120 minutes. Watch the how-to video and steps twice before starting. Have everything within reach. Start with overlays not extensions. Don't aim for perfection — aim for acceptable.
Do I need a nail drill? No. Hand files work fine. DIY e-files are not recommended — they cause more damage than they save time on for amateur users.
How long until I'm good at it? By set 5, most users produce salon-adjacent results. By set 10-15, your work is competent. By set 30+, you're refining nuances rather than learning fundamentals.
A Safety Note for First-Time Users
Builder gel uses acrylate-based monomers that can sensitize skin over repeated exposure. This is the one safety consideration worth understanding before your first set: the American Academy of Dermatology covers acrylate contact dermatitis in detail. Symptoms (redness, itching, swelling around the cuticles within hours of application) are uncommon at first exposure but build with cumulative skin contact over years. Apply with rigorous no-skin-contact discipline from set 1 to keep your long-term sensitization risk low.
Final Notes from Sara
Doing builder gel at home is a learnable skill. The first set will be messy — that's the cost of admission. Sets 2-5 improve rapidly. Set 5 onward is mostly refinement.
The two skills that determine whether you stick with it: apex placement and patient removal. Master those and the rest follows.
For the technical step-by-step, see how to use builder gel. For the kit picks, see best builder gel for beginners. For the full system context, see the Builder Gel Atlas.
Your first set will not look perfect. That's fine. Your tenth set will.
Last updated May 2026. This article uses AI assistance for research and structure; all observations come from teaching DIY clients and from my own learning curve.