The Short Version
Editor Picks — Amazon
Top picks for how to thin out builder gel
Curated from current Amazon ratings and review counts.
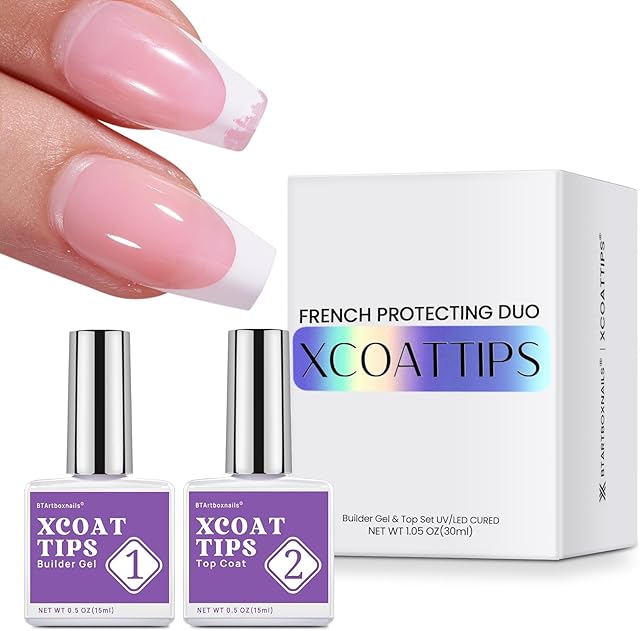
BTArtboxnails XCOATTIPS French Protecting DUO Builder Gel and Top Coat Set - Protect French Tips, No More Chipping
$16.99

modelones Builder Nail Gel, 7-in-One Clear Builder for Nails, LED Lamp Cured Color Rubber Base Gel Polish Coat Strengthener Thickening Extension Rhinestone Glue in a Bottle for DIY Home Salon Gifts
$7.64

Beetles Builder Gel for Nails,0.51 oz 8 in 1 Strengthening Nails Enhancement Building Apex for Beginners & DIY Salon Manicure,Clear Builder Nail Gel,LED & UV Lamp Needed,Gifts for Women
$7.99
Scroll →
How to thin out builder gel is the question I get most often from DIYers who bought a stiff-flowing pro formula and can't move it the way the YouTube videos showed. The honest answer is that 80 percent of "my builder gel is too thick" cases aren't actually a thickness problem — they're a temperature problem. Builder gel viscosity changes dramatically with room temperature, and a 65°F bathroom in February makes the same bottle behave like molasses when the same gel at 75°F in July flows like syrup.
This page walks through the only three methods that actually work to thin builder gel, the four wrong methods that ruin your bottle, and how to diagnose whether you have a thickness problem at all.
First — Is It Actually Too Thick?
Run this check before you do anything:
- Set the bottle on a warm surface (sunny windowsill, near a heating vent, NOT on the lamp) for 15 minutes
- Try a test bead again
- If the gel moves normally, you didn't have a thickness problem — you had a temperature problem
The viscosity of urethane methacrylate-based gels (what most builder gels are) roughly halves between 65°F and 75°F. A gel that feels like peanut butter in a cold bathroom feels like honey at room temperature.
If after warming the gel still doesn't flow the way the manufacturer's marketing showed, then proceed to the actual thinning methods.
Method 1 — Warmth (Works 80% of the Time)
The simplest and the only one that doesn't change the chemistry.
How to do it:
- Hold the closed bottle in your hand for 5-10 minutes before application
- Or set it near (NOT on) a heating vent for 15 minutes
- Or run warm tap water over the closed bottle for 60-90 seconds
- Or sit it on a heating pad set to low for 20-30 minutes
Why it works: the gel itself is unchanged. Once it cools again (which happens within an hour) it returns to its original viscosity. No chemistry was modified, no risk to the formula.
Don't: microwave the bottle (uneven heating, possible cracking), set it on the lamp (the gel cures inside the bottle), or use water above 110°F (some plastics deform).
Method 2 — Manufacturer's Slip Solution / Brush Cleaner (Works on Tube Gels)
Pro tube formulas (sculpting gels) are designed to be used with a slip solution that thins the working layer on the brush — not in the bottle.
How to do it:
- Dip the gel brush in the manufacturer's slip solution
- Wipe excess on a lint-free wipe
- Pick up gel with the now-damp brush
- Apply
Why it works: the slip solution evaporates from the gel surface within seconds, so the final cured layer has the original formula's properties. It only thins the layer while you're working it.
Important: only use the manufacturer's matched slip solution. Different brands use different solvents, and mixing them is unpredictable. For brush-on bottle gels, slip solution doesn't help — the gel and brush are inseparable.
Method 3 — Buy a Thinner Gel (Often the Right Answer)
Most people asking how to thin out builder gel are using a formula that's wrong for their hands. A thick high-control salon gel is unforgivingly stiff for beginners. A medium-viscosity bottle brush-on formula is the right starting product.
If you've tried warming and the gel still feels wrong, the lower-friction answer is selling or putting aside the stiff bottle and buying a beginner-friendly viscosity.
Recommended medium-viscosity formulas that flow at room temperature:

Modelones Builder Nail Gel 3-Pack with Top Coat
$13.29
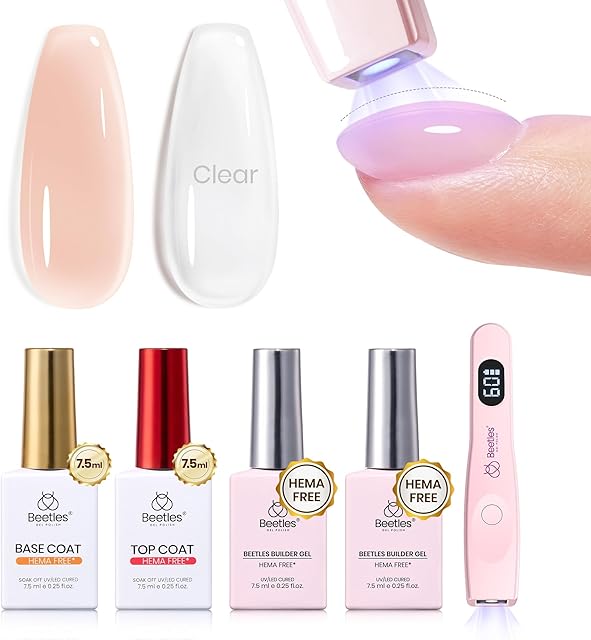
Beetles Builder Gel Nails Kit HEMA-Free 8-in-1
$21.99
For the fully self-leveling end of the spectrum (almost too thin to control, but very easy to apply), see best self-leveling builder gel.
The Four Wrong Methods (Don't Do These)
These are the methods that show up on Reddit threads and unverified TikToks. All four will damage your gel.
Wrong 1 — Adding nail polish thinner or acetone to the bottle. Will absolutely thin the gel. Will also break the photoinitiator chemistry. The gel will not cure properly afterward — either it won't cure at all, or it cures but stays sticky and lifts within 48 hours. Permanent damage to the bottle. Throw it out.
Wrong 2 — Adding clear top coat or base coat to thin builder gel. Same problem. Different gel chemistries are not compatible with each other. The mixture may cure once, but adhesion to the nail and inter-layer adhesion will fail. Lifts within days.
Wrong 3 — Adding water or oil. Water doesn't mix with gel — it pools as droplets. Oil contaminates the cure surface. Either way, the gel won't cure cleanly.
Wrong 4 — Heating the gel above 100°F to "permanently" thin it. Premature thermal activation of trace photoinitiators starts polymerization inside the bottle. The gel thickens, doesn't thin, and can become unusable. Extreme heat can crack the bottle.
If any of these four methods has already been tried with your bottle, the bottle is likely compromised. Don't use it on real nails — test it on a paper nail tip first to see if it cures properly.
The Specific Case — Bottle Brush-On Too Thick to Move
This is the most common scenario. You bought a bottle brush-on builder gel, the brush feels stiff in the gel, and the bead refuses to spread.
Run the warmth method first. Hold the closed bottle in your hand while you do your prep (file, push cuticles, dehydrate, base coat, cure). That's 10-15 minutes of skin contact warming the gel up. By the time you uncap, the gel will be at body temperature and flow normally.
If warming doesn't fix it, the bottle is either old (gel thickens slightly with age, especially if it's been opened a lot) or it's a thicker formula than the marketing suggested.
The Specific Case — Tube Gel Too Thick to Pick Up
Tube gels are usually thicker by design. They're meant to sit where you place them and hold their shape — that's the whole point of a sculpting gel.
The fix is technique-based, not bottle-based:
- Use a smaller spatula and warm it in your hand before picking up gel
- Dip the application brush in slip solution
- Place the gel and use the slip-wet brush to spread
If the tube gel is hard enough that the spatula can't penetrate the surface, the gel is probably past its shelf life. Don't try to revive it — buy fresh.

OPI GELement LED Cure Gel Nail Polish Starter Kit
$59.99
When Thinner Is Actually Worse
A counterintuitive note. Many DIYers think thinner is always better because thin gel applies easier. But thin gel:
- Doesn't hold an apex (see builder gel apex placement)
- Self-levels too aggressively, flooding cuticles
- Cures into a weaker structural layer
- Lifts at the free edge more easily because there's no thickness to seal
The right viscosity is medium — thick enough to hold its shape between bead placement and cure, thin enough that a normal brush stroke can move it. Aiming for "as thin as possible" produces worse sets, not better.
A Quick Reality Check on "Thinner Builder Gel"
Half the people asking how to thin out builder gel are actually looking for something marketed differently — a soft builder gel, a BIAB-style gel, or a self-leveling formula. These are categories of gel that are factory-made at lower viscosity, not regular builder gel modified after purchase.
If you find yourself constantly wanting to thin every bottle you buy, you're using the wrong category of gel for your skill level and intended use. Switching to a soft builder gel category solves the problem at the source.
For the soft-gel category overview, see soft builder gel nails. For the BIAB approach (essentially the same thing under different branding), it's a similar story — these are inherently lower-viscosity products, not regular builder gel modified.
A second hidden truth — pro nail techs often have multiple builder gels in their kit for different viscosity needs. One thicker bottle for apex-heavy structural work, one thinner bottle for thin overlays. Asking "how to thin" might be the wrong frame — "what's the second bottle I need" might be the right one.
Cited Reading
For the chemistry of why methacrylate gel viscosity is temperature-sensitive and why solvent contamination breaks the cure, see the FDA's nail care products overview — covers the cosmetic ingredient classes used in builder gel and why mixing them with non-matched solvents is risky.
FAQ
Can I store builder gel in the fridge to make it last longer? Will that affect viscosity? Fridge storage is fine for shelf life and slows polymerization. You'll need to warm the bottle to room temperature before use — cold gel applies even thicker than usual.
My gel is thick AND sticky after curing. Is that a viscosity problem? No, that's an inhibition layer (normal — the tacky top surface that wipes off with alcohol) or an under-cure problem. See why is my builder gel sticky.
Does adding more layers fix a too-thick gel? No. Thick gel applied in multiple thin layers is still thick gel — each layer behaves the same way. The fix is the gel itself, not the layering.
Does shaking the bottle make builder gel thinner? No. Shaking introduces air bubbles into the gel, which produces a worse finish, not a thinner one. The viscosity itself doesn't change from shaking. If you've been shaking your gel bottle before use, stop — let the bubbles settle out for an hour before applying.
What about putting the bottle in a warm water bath? Same as Method 1 (warmth), more controlled. Water bath at 95-100°F for 10 minutes works well. Don't exceed 110°F. Make sure the bottle is sealed tight before submerging.
My gel was fine yesterday and feels thicker today. What changed? Three possibilities — the room is cooler today (Method 1 fix), the bottle has been opened many times and oxygen has slightly thickened the gel near the brush (normal, the gel deeper in the bottle is fine), or the gel is approaching end of shelf life. Most builder gels last 12-18 months from opening.
Can I mix two different brands of builder gel to get an in-between viscosity? Strongly not recommended. Different brands use different chemistries — even ones that look identical in the bottle can interact poorly during cure. If you want an in-between viscosity, buy a product marketed at that viscosity, don't try to make one yourself.
Related Reading
- Builder gel nails (homepage) — topic hub
- Best self-leveling builder gel — the easier-to-apply viscosity tier
- Builder gel apex placement — why thick is sometimes better
- Builder gel mistakes to avoid — the broader catalog of common errors
- Why is my builder gel sticky? — separate problem from thickness
- Best builder gel for beginners — recommended forgiving viscosities
Last updated May 2026 — thinning advice written from real bottle-troubleshooting cases brought in by DIY clients.