Why a Mistake List Beats a Tutorial
Editor Picks — Amazon
Top picks for builder gel mistakes to avoid
Curated from current Amazon ratings and review counts.

modelones Builder Nail Gel, 7-in-One Clear Builder for Nails, LED Lamp Cured Color Rubber Base Gel Polish Coat Strengthener Thickening Extension Rhinestone Glue in a Bottle for DIY Home Salon Gifts
$7.64

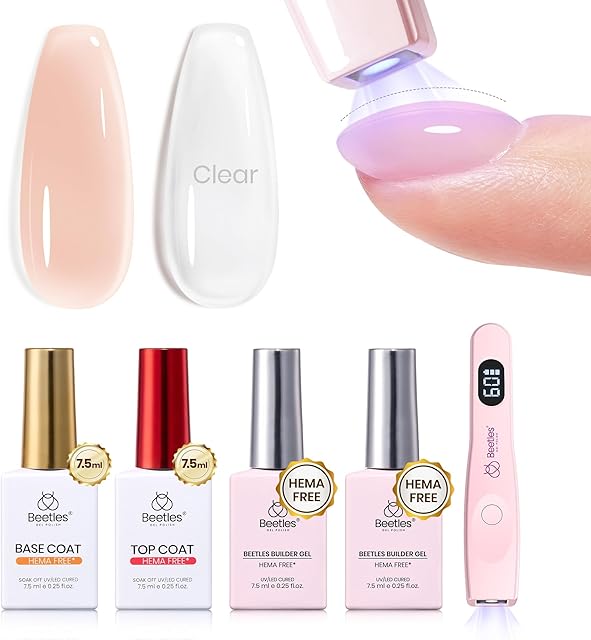
Beetles Builder Gel for Nails,0.51 oz 8 in 1 Strengthening Nails Enhancement Building Apex for Beginners & DIY Salon Manicure,Clear Builder Nail Gel,LED & UV Lamp Needed,Gifts for Women
$7.99

Orly Builder In A Bottle Soak-Off Sculpting Gel For Quick Nail Extension, Repair And Strengthening | Long-Lasting Builder Gel With Brush-On Application | Salon-Quality Nails At Home (18ml)
$17.99

IBD Building Gel Clear – Hard Builder Gel for Nails Extensions, Soak-Off UV/LED for Sculpting & Strengthening, Nail Enhancement Gels, 0.5 oz
$8.78
Scroll →
Tutorials describe the happy path. The happy path is roughly 5 percent of what determines whether your set lasts. The other 95 percent is the small, specific mistakes you'll make on the way to a clean set — and which of them you'll catch before the gel cures vs. after.
This is the list of builder gel mistakes to avoid I wish someone had handed me in week one. Fourteen real failures I've watched DIY clients (and myself) make, ordered by how often they happen, with the fix in one paragraph each.
If you want the positive-framing tutorial after reading this, see how to use builder gel or builder gel step by step at home.
Mistake 1 — Skipping Cuticle Push
The most boring step is the most important one. If cuticle film is left on the nail plate, builder gel bonds to the film rather than the nail. The film lifts off the nail in 3-5 days, taking the gel with it.
Cost: entire set lifts in week one. Fix: wooden pusher first to push cuticles back, then scrape the nail plate from cuticle to free edge with light pressure. Lift any cuticle film off. Wipe with alcohol.
Mistake 2 — Bead Too Big
Universal first-timer error. You pull a bead the size of a pea because the brush feels stingy with anything smaller. Then half the bead floods the cuticle area before you can move it.
Cost: cuticle flooding, uneven thickness, possibly a redo on that nail. Fix: start with a bead about the size of a small lentil. You can always add more. You cannot subtract gel mid-application.
Mistake 3 — Apex in the Wrong Place
The apex is the highest, thickest point of the gel. It's also the structural reinforcement point.
Apex too far back (under cuticle) → free edge has no support → cracks at tip. Apex too far forward (right at free edge) → cuticle area flexes → set lifts at base. Apex correct → set holds for 3 weeks.
Cost: the set fails in a specific predictable way depending on where the apex is. Fix: the apex belongs roughly one-third back from the free edge, dead center on the nail. See cracking fixes for diagnostic photos by apex location.
Mistake 4 — Curing Thumbs with the Rest of the Hand
This is the silent killer because the set looks fine for a week, then both thumbs lift mysteriously. Thumb geometry under the lamp leaves the gel under-cured if you cure them with the four fingers.
Cost: thumb-only lifts, usually around day 7-10. Fix: cure thumbs separately, hand flat, palm up, thumb pointing straight at the bulbs. 90 seconds for builder layer (vs 60 for fingers). Same for base and top coats.
Mistake 5 — Skin Contact at the Cuticle
The most consequential mistake long-term. Cured builder gel against skin is the primary trigger for HEMA-related sensitization. The reaction builds with cumulative exposure — you don't react on set 1, you might on set 30, and once sensitized it's lifelong.
Cost: at first, none visible. Long term, possible acrylate dermatitis (redness, itching, swelling around cuticles within hours of application). The American Academy of Dermatology covers this in depth — required reading before set 1. Fix: leave a deliberate 1 mm gap between gel and skin everywhere — cuticle, sidewalls, under the free edge. If gel touches skin, wipe with alcohol on a wipe immediately, BEFORE curing.
For the HEMA-conscious formula path, see best HEMA-free builder gel.
Beetles Builder Gel Nails Kit HEMA-Free 8-in-1
$21.99
Mistake 6 — Skipping the Free-Edge Cap
The free-edge cap is the brush stroke along the underside of the free edge that seals the tip. Without it, the unsealed tip wears in week 2 and water gets between layers.
Cost: chips and tip wear by day 10-14, full lifting by day 18. Fix: after applying the top builder layer (before curing), run the brush along the underside of the free edge. One stroke per nail. Cure as normal.
Mistake 7 — Peeling a Lifted Edge
You see a corner lifting and the temptation is to pull it. Don't. Peeling pulls layers off the natural nail with the gel. Damaged nails take 4-6 weeks to grow out.
Cost: thin, weak natural nails for weeks. Sometimes more lifting underneath where you peeled. Fix: if a corner lifts, file it down and seal with a thin builder gel layer. See lifting fixes for the full repair protocol.
Mistake 8 — Buying a Bottle Builder Gel But Storing It in Light
Builder gel is light-sensitive. Bottles left in window light or under task lamps slowly cure inside the bottle — viscosity goes up, brush gets gummy, eventually the bottle is unusable.
Cost: $15-30 wasted bottle, often before you've used half of it. Fix: store gel bottles in a closed drawer or opaque box. Never in a sunny window or under a strong LED desk lamp.
Mistake 9 — Buying a Lamp Under 48 W
Cheap 24-36 W lamps don't have the wavelength coverage to cure modern builder gel properly. Sets look fine, feel solid, then fail mysteriously around day 5-7 because the bulk of the gel underneath wasn't actually cured.
Cost: the entire set fails for reasons that look like other mistakes (lifting, sticky residue, cracking) but are actually undercure. Fix: 48 W minimum, dual-wavelength UV/LED. Most builder gel kits include a compatible lamp. If buying lamp + gel separately, confirm the wattage.
Mistake 10 — Filing Wet Builder Gel
A few minutes after curing, the gel surface still feels slightly tacky — that's the inhibition layer, not undercured gel. If you try to file before wiping the inhibition layer with alcohol, the file clogs with sticky residue and drags across the nail surface.
Cost: ruined file, messy surface, possibly a redo. Fix: wipe the inhibition layer with 91 percent isopropyl on a lint-free wipe before filing. The surface should feel clean and dry-firm, not tacky. See why builder gel is sticky for the full explanation.
Mistake 11 — Trying Extensions on Set 1
Extensions (added length past the natural nail using forms) require a separate skill — sculpting on a flexible surface that moves while you work. Most beginners fail at extensions on set 1 in dramatic ways.
Cost: wasted 90 minutes, frustration, sometimes a sworn-off-builder-gel decision. Fix: overlay only for sets 1-5. Master the apex on overlays first. Try extensions on set 6+. See builder gel on short nails for the overlay-only approach.
Mistake 12 — Wrong Removal: Acetone Soak Without Pre-Filing
Tossing your fingers in acetone without filing the top layer off first makes for a 60-90 minute soak instead of 15-20 minutes — because acetone can't penetrate the cured top coat.
Cost: burned-out cuticles from too-long acetone exposure, frustration. Fix: file 80 percent of the bulk off first, THEN acetone-wrap. Full protocol: how to remove builder gel or how to remove builder gel without drill.
Mistake 13 — Touching the Nail After Alcohol Wipe
You wipe each nail with alcohol — clean, oil-free, ready for gel. Then you steady the finger by holding it… and your skin oil transfers right back to the nail plate. The gel applied next won't bond properly there.
Cost: localized lifting at whatever spot you touched. Fix: after the alcohol wipe, only handle the finger by the SKIN side (back of the finger, sides). Never re-touch the nail surface with your fingers.
Mistake 14 — Skipping Daily Cuticle Oil After the Set
Cuticle oil isn't for the gel — it's for the natural nail underneath. Without daily oil, the natural nail dehydrates and gets brittle, the bond between gel and nail becomes rigid, and you get cracking at week 2.
Cost: dry, cracking nails by mid-set; reduced wear time. Fix: jojoba oil or any cuticle oil, applied daily, massaged in. Takes 30 seconds. Single biggest lever for extending wear time.
Mistakes That Aren't Actually Mistakes
Three things people panic about that aren't problems:
| Apparent issue | Actually | Action |
|---|---|---|
| Top coat looks streaky | Thin layer pre-cure looks streaky; resolves on cure | None — cure as normal |
| Gel is sticky after curing | Inhibition layer — every gel does this | Wipe with alcohol |
| Tiny bubbles in the bottle | Normal — they cure out invisible | Don't shake |
| Brush feels stiff at first use | Factory residue — works in after 1-2 uses | None |
| Base coat looks too thin | It's supposed to be thin | None |
If you've already mis-cured and the gel feels wrong, the diagnostic is at builder gel not curing.
Mistakes by Stage of Application
Where in the workflow each mistake usually happens:
Prep stage (before gel):
- Skipping cuticle push (#1)
- Touching nail after alcohol wipe (#13)
- Wrong lamp under 48 W (#9)
Application stage (gel on nail): 4. Bead too big (#2) 5. Apex in wrong place (#3) 6. Skin contact at cuticle (#5) 7. Skipping free-edge cap (#6)
Cure stage: 8. Curing thumbs with rest of hand (#4)
Finish stage (after cure): 9. Filing wet builder gel (#10) 10. Trying extensions on set 1 (#11)
Maintenance stage (after the set is on): 11. Peeling a lifted edge (#7) 12. Skipping daily cuticle oil (#14)
Storage stage: 13. Storing gel in light (#8)
Removal stage: 14. Acetone soak without pre-filing (#12)
What a "Mistake-Free" Set Actually Looks Like
For context, even pros make mistakes. A salon-quality set is usually a 0-2 mistakes set, not a zero-mistakes set. The bead might be slightly off on one nail. The apex might be 2 mm too far back on a thumb. These are recoverable.
The mistakes that wreck a set are the ones from the list above:
- Skin contact during application (HEMA risk)
- Undercure (set fails in mysterious ways)
- Skipping the cuticle push or alcohol wipe (lifting in week 1)
- Peeling lifted gel (natural nail damage)
Avoid those four, accept the rest as part of learning, and your set wear time goes up from 7-10 days to 18-21 days within 5 sets.
Recommended Forgiving Formulas
If you're still on your first kit, forgiving formulas absorb a lot of these mistakes:

Modelones Builder Nail Gel 3-Pack with Top Coat
$13.29

Beetles 3-Piece Clear Builder Gel with Base & Top
$9.99
For the full beginner-grade kit breakdown, see best builder gel for beginners.
FAQ
What's the most common builder gel mistake to avoid? Bead-too-big and apex-in-wrong-place tie for first. They both happen on every first set. Both are forgivable once — and easy to fix on set 2 if you catch them.
Which builder gel mistake to avoid is most damaging long-term? Skin contact at the cuticle. It's the trigger for HEMA-related acrylate dermatitis, which is cumulative and can become lifelong. The acute mistakes (lifting, cracking) heal in weeks. Sensitization doesn't reverse.
Why does my builder gel lift even though I think I avoided the mistakes? Usually one of three things: (a) cuticle film not fully removed in prep, (b) thumbs cured with rest of hand, (c) lamp under 48 W. See lifting fixes for systematic diagnosis.
Are there mistakes specific to bottle vs tube builder gel? Bottle gel: not shaking causes brush separation; storing in light is more common. Tube gel: not enough slip solution, working too slowly with sticky brush, over-saturating the brush head.
Builder gel mistakes to avoid for first-timers specifically? Trying extensions on set 1 (#11), big beads (#2), and skin contact (#5). Those three account for 80 percent of first-set disasters.
Can I recover a set after making a mistake mid-application? Yes, if you catch it before the FINAL cure. Skin contact → wipe with alcohol and re-apply. Bead too big → wipe excess back into the bottle with the brush. Apex wrong → push gel toward correct apex position before curing. Once final-cured, only mistake fixes are possible at the surface (file, top-coat correction) — structural issues require removal and redo.
How do I know if my set was mistake-free? Wear time tells you. Sets with most mistakes: 5-10 days. Sets with a few small mistakes: 14-18 days. Mistake-light sets: 18-21+ days.
Where to Go Next
Once you've internalized the mistake list, the next thing to learn is diagnostics — recognizing which mistake caused which symptom on a finished set. Those resources:
- Builder gel cracking fixes — for tip/free-edge failures
- Builder gel lifting fixes — for cuticle/wall failures
- Builder gel not curing — for cure-stage failures
- Why builder gel is sticky — for finish-stage confusion
And for the strategic learning curve over your first five sets, see how to do builder gel nails.
For the wider system context, see the Builder Gel Atlas and the project homepage.
Final Notes from Sara
The fastest way to get good at builder gel is to track which mistakes YOU make. Most DIYers have a personal weak point — mine was the apex (always too far back). My partner's was bead size (always too big). My neighbor's was thumb cures (always rushed).
After your first set, write down the three mistakes you noticed yourself making. Tape it to your lamp. Read it before set 2. By set 5, those three are gone and you'll have a new (smaller) list of three.
That's how the learning curve works. Sets don't get better by following a longer tutorial. They get better by deleting personal mistakes one at a time.
Last updated May 2026. This article uses AI assistance for research and structure; the mistake list is the running record I keep from teaching DIY clients and from my own first ~30 sets.