Apex Placement Is Not About Looks
Editor Picks — Amazon
Top picks for builder gel apex placement
Curated from current Amazon ratings and review counts.

modelones Builder Nail Gel, 8-in-One Cover Nude Builder, LED Lamp Cured Thickening Apex Building Strengthener Extension Rubber Color Base Gel Polish Glue in a Bottle for Home DIY Salon Girls
$8.99
Amazon price as of Oct 22, 2026

Beetles Builder Gel for Nails,0.51 oz 8 in 1 Strengthening Nails Enhancement Building Apex for Beginners & DIY Salon Manicure,Clear Builder Nail Gel,LED & UV Lamp Needed,Gifts for Women
$7.99
Amazon price as of Oct 22, 2026
Scroll →
Product prices and availability are accurate as of Oct 22, 2026 and are subject to change.
Builder gel apex placement is the structural decision that separates a 3-week set from a 5-day set. The "apex" is the highest, thickest point of the gel — the dome of the structure. Where that dome sits on the nail decides where the nail can flex and where it cannot, which decides where it cracks, lifts, or chips. Most DIY problems I diagnose for clients come down to the apex being in the wrong place, not the gel being wrong, the cure being wrong, or the prep being wrong.
Builder gel apex placement is the single decision that decides whether a set flexes, cracks or holds for three weeks. This is the visual-companion page for "watch me place the apex" video tutorials — slowed down to the point where you can see why pros stop, hold the brush still, tilt the hand, and place the dome with so much deliberation. Once you understand what they're doing, the rest of the technique gets a lot easier.
The 30-Second Theory
Imagine the nail as a tiny bridge. The free edge is the part of the bridge that hangs over open air. The cuticle area is anchored on solid ground. The middle of the bridge is where load concentrates when weight pushes down.
If the bridge has a thick reinforcement beam, the beam should sit over the load point, not over the anchor and not at the very edge of the overhang.
Apex = beam. Load point = roughly one-third back from the free edge. That's where you place the apex.
Apex too far back (under the cuticle) → the free edge has no reinforcement → cracks at the tip when you type, open a can, or grab keys.
Apex too far forward (right at the free edge) → the cuticle-to-mid-nail zone is too thin and flexes → set lifts at the cuticle.
Apex correct → the dome catches load before it propagates to either end of the nail → set holds.
The Three Apex Zones, Visualized
For a written page, the easiest way to describe apex zones is to think of the nail in thirds, measured from cuticle to free edge.
Zone A — Cuticle Third (back third of the nail) This is the back third of the nail, closest to the cuticle. Apex placement here is the most common DIY mistake. It feels natural because that's where you can see what you're doing. It looks like a normal nail from above. It fails by tip-cracking within a week.
Zone B — Middle Third (apex zone, correct) The center third of the nail. The dome center should sit roughly at the line where Zone B meets Zone C — about one-third back from the free edge. This is the load-bearing position. Most pro applications place the dome center here.
Zone C — Free Edge Third (forward third) The front third of the nail. Apex placement here is the second most common mistake. It feels structurally reassuring (you can see the tip is reinforced), but it leaves Zone A under-supported. Sets lift at the cuticle within 5-7 days.
Why "One-Third Back From Free Edge"
The one-third-back number is not aesthetic preference — it comes from where the bending stress actually concentrates when a nail is loaded.
Hold your hand flat, palm down. Press the tip of your nail into a hard surface. The bending stress concentrates not at the tip and not at the cuticle but at the point where the nail starts to curve down toward the fingertip — roughly one-third back from the free edge on most nail shapes.
The apex is positioned at the bending stress point so that when force pushes the tip down, the thickest part of the gel resists the bend instead of allowing it.
Different nail shapes shift this point slightly:
- Square nails — apex slightly more forward (about one-third back)
- Almond/oval nails — apex slightly further back (about 40 percent back from free edge) because the tapered tip is more flexible
- Coffin/ballerina nails — apex about one-third back, same as square
- Stiletto nails — apex shifted slightly forward, because the long taper concentrates stress closer to the tip
For builder gel on short or naturally-thin nails, the apex placement matters even more — see builder gel on short nails for shape-specific adjustments.
How to Place the Apex Correctly
Step-by-step, from the moment the bead lands on the nail:
-
Place the bead at the one-third-back position, dead center on the nail (not toward either sidewall). Don't drag it yet.
-
Tilt the finger downward — finger pointing toward the floor, nail facing the ceiling. This is the critical move pros do that most tutorials skip. The downward tilt uses gravity to pull the bead toward the cuticle and prevents pooling at the free edge.
-
Hold the tilt for 5-10 seconds. Watch the bead. It should slowly migrate slightly toward the apex zone and self-level. This is the gel "finding its dome."
-
Tilt the finger upward — finger pointing toward the ceiling, nail facing the floor. Hold for 5-10 seconds. The gel migrates slightly toward the free edge and self-levels there.
-
Return to flat — finger horizontal, nail facing up. The gel should now sit in a smooth dome with the highest point at the apex zone.
-
Cure immediately. The longer you wait, the more the dome flattens by gravity.
This "flag pole" technique (tilt down, tilt up, return) is what professionals use in salon. Watch any longer-form builder gel video and you'll see it — it's so habitual most creators don't even narrate it.
Apex Diagnostic — Reading a Failed Set
After a set fails, the failure pattern tells you exactly where the apex went wrong. This is the diagnostic tree:
Cracks straight across the free edge tip → apex too far back. Tip had no reinforcement. Move apex forward on the next set.
Cracks at one of the back corners (where nail meets cuticle on the sides) → apex too far forward. The cuticle area flexed and split. Move apex back on the next set.
Lifts at the cuticle as a uniform crescent → apex too far forward OR cuticle prep was insufficient. Check cuticle push next time AND move apex back slightly.
Lifts at the free edge as a uniform crescent → apex too far back OR no free-edge cap. Most often it's "no free-edge cap." See builder gel lifting fixes for the cap correction.
No failure visible at week 3 but the nail feels "bouncy" when tapped → apex correct but gel layer too thin overall. Add a touch more volume next set without changing apex position.
What Different Gels Do to Apex Behavior
The same apex placement behaves differently in different formulas because viscosity controls how much the dome holds vs. flows.
Thick, self-leveling-resistant gels (true salon-grade tube formulas, hard gels) hold the apex shape you place — high control, low forgiveness. If you place the apex slightly wrong, the gel holds it wrong.
Medium-viscosity bottle brush-on formulas (most consumer builder gels) self-level slightly during the pre-cure flagging step. They forgive small placement errors by migrating into the natural apex zone.
Soft, very thin "BIAB-style" formulas self-level so aggressively that the apex is mostly determined by gravity and how long you flag the bead. Hard to over-build, harder to place a deliberate apex.
For thicker, control-friendly bottle formulas:

Beetles 3-Piece 15ml Builder Nail Gel Set
$11.99
Amazon price as of Oct 22, 2026
For the soft self-leveling end of the spectrum, see best self-leveling builder gel.
For hard gel apex placement (different physics — the gel doesn't self-level at all and apex placement is purely under your control), see builder gel vs hard gel.
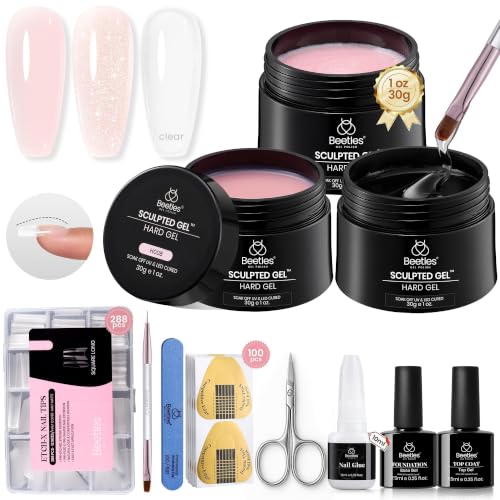
Beetles Hard Gel for Nails Kit (3 Colors)
$29.99
Amazon price as of Oct 22, 2026
Apex Placement on Extensions
When you've built length past the free edge on a nail form, apex placement shifts. The apex of an extension does NOT sit on the original free edge — it sits on the new free edge of the extension.
If the extension adds 5 mm of length, the new apex position shifts roughly 1-2 mm forward from where the natural-nail apex would sit. The principle is the same (one-third back from the new free edge) — only the reference point moves.
For full extension application steps, see builder gel on full tips and best builder gel for nail extensions.
Apex Placement vs. Apex Building
Two different problems people confuse:
Apex placement — where the dome sits horizontally on the nail (cuticle-to-tip axis). This page.
Apex building — how tall the dome is vertically. A separate skill that depends on volume control and how many layers you build.
A correctly-placed apex that's too short still doesn't support the nail enough. A tall apex placed in the wrong spot supports the wrong area and fails differently. Both have to be right.
The fast rule on apex height: about 1.5x the thickness of the cuticle and free-edge gel layers. If your perimeter gel layer is 0.5 mm thick, the apex height should be roughly 0.7-0.8 mm thick at its peak.
Cited Reading
Apex placement in gel and acrylic structures has been written about in dermatology and nail-industry literature for years. For a clinical view of why proper structure matters for nail health (not just durability), see the American Academy of Dermatology nail care guide — it covers nail anatomy and the safer-application practices that go alongside structural decisions.
FAQ
Does apex placement matter on overlay (no extension)? Yes, exactly as much as on extensions. The natural nail still bends, still has load points, and still cracks if apex placement is wrong. Some DIYers think apex only matters on extensions — it doesn't.
Can you fix wrong apex placement after curing? Partially. You can file the dome down and rebuild with a corrective layer in the right position. The first layer (now under the rebuild) won't be load-bearing, but the new apex will be. Better than removing and starting over for a small misplacement.
Why do my apexes look fine but my nails still break? Three common causes — the apex height is too short, you're not curing thumbs separately (thumb cure mistake), or your gel viscosity is too thin to hold a real structural dome.
Should the apex be visible from the side? Yes. If you look at the nail from the side, you should see a gentle curve up to the apex zone and back down to the free edge. A nail that looks flat from the side has no structural dome and will flex.
Related Reading
- Builder gel nails (homepage) — topic hub
- Builder gel one bead method — the application technique that places the apex
- Builder gel cracking fixes — diagnostic tree for apex failures
- Builder gel mistakes to avoid — apex appears as Mistake 3 in the catalog
- Builder gel application steps — where apex fits in the full sequence
- Best builder gel for nail extensions — extension apex considerations
Last updated May 2026. This article uses AI assistance for research and structure; the apex placement diagnoses are written from over 400 in-salon corrective sets where DIY clients came in with structural failures.