Everyone believes ghost nails require a steady artist's hand, an opaque white that covers in one stroke, and a cartoonist's talent for faces. All three of those beliefs are wrong, and they're the reason people scroll past this design thinking it's beyond them. Ghost nails are actually the most forgiving spooky look you can do at home, because a ghost is supposed to be a wobbly, lopsided little blob — precision would make it worse. In this tutorial I'll debunk the myths one by one, then give you the exact sheer-base-plus-white-swirl method I use, and five variations from matte to glow-in-the-dark so your set doesn't look like everyone else's.
My ghost-night lineup — Amazon
A HEMA-free builder base, a 3D art kit, and a color set
The sheer builder overlay plus the white striper and tools these ghosts are painted with.

GAOY White Swirl Gel Nail Polish Art Liner, 12ml Classic Color Nail Paint Design with Thin Brush, UV Light Cure for DIY French Manicure at Home
$6.99
Amazon price as of Oct 19, 2026

Beetles Black Gel Polish, 15ml Soak-Off UV LED Audrey Black Gel Nail Polish for DIY Nails Art & Salon-Style Manicures
$5.39
Amazon price as of Oct 19, 2026
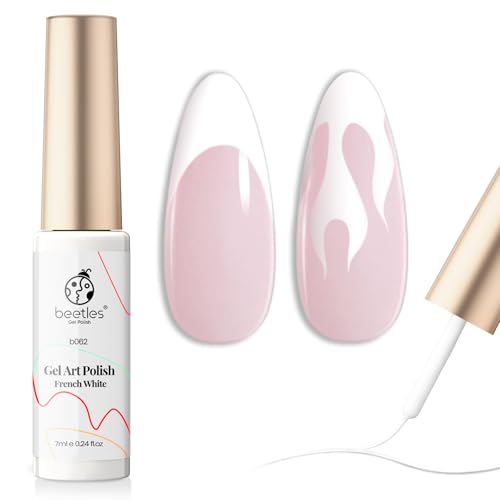
beetles Gel Polish Swirl Nail Art White Gel Liner Nail Polish
$6.99
Amazon price as of Oct 19, 2026
Scroll →
Product prices and availability are accurate as of Oct 19, 2026 and are subject to change.
The reason I build ghost nails on a builder gel overlay rather than bare polish is that the sheer structural base gives the whole thing a soft, milky depth that flat polish can't — and it lasts. If builder gel is new to you, start with our builder gel guide for the fundamentals, then come back for the ghosts.
Myth One: You Need an Opaque White That Covers in One Coat
The most common thing that stops people is fighting a streaky white, convinced their ghosts have to be solid and bright. They don't. A ghost reads better when it's slightly translucent and soft-edged, like it's actually floating rather than painted on. I build my ghosts in two thin, deliberately imperfect passes of white striper gel, letting a little of the sheer base show through at the edges. The softness is the point. If you chase a hard, flat, one-coat white you'll get a paper cutout, not a ghost. So the "problem" of streaky white isn't a problem here — it's the effect. Two whisper-thin coats, each flash-cured, and let the base peek through.
The base itself is where builder gel earns its place. I prep the natural nail — cuticles back, shine buffed off, dehydrate — then lay a thin structural coat of clear or milky-nude builder gel with a proper apex and cure it fully. That milky base is the "sky" your ghosts float in, and it's the layer that makes the design last three weeks instead of chipping off by the weekend. For the underlying overlay technique, builder gel for 3D nail art covers building a smooth, hard canvas that art sits on cleanly.
Myth Two: Ghost Faces Have to Be Perfect
Here's the second belief to throw out: that the eyes and mouth need to be neat. On a real cute-ghost design the face is two uneven dots and maybe a tiny oval mouth, placed slightly off-center, and asymmetry is what makes it charming. I've watched clients relax visibly the moment I tell them "make the eyes different sizes on purpose." So the face is the easiest part, not the scary part. Once your white ghost body is cured, load a fine dotting tool or the tip of a striper with black gel and place two small dots for eyes — deliberately not matched — and if you like, a tiny dot or short line for a surprised little mouth. Cure. That's the whole face.
Now the core method, start to finish, so you have it in one place:
- Build and cure the sheer base. Thin structural builder gel coat over prepped nails, milky-nude or clear, full apex, cured hard, tacky layer wiped.
- Paint the ghost body. With white striper gel, draw a soft blob — round top, wavy little tail at the bottom like a sheet. Keep it thin and imperfect. Flash-cure for 10 to 15 seconds.
- Second white pass. Add a thin second coat only where you want it a touch more solid, leaving edges sheer. Flash-cure again.
- Add the face. Two uneven black dots for eyes, optional tiny mouth, with a dotting tool. Full-cure the nail.
- Cap and seal. A thin clear builder or gloss top layer over the whole nail, cap the free edge, cure a final time so the ghosts wear down evenly instead of chipping.
I usually put ghosts on just two or three accent nails and leave the rest as solid milky or black nails — a full set of ten ghosts tips over from cute into busy. For help balancing accents across a set, the builder gel nails ideas gallery is where I send people.

MelodySusie Nail Art Brushes Set,6pcs Nail Art Design Pen Painting Tools with Extension Gel Brush, Polish Brush, Builder Brush,Liner Brush, Carved Brush, and Dotting Pen for Home DIY Salon Use
$5.99
Amazon price as of Oct 19, 2026
Myth Three: It's a One-Look Design — The Five Variations
The last myth is that ghost nails are a single childish look. They're a base you can push in five directions, and this is where you make the set yours.
- Matte ghosts. Finish with a matte top coat instead of gloss and the whole set turns eerie and soft, like fog. Matte is my personal favorite because it hides tiny imperfections in the white and reads far more grown-up. It's the single easiest upgrade.
- Glow-in-the-dark ghosts. Mix a glow pigment into the white gel or use a glow-white striper for the ghost bodies. Under normal light they look like standard ghosts; in a dark room or club they light up. Charge them under the lamp or any bright light first. This is the one that gets the biggest reaction at parties.
- Mixed-spooky set. Alternate ghost accent nails with the spiderweb nails technique on neighboring fingers, over the same milky base, so the set tells one Halloween story instead of repeating one motif.
- Boo-lettering ghosts. Add a tiny white "BOO" in striper across one solid-black accent nail among your ghosts. It breaks up the blobs and gives the eye something to read.
- Pastel-ghost set. Swap the black eyes for soft pink or lilac and do the base in a pale pastel rather than milky-nude. This is the "not-scary" version that clients who don't love Halloween still say yes to.
Last October I did nine ghost sets in a single week, and the split told me everything: the under-eighteen crowd wanted glow-in-the-dark almost unanimously, while everyone thirty and up chose matte. Same five-step method underneath — the variation is all in the finish and the palette, which is exactly why this design is worth learning once.
If you want to mix and match rather than commit to one variation, a set that works beautifully is three matte ghosts on the accent fingers, one glow ghost on a ring finger as a hidden surprise, and the remaining nails left as plain milky or black. That combination hits the "cute in daylight, magic at the party" note better than doing all ten the same way, and it takes barely any extra time because the base coat and the ghost bodies are identical — only the top coat and the one glow nail differ. I've stopped talking clients into full matched sets entirely; a little variation across the ten nails is what makes ghost nails look styled rather than stamped.
Read next
Builder Gel Nails Ideas: 12 Editorial Looks for 2026
Twelve builder gel and BIAB nail ideas across four aesthetic families — clean girl, editorial classic, expressive color, and seasonal — plus the technical notes for each.
Continue readingPicking the Base and the White That Make or Break the Look
I get asked more about product choice for ghost nails than about the painting itself, so let me be specific, because the wrong two gels will fight you the whole way. Your base gel matters most. A milky-nude builder gel is my default because it gives the ghosts a soft "night sky" to float in and hides ridges in the natural nail; a sheer clear builder works if you want the ghosts to feel like they're on bare skin, but it shows every imperfection underneath, so it needs a flawlessly buffed nail first. A true-black base flips the whole design into high-drama mode and makes glow-in-the-dark ghosts read brightest, but it's the least forgiving of stray white marks. Match your base to how confident you feel: milky forgives, clear demands prep, black demands precision.
The white is the other half of the equation, and here's where people waste money. A thin, floody art white will chase you around the nail and never build a shape; a thick, chalky "one-coat" white is too stiff to feather into that soft ghost edge. What you want is a white striper or gel-paint with a medium body — thick enough to hold a blob shape, thin enough to leave the edges sheer with a light hand. If your white is too thick straight from the pot, a single drop of clear gel thins it perfectly. And for the glow variation, don't trust glow pigment to also be your only white — glow formulas are usually semi-translucent, so I lay a thin regular white ghost first, cure, then a glow coat on top, so the shape is solid in daylight and still lights up in the dark.
Two more small choices round out the kit. A fine dotting tool in a small-to-medium size gives you the best eyes — too fine and the dots vanish, too big and the ghost looks startled. And a matte top coat is worth owning even if you only think you'll do glossy ghosts, because as I mentioned it's the single upgrade that ages the whole design up and hides a multitude of white streaks. None of this is expensive or specialized — a HEMA-free builder, one white striper, a black liner, a dotting tool and a matte top will carry you through an entire spooky season and plenty of non-Halloween art after it.
Ghost Nails Questions People Ask Before Trying Them
Can I do ghost nails with regular gel polish instead of builder gel?
You can paint the ghosts themselves with any white gel, but the base is where builder gel matters. A structural builder overlay gives the design its milky depth and the strength to wear for weeks; a flat polish base looks thinner and chips at the tips sooner. If you only have gel polish, the five-step method above still works. Just expect the set to behave like a polish manicure, not a builder set.
How do I make ghost nails glow in the dark?
Paint a thin regular-white ghost first and cure it, then lay a glow-white coat over the body. Glow formulas are usually semi-translucent, so the plain white underneath keeps the shape solid in daylight while the glow layer lights up in the dark. Charge the nails under the lamp or any bright light before you go out, and seal everything under clear as normal.
How many nails should have ghosts on them?
Two or three accent nails is the sweet spot. Ten ghosts tips the set from cute into busy; leave the rest as solid milky or black nails, or mix in one spiderweb finger so the set tells a single Halloween story. The combination above of three matte ghosts, one glow ghost on a ring finger and plain nails everywhere else is the one I suggest most.
Making Ghost Nails Last — and Taking Them Off Cleanly
Because the ghosts are built into a structural builder gel overlay and capped under clear, a good set carries three weeks without the faces rubbing off — which is the whole reason I do them in gel rather than craft polish that's gone by Sunday. The two failure points are the same as any design: an uncapped free edge, and art painted on top of a finished nail instead of sealed under a clear layer. Cap every tip, seal the ghosts, and they wear down evenly.
Removal is where people worry about the white and black staining, and it's a fair concern — but builder gel soaks or files off rather than peeling, and a milky base means there's no dark pigment sitting against your natural nail to leave a shadow. File off the gloss and bulk, soak the thin remaining layer in acetone under foil, and it lifts in a soft sheet. The full method — including how to tell when it's actually soaked versus when you're forcing it and risking your natural nail — is in soak off builder gel. Never pry a set off dry.
One honest safety note to close on, because I say it to every client: the more art and layers you build, the more it matters to keep every trace of uncured gel off your skin and to cure each stage fully. Uncured acrylates are a known contact-allergy trigger, and repeated skin contact is how sensitivities develop over time. If you ever notice itching, redness, or lifting skin around a nail, take it seriously rather than pushing through. The American Academy of Dermatology's contact dermatitis overview explains how these reactions present and progress. Clean application — gel on the nail only, full cure, sealed edges — is the safety habit that makes a fun little ghost set genuinely low-risk.
Ghosts are the friendliest of the three tutorials in the Halloween builder gel nails guide; once they feel easy, spiderweb nails is the one to learn next.
Last updated October 2026. This article uses AI assistance for research and structure; the design methods and client notes are my own.