Why do spiderweb nails look so hard to freehand when the actual web is nothing but a handful of straight lines and a few connecting curves? That's the question almost every client asks me before I start, and the answer is the reason I love recommending this design to nervous beginners: spiderweb nails are geometry, not artistry. Once you understand that a web is built from anchor lines that all meet at one corner, the "hard" part disappears. In this tutorial I'll walk you through the exact method I use at my table — a fine-line web over a structural builder gel base — plus the flash-cure timing that keeps your black lines from bleeding, and a dotting-tool shortcut for anyone who doesn't trust their hand with a striper brush yet.
What I reach for on web nights — Amazon
Builder gel base, a fine liner, and a 3D art kit
A HEMA-free builder gel overlay plus the striper and tools that make crisp web lines possible.

Beetles Black Gel Polish, 15ml Soak-Off UV LED Audrey Black Gel Nail Polish for DIY Nails Art & Salon-Style Manicures
$5.39
Amazon price as of Oct 19, 2026

Beetles Black White Gel Polish Set, 2 Pcs 15ml Full Size, Black White Color
$7.97
Amazon price as of Oct 19, 2026
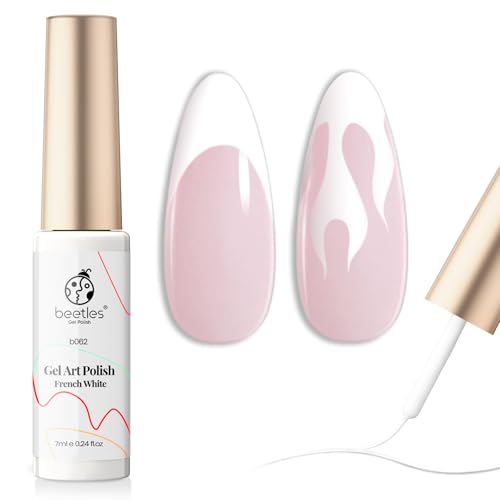
beetles Gel Polish Swirl Nail Art White Gel Liner Nail Polish
$6.99
Amazon price as of Oct 19, 2026
Scroll →
Product prices and availability are accurate as of Oct 19, 2026 and are subject to change.
The whole point of doing spiderweb nails over builder gel rather than plain polish is durability — a structured overlay means the design survives the whole party season instead of chipping off by the second night. If you're brand new to the medium, our full builder gel guide covers the basics, and the how to do builder gel nails walk-through is the foundation everything below sits on top of.
Setting Up the Base Before You Draw a Single Line
You cannot freehand a clean web on a wet or bumpy surface, so the base has to be finished and cured before any black touches the nail. I prep the natural nail the usual way — push back cuticles, gently buff off the shine, dehydrate, and lay a thin structural coat of clear or milky builder gel with a proper apex. Cure that fully. This gives you a smooth, hard, glass-flat canvas, and it's the difference between lines that glide and lines that drag and pool.
For a classic Halloween web I like one of two backgrounds. A sheer milky-white or pale-grey base makes black webbing pop like a photograph, and it's the most legible from across a room. A glossy true-black base with white webbing flips the whole effect and reads as more editorial, though white striper gel is fussier and needs two passes to stay opaque. Whichever you choose, apply that color as a thin builder or gel-polish layer over your structural coat, cure it, and only then wipe the tacky layer and move to the web. Working the web onto a fully cured, non-tacky surface is what keeps your lines sitting exactly where you place them instead of smearing into the sticky inhibition layer.
One thing I insist on with clients: pick your web's anchor corner before you load your brush. A web is asymmetrical — it radiates from one point, usually a bottom corner or the sidewall — and deciding that anchor first is what stops the design from turning into a random scribble. Look at your ten nails and vary the anchor corner across them so the set reads as a scattered web rather than ten identical stamps.
The Anchor-Line Method: Freehand Web, Step by Step
Here's the core tutorial. Load a fine striper brush or a nail-art liner with black gel — thin, not gloopy, wipe the excess on the pot's neck. Then:
- Lay your anchor lines. From your chosen corner, draw three to five straight lines fanning outward across the nail like spokes of a wheel — one to the opposite corner, one up the middle, the rest spaced between. These are the spokes. Keep them straight and confident; a wobbly spoke is far more forgiving than a wobbly curve, and slight imperfection actually reads as more web-like.
- Flash-cure the spokes. Pop the hand under the lamp for just 10 to 15 seconds — a flash cure, not a full cure. This is the single trick that makes web nails work. It sets the spokes just enough that they won't smear when you cross them, but the surface is still slightly tacky so the connecting arcs bond. Skip this and every curve you draw will drag a spoke out of place.
- Connect with curves. Now draw short curved lines between adjacent spokes, arcing them slightly toward the anchor corner so they sag like real web silk. Work from the anchor outward, spacing the arcs a little wider as you move away from the corner — real webs are dense near the center and loose at the edges.
- Full-cure the web. Once all the arcs are in, cure the whole nail fully for the lamp's recommended time.
- Cap it. Seal everything under a thin clear builder or gloss top layer, cap the free edge, and cure a final time. This locks the design in so it wears down evenly instead of chipping at the raised black lines.
The flash-cure between spokes and arcs is what I most often see missing from home attempts. People try to do the whole web in one wet pass, the curves smear the spokes, they panic, and the whole thing turns to mud. Two stages — spokes, flash, arcs, full cure — and it comes out crisp every time.

Artdone Metallic Nail Art Liner Brushes, 5-Piece Set
$6.99
Amazon price as of Oct 19, 2026
The Beginner Shortcut: Dotting Tool and French-Tip Webs
If a striper brush feels like too much, there are two lower-stress routes to the same look, and I genuinely reach for both on clients who want speed.
The dotting-tool method turns freehand lines into connect-the-dots. Place small black dots along the paths where your spokes and arcs would go, flash-cure, then drag a clean dotting tool or a toothpick through each row of dots to pull them into lines while the gel is still workable. You get slightly softer, more organic web strands, and it's almost impossible to make it look wrong. It's the version I teach first to anyone who's never held a striper.
The spiderweb French tip is the most wearable option for people who want a hint of Halloween without full spooky commitment. You do a normal French tip — a clean smile line at the free edge — then freehand a small partial web radiating from just one corner of the tip. The web only occupies the outer third of the nail, so there's far less area to control, and the French base keeps the whole thing looking polished rather than costume-y. This is my most-requested "web for grown-ups" and it survives an office dress code easily. Because it's a structured tip, it pairs perfectly with the techniques in builder gel for 3D nail art, where the same anchor-and-cure logic applies to raised elements.
A quick note on which tool suits which hand. If you're right-handed, the dotting-tool method is far kinder to your non-dominant left hand, because dragging dots is more forgiving of a shaky pull than laying a continuous striper line is. I tell clients who want to try this at home to do their dominant hand with the striper and their weaker hand with dots — the two techniques give nearly identical results, and nobody will spot the switch across a set. The other small thing that separates a clean web from a muddy one is brush maintenance: wipe your striper on a lint-free pad and reload with a fresh thin bead between every two or three nails. Gel starts to thicken and drag on the brush as it sits, and a tired, half-dry brush is behind more ruined webs than a shaky hand ever is.
There's also the question of color, which most tutorials skip. Black on milky-white is the default, but a deep plum web on a dusty-grey base or a dark-teal web on a pale sage base both read as spooky-elegant rather than costume, and they photograph beautifully in low autumn light. The web technique is identical — only the two gel colors change — so once you've learned the anchor-line method you can restyle the whole look just by swapping the striper shade.
For anyone building a whole spooky set rather than a single accent, browse the builder gel nail designs gallery for balance ideas — a common mistake is webbing all ten nails, when two web accents against solid black or milky nails reads far more expensive.
Troubleshooting, Wear, and a Word on Skin Safety
Last October I did fourteen web sets in the two weeks before Halloween, and the same three problems came up over and over, so here's what actually fixes each. Lines that bleed or fatten mean your black gel was too thin and floody, or you skipped the flash cure — thicken the gel slightly and always flash between spokes and arcs. Lines that drag and skip mean the base still had its tacky inhibition layer on it, or the brush was overloaded and dry-catching; wipe the base clean and reload with a thin, even bead. Webs that chip at the edges within days mean the design wasn't capped under a clear layer — surface art always chips, built-in art wears down evenly, so that final clear cap over the whole web is non-negotiable.
One honest note on wear: a capped web set built into structural builder gel should carry you through the full two to three weeks of party season without touch-ups, which is exactly why I push people toward gel over craft polish for Halloween. But the more layers and pigment you build, the more it matters to keep every trace of uncured gel off your skin and to cure each stage fully. Uncured acrylates are a known contact-allergy trigger, and repeated skin contact is how sensitivities build. If you ever notice itching or redness around a nail, take it seriously — the American Academy of Dermatology's contact dermatitis overview explains how these reactions present. Clean application isn't just tidy, it's the safety practice.
Read next
Builder Gel for 3D Nail Art in 2026: Sculpting Flowers, Bows and Hearts That Actually Hold
Builder gel for 3D nail art works best when you choose a firm-viscosity formula that holds a sculpted shape instead of slumping before cure. Here is the gel, the tools and the build-cure-build method I use to sculpt flowers, bows and hearts that survive two weeks of real wear.
Continue readingFrequently Asked Questions
Are spiderweb nails hard to do for beginners?
Less than they look. A web is built from straight anchor lines that all fan from one corner, plus a few connecting curves — geometry rather than freehand artistry. The dotting-tool shortcut (place dots, then drag them into strands) makes it nearly foolproof, and a partial spiderweb French tip limits the design to the outer third of the nail so there's very little area to control.
What's the flash-cure trick for spiderweb nails?
After you draw the straight spoke lines, cure them for just 10 to 15 seconds instead of the full time. This sets the spokes so they won't smear when you cross them with curves, while leaving the surface tacky enough that the arcs still bond. Doing the whole web in one wet pass is the number-one reason home attempts smear into mud.
Do I need special tools for spiderweb nails?
A fine striper brush or nail-art liner and thin black gel are all you truly need, over a cured builder gel base. A dotting tool helps beginners and gives softer, more organic strands. You don't need stamping plates or stencils — spiderwebs are one of the few designs that genuinely look better slightly imperfect and freehand.
Spiderwebs are one of three looks in the full Halloween builder gel nails guide, and they pair naturally with the ghost nails tutorial on the neighboring fingers.
Last updated August 2026. This article uses AI assistance for research and structure; the web-line techniques here come from hands-on salon work.