This builder gel nail tutorial is the walkthrough I wish someone had given me before my first set. Not the polished, six-minute YouTube version that skips the awkward bits, but the actual sequence — including the parts where you'll mess up and need to backtrack. I've taught dozens of clients to do their first sets at home and the same five questions come up every time. They're answered in order here, so you don't need to scroll around.
Editor Picks — Amazon
Top picks for builder gel nail tutorial
Curated from current Amazon ratings and review counts.
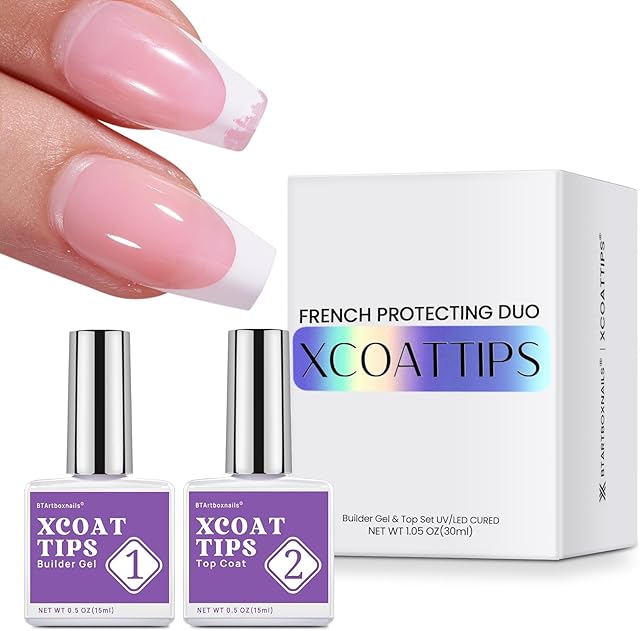
BTArtboxnails XCOATTIPS French Protecting DUO Builder Gel and Top Coat Set - Protect French Tips, No More Chipping
$16.99

modelones Builder Nail Gel, 7-in-One Clear Builder for Nails, LED Lamp Cured Color Rubber Base Gel Polish Coat Strengthener Thickening Extension Rhinestone Glue in a Bottle for DIY Home Salon Gifts
$7.64

Beetles Builder Gel for Nails,0.51 oz 8 in 1 Strengthening Nails Enhancement Building Apex for Beginners & DIY Salon Manicure,Clear Builder Nail Gel,LED & UV Lamp Needed,Gifts for Women
$7.99
Scroll →
Before you start, decide whether you're doing an overlay (gel on natural nails for strength) or an extension (gel sculpted past the free edge for length). The technique is similar but the bead size and apex placement differ. This tutorial covers overlays primarily, with extension notes at the end. For dedicated extension work, see best builder gel for nail extensions.
What You Need on the Table
Before opening anything, set up your workstation. Builder gel sets gradually under ambient light over an hour or two, so you want to move efficiently once you start.
The product list:
- Soak-off builder gel (Modelones, Beetles, Olive & June, or similar)
- Base coat compatible with your builder gel brand
- Top coat
- 48W+ LED lamp (or UV+LED dual-mode)
- 91% isopropyl alcohol in a small bottle
- Lint-free wipes (NOT cotton balls — fibers stick to gel)
- 100/180 grit nail file
- 220-grit buffer
- Wooden orange stick or metal cuticle pusher
- A nail brush from the gel kit (or a stiff nylon liner brush)
- Optional: nail forms or full-cover tips if doing extensions
- Cuticle oil for after
Lay everything out within arm's reach. Pour a small dish of acetone if you'll need to clean your brush mid-set. Have a paper towel handy.
For complete kit recommendations, see best builder gel kit with lamp.
Step 1 — Push Back Cuticles
Soak your hands in warm water for two minutes to soften cuticles. Pat dry.
Use a wooden orange stick or metal pusher to gently push the cuticle skin back from the nail plate. You're not cutting — just pushing. You should be able to see clearly where the nail plate ends and where the cuticle skin begins.
Some people have non-living cuticle stuck to the nail plate (a transparent film called the pterygium). Use the back edge of your pusher to scrape it gently off. This is the single biggest cause of lifting at the cuticle area.
Step 2 — Shape Free Edge and Buff Surface
File the free edge of each nail to your preferred shape. Square, oval, almond, or coffin — pick what you'll be comfortable maintaining. For your first set, square or rounded square is the easiest.
Then take your 220-grit buffer and lightly buff the entire nail plate surface. You're not grinding — just removing shine. Three to four light passes per nail, in one direction. Stop when the nail looks uniformly matte (not shiny in patches). Over-buffing thins your natural nails.
Step 3 — Dehydrate
Apply 91% isopropyl alcohol to a lint-free wipe and press it onto each nail in sequence. Don't rub — just press and lift. Let nails air-dry for 30 seconds.
The job here: remove every trace of oil from the nail plate. Skin oil is the enemy of gel adhesion.
Do not touch your face, hair, or any oily surface between this step and the next. If you accidentally touch something, redo the dehydration.
If your nails are oily-prone (genetic — you'll know), use a dehydrator product like KBShimmer Dehydrate after the alcohol. One pass each.
Step 4 — Apply Base Coat
Open your base coat. Wipe excess from the brush on the bottle's neck so you have a controlled amount — about half a brush-load.
Apply a thin, even layer across the entire nail plate, leaving a tiny 0.5mm gap at the cuticle and sidewalls. Don't flood the cuticle area — that's the #1 cause of lifting.
Cap the free edge (drag the brush down the front edge of the nail) to seal it.
Cure in your LED lamp for 60 seconds. UV lamps require longer cure times — check your lamp's manual.
Step 5 — Pick Up Your First Bead
Now you'll handle builder gel. This is where the learning curve sits.
Open the jar of builder gel. With your gel brush or a metal spatula, pick up a small bead — for a natural-nail overlay, about the size of a green pea. For an extension, about the size of a small pearl.
The bead should sit on the brush bristles without dripping. If it drips off, you took too much; scrape some back into the jar. If it won't release from the brush onto the nail, you have too little; pick up a bit more.
For bottle-format builder gel (BIAB style), this step is replaced by simply painting the gel on like polish. See biab vs builder gel for the format comparison.
Read next
BIAB vs Builder Gel: Are They Actually Different, or Is It Just Marketing?
BIAB vs builder gel — the honest answer from someone who uses both. They're related but not identical, and the difference matters for wear, application, and price.
Continue readingStep 6 — Place the Bead
Touch the brush to the nail at the apex zone. For natural-nail overlays, the apex sits in the middle of the nail plate. For extensions, the apex sits at the stress point — roughly where the natural nail meets the extension.
Tap the bead off the brush onto the nail. It should sit there as a small dome. Don't smear or paint — just place.
If the bead lands wrong, scoop it off with your brush and try again. Builder gel is forgiving in this state — it hasn't cured yet, so you have unlimited time to reposition.
Step 7 — Self-Level
Flip your hand so the nail points downward. Hold steady for 5-10 seconds. Gravity pulls the gel into a natural dome that bridges from cuticle to free edge.
This is the move that makes builder gel different from acrylic. Most beginners skip it and end up trying to manually shape the bead with their brush, which is much harder than letting physics do the work.
After 5-10 seconds upside-down, right your hand carefully without jostling the gel.
Step 8 — Refine with the Brush
The self-leveled dome will be mostly correct, but the cuticle and sidewalls usually need a tiny bit of brushing.
Use light, controlled strokes to push gel toward the cuticle and sidewalls — without touching the skin. Leave a 0.5mm gap. Cap the free edge again with whatever excess is on the brush.
Look at the nail from the side. The profile should look like a gentle dome with the highest point at the apex zone. Adjust if needed.
Step 9 — Flash Cure and Full Cure
Place the hand in the lamp for 10 seconds. This flash cure locks the shape so it won't flow.
Pull the hand out, inspect from all angles. If anything is off, the shape is now mostly fixed but you can still file it after the full cure — no need to undo and redo unless something is dramatically wrong.
Place the hand back in the lamp for 60 more seconds (or 90 seconds for tinted shades). This is the full cure.
Step 10 — Repeat for Remaining Nails
Do each nail one at a time through Steps 5-9. Don't try to do all five nails on a hand simultaneously — by the time you get to the fifth nail, the first nail's bead has been sitting uncured for 5+ minutes, which can cause flowing or partial setting issues.
After all ten nails are gel-coated and cured, move to the top coat step.
Step 11 — Top Coat
Apply a thin layer of top coat over the entire cured builder gel surface. Cap the free edge.
Cure per top coat instructions — most are 60 seconds in LED. Some no-wipe top coats specify a different time.
After cure, most builder gel top coats leave a sticky inhibition layer. Wipe with 91% isopropyl alcohol on a lint-free pad. The nails should now feel slick and hard, not tacky.
Step 12 — Oil and Cleanup
Apply cuticle oil to each nail and the surrounding skin. Massage in.
Clean your gel brush by wiping on a clean lint-free pad, then dipping briefly in acetone, then wiping again. Cap your gels tightly. Store everything in a dark place — UV from sunlight will gradually cure product in the jar.
You're done. Total time for an experienced person: 45-60 minutes. For your first time: probably 90-120 minutes. That's normal.
Common First-Set Problems
The gel won't pick up cleanly. Your brush is dry. Wet it lightly with builder gel itself (not acetone) on the bottle's edge. Try again.
The bead flows off the nail before I can shape it. You picked up too much. Smaller bead next time, and don't wait between placement and flip — do it immediately.
The cured surface is sticky. That's the inhibition layer — normal. Wipe with isopropyl alcohol.
My apex is in the wrong place. Common on first sets. After full cure, file down with 100/180 grit and reapply a tiny bead at the correct spot. Cure. Top coat over the whole thing.
My nails look chunky. You used too much gel. Next set, use half as much per bead.
One nail lifted at the cuticle within a day. You touched skin during application, or you didn't dehydrate properly. See builder gel lifting fixes.
Read next
Builder Gel Lifting? When It Lifts Tells You Why It's Lifting (2026)
When your builder gel lifts tells you exactly what went wrong. Day 1-3 means prep failed. Day 4-7 means cure failed. Day 8+ usually means impact or natural regrowth.
Continue readingProduct Pick for This Tutorial
For a first set following this tutorial exactly, I recommend the Modelones 3-piece clear builder set. It's the most forgiving formula I've used — self-levels well, cures reliably under any 48W+ lamp, and is cheap enough that practice failures don't sting.

Modelones Builder Nail Gel 3-Pack with Top Coat
$13.29
If you want a complete kit including the lamp and tools, see best builder gel kit with lamp.
After This Set — Care and Wear
What to expect:
- Days 1-3: nails feel slightly tight (normal — the gel is settling)
- Days 4-7: full wear-in, shouldn't notice anything
- Days 8-14: peak wear period
- Days 15-21: regrowth gap visible at cuticle, slight lift at sidewalls possible
- Day 21+: time to fill or remove
Apply cuticle oil daily — at least twice. The bond between gel and natural nail benefits from a hydrated cuticle.
For removal, see how to soak off builder gel at home.
Read next
How to Soak Off Builder Gel at Home: The 35-Minute Method That Won't Wreck Your Nails
How to soak off builder gel at home without trashing your natural nails — the 35-minute acetone foil method I use on clients who refuse the e-file.
Continue readingFor filling instead of removing, see how to fill builder gel.
Extensions — What Changes
If you're using nail forms or full-cover tips for length, three things change in the tutorial above:
- Bead size doubles. You need enough gel to span the form/tip plus the apex.
- Apex placement moves. For extensions, the apex sits at the stress point — roughly where the natural nail meets the extension, not in the middle of the natural nail.
- Two layers may be needed. Build the base layer first, cure, then add a thinner correcting layer.
For the full extension walkthrough, see builder gel on full tips or nail forms for builder gel.
On Safety
Builder gel contains acrylate monomers that can trigger contact allergy with prolonged skin exposure. The American Academy of Dermatology covers acrylate contact dermatitis — the protective rule is simple: gel should never touch skin during application. The 0.5mm cuticle gap exists for this reason, not just for aesthetics.
For more on long-term nail health, see is builder gel bad for your nails.
Frequently Asked Questions
Can I do builder gel nails at home? Yes — follow this tutorial step by step. Most beginners produce a respectable first set within 3-5 attempts. The learning curve is the bead placement and apex shaping, both of which improve quickly with practice.
Do I need an expensive lamp for builder gel? A 48W+ LED lamp ($20-40) is sufficient for most soft builder gels. UV-only lamps work but require longer cure times. Avoid 24W and lower — undercures cause lifting.
How long does a builder gel set last? On natural-nail overlays, 18-25 days typical. On extensions, 18-22 days before fill needed. Highly dependent on prep quality.
Is this tutorial good for BIAB? Yes, with one substitution: instead of picking up a bead (Step 5-6), simply paint BIAB on the nail like polish in a thin layer, then proceed to Step 7 (self-level). All other steps are identical.
Can I use builder gel without a base coat? Some builder gels are designed as self-base — Modelones 3-in-1 and Beetles 8-in-1 are examples. For most, use the matching base coat to prevent lifting.
For the full step-by-step guide reference, return to the Builder Gel Nails pillar.
Last updated May 2026. This tutorial uses AI assistance for research and structure; the step sequence is what I teach hands-on to home clients.