How to do builder gel on toes is one of the most-searched questions I see from people who've used builder gel on their hands and want the same long-wear finish on their feet. The good news is that builder gel works beautifully on toes — often lasting longer than on fingernails because toes don't take the same daily impact. The catch is that the technique needs four specific adjustments. If you apply builder gel on toes the same way you apply it on fingernails, your set will lift in two weeks instead of two months. This page is the visual walkthrough of what changes and why.
Editor Picks — Amazon
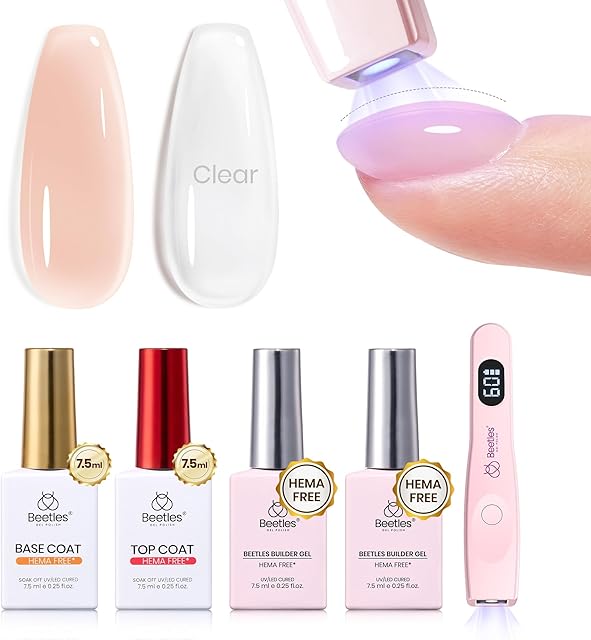
Top picks for how to do builder gel on toes
Curated from current Amazon ratings and review counts.

UNA GELLA Square Toe Nail Tips For Big Toe, 504Pcs 15Sizes Soft Gel Full Cover Toe Nail Tip Pre-buff Fake Acrylic Toes Nail Press Ons Soak Off Pedicure For Nail Extensions Home DIY Nails Salon
$9.99

BTArtboxnails Nail Tips Builder Gel - Long Lasting 15ml Builder Gel with Portable Nail Lamp for French XCOATTIPS, 30+Days French Protection Duo Nail Extension Tool for Nail Art
$25.99

modelones Builder Nail Gel, 7-in-One Clear Builder for Nails, LED Lamp Cured Color Rubber Base Gel Polish Coat Strengthener Thickening Extension Rhinestone Glue in a Bottle for DIY Home Salon Gifts
$7.64

Beetles Builder Gel for Nails,0.51 oz 8 in 1 Strengthening Nails Enhancement Building Apex for Beginners & DIY Salon Manicure,Clear Builder Nail Gel,LED & UV Lamp Needed,Gifts for Women
$7.99
Scroll →
If you haven't done builder gel before at all, start with how to use builder gel or the builder gel tutorial. Get one fingernail set down before attempting toes — the technique transfers, but the workspace ergonomics are completely different.
Why Toes Are Different
Four things about toes change the application:
1. Cure angle is harder. You can't easily get a toe flat under a lamp the way you can a finger. Most lamps are designed for hands. The toe-and-lamp geometry leaves the gel under-cured on the outer sides of the toenail.
2. Pressure load is constant and one-directional. Every step puts downward pressure on the toenail through the shoe. Fingernails get impact-loaded (sudden taps); toenails get sustained-loaded (hours of shoe pressure). The structural requirements are different.
3. Toenails are thicker and grow slower. The natural nail underneath provides more structural support and the fill cycle is longer — 5-7 weeks instead of 3-4.
4. Prep is harder. Toenail cuticles are usually thicker, with more dead skin around the perimeter. Skipping prep here is the #1 cause of lifting.
Adjustment 1 — Workspace Setup
Before you touch any gel, get the workspace right. This is half the battle on toes.
Position: sit on a couch or low chair with your foot resting on a footstool or coffee table at roughly waist height. The toes should point UP, not forward.
Lamp placement: the lamp sits over the toes, opening facing the floor. Most lamps are designed to be a stationary box with the hand placed inside — for toes, you may need to flip the lamp upside down or set it on its side so the bulbs face down onto the toes from above.
If your lamp doesn't reposition: put the foot on a stack of pillows or books high enough that the toes reach the natural opening of the lamp from below.
Toe separator — a foam toe separator (the kind used for nail polish pedicures) keeps toes apart so gel from one doesn't smudge the next. Mandatory for builder gel.
Adjustment 2 — Heavier Prep
Toenail prep is roughly 2x the effort of fingernail prep. The shortcut here is exactly why DIY pedicure sets fail at week 3.
The full prep sequence:
- Soak feet in warm water for 5-10 minutes to soften dead skin
- Dry thoroughly — water inside the toenail-cuticle area = adhesion failure
- Push cuticles back with a wooden pusher, more aggressively than on fingers (the cuticles are thicker)
- Remove cuticle film by scraping the nail plate gently from cuticle to free edge
- Trim hangnails and side skin that overlaps the nail edges (this is where lifting starts)
- File the natural toenail to your desired shape — square is more stable than rounded
- Buff the surface with a 220-grit buffer to remove shine
- Wipe with 91% isopropyl alcohol twice — once to clean, once to dehydrate
- Let dry 30 seconds before applying base coat
The "wipe with alcohol twice" step is non-negotiable on toes. Toe oils and sweat are heavier than fingers and contaminate the nail surface more.
Adjustment 3 — Thicker, Flatter Structure
Toenails take sustained shoe pressure all day. The structure needs to handle that.
Apex placement — sits roughly in the middle of the nail rather than one-third back from the free edge. Toenails get loaded along the whole length by shoe pressure, so the apex needs to be central rather than tip-biased. See builder gel apex placement for the apex theory on fingers — adjust the position one notch back for toes.
Apex height — slightly taller than on fingers. The extra height provides resistance to the constant compressive load.
Free-edge cap — even more important on toes than fingers. Without a free-edge cap, water and bacteria from inside shoes work their way under the gel. Always cap the free edge.
Overall thickness — about 1.2x the thickness of a fingernail set. Toenails can carry the extra weight without flexing.
Adjustment 4 — Cure Time and Angle
This is where most DIY toe sets fail.
Lamp time — add 15-30 seconds to every cure compared to your fingernail times. A 60-second builder layer cure on fingers becomes 75-90 seconds on toes because the lamp angle isn't optimized.
Big toe specifically — cure the big toe separately. It's wide enough that the lamp bulbs don't hit the outer edges evenly. Position the big toe centrally under the lamp, cure for the full builder time. Then position the four smaller toes together and cure those.
Tilt the foot during cure — similar to the "flag pole" technique for fingers. Tilt the foot slightly down toward you for 5 seconds, then back to flat. This redistributes the gel into a smooth dome before cure starts in earnest.
The Full Application Sequence
After prep, the application steps:
- Apply base coat to all 10 toes. Cure 30-60 seconds per foot.
- Apply builder gel to the big toe first. Use the one-bead method (builder gel one bead method) — slightly larger bead than for fingers. Cure 75-90 seconds.
- Apply builder gel to the second toe. Cure 75-90 seconds.
- Continue toe-by-toe for the remaining three toes on that foot.
- Repeat for the other foot.
- Apply top coat to all 10 toes. Cure per top coat instructions, typically 60 seconds.
- Wipe inhibition layer with alcohol on a lint-free wipe.
- Apply cuticle oil to all toes.
Total time: about 45-60 minutes for both feet.
The one-toe-at-a-time approach is slower than the all-fingers-at-once approach for hands, but the cure-angle issue makes it necessary on toes.
Product Recommendations for Toes
Two specific properties matter more for toes than fingers:
Stronger adhesion — toes are wetter, sweatier environments. Adhesion-focused formulas hold longer.
Thicker viscosity — to build the heavier structure toes need without multiple thin layers.
Recommended for toe application:

Beetles 3-Piece 15ml Builder Nail Gel Set
$11.39
For HEMA-sensitive users (toe skin can be more reactive in shoes), HEMA-free formulas are worth the upgrade:
Beetles Builder Gel Nails Kit HEMA-Free 8-in-1
$21.99
For full kits including a lamp positioning that works for toes, the wider kit lamps are easier to angle:

OPI GELement LED Cure Gel Nail Polish Starter Kit
$59.99
For broader buying advice, see best builder gel for beginners.
Common Toe Application Mistakes
Mistake 1 — Treating the big toe like a fingernail. The big toe is wider than any fingernail and has different cure geometry. It needs separate cure attention.
Mistake 2 — Skipping the free-edge cap. On fingers, missing the cap means a chip in week 3. On toes, it means water and shoe bacteria get under the gel within days.
Mistake 3 — Applying with feet still slightly damp. Even slightly moist toenails create adhesion failure. Towel-dry thoroughly, then air-dry for 5-10 minutes before starting.
Mistake 4 — Not pushing toe cuticles aggressively enough. Toe cuticles are thicker than finger cuticles. The "gentle push" recommended for fingers leaves too much cuticle film on toes.
Mistake 5 — Using same lamp times as fingers. Different cure angle = different effective cure time. Always add 15-30 seconds for toes.
For the broader mistake catalog, see builder gel mistakes to avoid.
Wear Time and Fill Schedule
Properly-applied builder gel on toes typically lasts:
- 6-8 weeks before cuticle growth becomes visible
- 8-10 weeks before any structural lifting starts
- 10-12 weeks total wear if you do a single fill at week 6
This is significantly longer than fingernail wear because of the slower toenail growth rate and the protected environment inside shoes.
Fill schedule:
- Week 6 — fill at the cuticle area. Standard fill technique, see how to fill builder gel.
- Week 10-12 — full removal and redo. By this point, the natural toenail underneath has grown significantly and structural integrity is compromised.
Cited Reading
For safer toenail care practices, the American Academy of Dermatology covers nail anatomy and toenail-specific concerns including infection risk under any nail-enhancement product. Read their nail care tips before pedicure work, especially if you have any history of toenail fungal issues.
FAQ
Can you do builder gel on toes if you have any toenail damage or fungus? No. Builder gel seals over the toenail. If there's any active fungal infection, sealing it under gel creates a moisture-trapped environment that worsens the infection. See a doctor first, treat fully, then consider gel.
Is builder gel on toes safe in summer / open-toed shoes? Yes. The cured layer is durable and weather-resistant. The only consideration is that sun exposure can yellow some gel formulas over months — use a UV-resistant top coat if you're outdoors heavily.
How thick should the builder gel layer be on toes? About 1.2-1.5 mm at the apex, tapering to 0.5-0.7 mm at the perimeter. Slightly thicker than the typical fingernail set.
Can you do extensions on toenails? Technically yes, but rarely recommended. Toenail extensions are vulnerable to catching on shoes and getting torn off, which can damage the natural nail. Overlay only is the safer choice for toes.
Do you need a different gel for toes than fingers? Not strictly, but a slightly thicker viscosity helps build the heavier structure. The same bottle works for both with technique adjustments.
Related Reading
- Builder gel nails (homepage) — topic hub
- Builder gel application steps — base application sequence
- Builder gel apex placement — apex positioning adapts for toes
- Builder gel one bead method — the application technique used on each toe
- Builder gel mistakes to avoid — broader troubleshooting catalog
- How to fill builder gel — toe fill technique at week 6
Last updated May 2026 — toe application sequence written from real pedicure work on clients across the last 18 months.