Read This Before You Open the Box
Editor Picks — Amazon
Top picks for first time using builder gel
Curated from current Amazon ratings and review counts.

modelones Rubber Base Gel Nail Polish, 6 Color Builder Clear Nude Milky Baby Pink Jelly Brown 6 in One Strengthener Apex Building Extension for Weak Nails Long Last U V French Manicure Gift for Women
$9.99

modelones Builder Nail Gel, 7-in-One Clear Builder for Nails, LED Lamp Cured Color Rubber Base Gel Polish Coat Strengthener Thickening Extension Rhinestone Glue in a Bottle for DIY Home Salon Gifts
$7.64

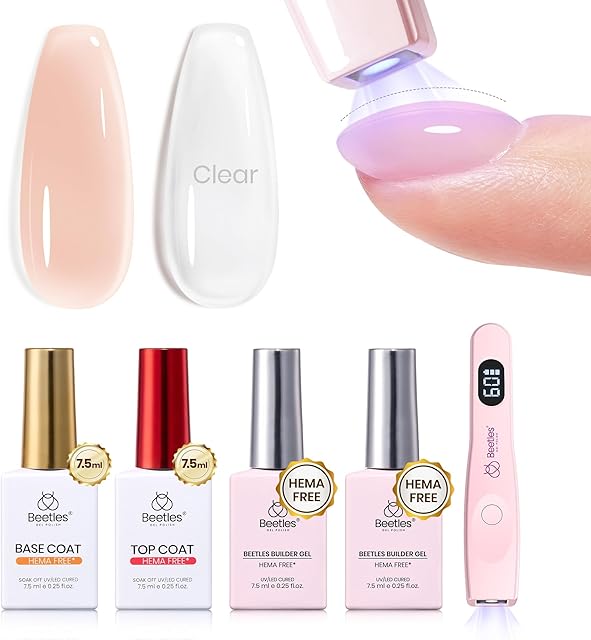
Beetles Builder Gel for Nails,0.51 oz 8 in 1 Strengthening Nails Enhancement Building Apex for Beginners & DIY Salon Manicure,Clear Builder Nail Gel,LED & UV Lamp Needed,Gifts for Women
$7.99

Orly Builder In A Bottle Soak-Off Sculpting Gel For Quick Nail Extension, Repair And Strengthening | Long-Lasting Builder Gel With Brush-On Application | Salon-Quality Nails At Home (18ml)
$17.99
Scroll →
The first time using builder gel is mostly a series of small panics. The bead is too big. The brush is sticky. The cuticle pusher slips. Your thumb is curing weird. None of these are catastrophes — they're just the parts of the process no tutorial slows down to acknowledge.
This page is the honest companion to your first set. Not a 10-step list pretending the process is clean. A real walkthrough of what your hands will do, where your timing will be off, and which four decisions made now will decide whether the set wears two weeks or two days.
If you want the clinical step sequence instead, that lives at how to use builder gel. Read it AFTER this one — it'll make a lot more sense once you know which steps are actually hard.
The Four Decisions That Matter Most
Before you touch any gel, four choices have already locked in 80 percent of how your first set turns out:
Decision 1 — Overlay or Extension?
Overlay only (no added length) is the right answer for set #1. Extensions add nail forms, sculpting, and a free-edge support skill you don't have yet. Every "my first builder gel was a disaster" story I've heard started with someone trying half-inch extensions on attempt one.
Decision 2 — Soak-Off or Hard Gel?
Soak-off. Always soak-off for set #1. Hard gel removes with a drill. You shouldn't be running a drill on your own nails yet — that's a learn-it-third skill.
Decision 3 — Bottle Brush-On or Tube?
Bottle brush-on. Tube formulas need a separate gel brush, slip solution, and a feel for moving sticky gel without dragging it. The bottle's built-in brush is the lower-skill-floor format and is what every first-time user should buy.
Decision 4 — Color or Clear?
Clear. Color hides nothing — every air bubble, brush stroke, and thickness mistake reads at full contrast. Clear forgives. You can do color on set #3 once your technique is consistent.
If those four decisions all line up (overlay, soak-off, brush-on bottle, clear), you've already de-risked most of what goes wrong.
What to Buy for Your First Set
For first-time builder gel, these formulas are forgiving and reliable:
Beetles Builder Gel Nails Kit HEMA-Free 8-in-1
$21.99

Modelones Builder Nail Gel 3-Pack with Top Coat
$13.29
The Beetles 8-in-1 is what I'd hand a friend doing their first set today — bottle brush, clear, self-leveling enough to recover from imperfect bead placement, and HEMA-free which is gentler on first-time skin.
For full kit decision logic with multiple price tiers, see best builder gel for beginners and best builder gel kits.
The Honest Walkthrough
Here's what your first set will actually look like, hour by hour. Numbers are realistic — not the "30 minute set" you see in salon videos.
Minute 0-15 — Setup and Prep
Lay everything out within arm's reach before you start. Once gel is on your brush, you don't have a free hand to fish for your file. Specifically:
- Lamp plugged in and reachable
- File and buffer on a paper towel
- Cuticle pusher
- 91 percent alcohol + lint-free wipes
- Cotton ball + nail polish remover (in case of disaster)
- Cuticle oil (for after)
Wash hands. Push back cuticles with the wooden pusher — no metal yet, you'll dig too deep. Buff the shine off the nail surface with the gentle side of the buffer. Wipe each nail with alcohol on a lint-free wipe.
The first panic: "Did I buff enough?" The honest answer is you probably buffed too much on one nail and not enough on another. That's fine for set #1. Aim for matte across the whole nail plate.
Minute 15-25 — Base Coat
Apply a thin base coat layer to each nail. Cure 30 seconds under your lamp.
The second panic: the base coat looks streaky. That's normal — it's a thin layer, not a finished surface. The streaks won't show through builder gel.
Minute 25-55 — Builder Gel Application
This is the long stretch. Work on one or two nails at a time, not all five.
Pull a small bead — smaller than you think — onto the nail surface near the middle. Use the brush to push it toward the cuticle (leave a tiny gap, never touch skin), then back toward the free edge, then sideways to the walls.
The third panic: the gel is moving back into your cuticle area. Tilt the finger downward so gravity pulls the gel toward the free edge while you work. If gel touches skin, wipe immediately with alcohol on the corner of a wipe.
The fourth panic: "Where do I put the apex?" Apex = the highest, thickest point of the gel. It belongs roughly one-third back from the free edge. Push extra gel toward that spot before you cure. Don't worry about getting it perfect — just don't put the thickness right at the cuticle (will lift) or right at the tip (will crack).
Cure each nail 60 seconds. Cure your thumbs SEPARATELY at 90 seconds each — thumb geometry under the lamp leaves them under-cured if you do them with the rest of the hand.
For diagnostic help if a nail isn't curing fully, see builder gel not curing.
Minute 55-70 — File, Shape, Top Coat
After full cure, the gel surface will feel firm. Wipe the sticky inhibition layer off each nail with alcohol on a wipe. File the free-edge shape (square, almond, etc.) with the coarse side of the file. Buff any unevenness with the soft side.
Apply a thin top coat layer. Cure 60 seconds. Wipe inhibition layer.
Apply cuticle oil to every cuticle. Massage in.
You're done.
The Three Moments You'll Definitely Mess Up
In order of likelihood:
Moment 1 — Bead too big. You'll pull a bead the size of a pea and it'll flood half the nail before you can move it. Fix: smaller bead next nail. Like, half the size you just used.
Moment 2 — Skin contact. Gel will touch your cuticle at least once. Wipe with alcohol immediately, before curing. Cured gel against skin is the #1 trigger for HEMA sensitization over time — the American Academy of Dermatology covers acrylate contact dermatitis and the cumulative-exposure mechanism in detail.
Moment 3 — Pulling the brush out wrong. Builder gel is sticky — the brush wants to drag the gel back up when you lift it. Press the brush flat to the nail, then lift straight up, not at an angle.
How Set #1 Will Actually Look
Real talk about the visual results:
- From 3 feet away: decent. Looks like nails.
- From 1 foot away: uneven thickness across nails, possible cuticle flooding on 1-2 fingers, apex placement varies.
- From 2 inches away (selfie distance): you'll see every flaw. This is fine. Nobody else will look this close.
- Wear time: 7-10 days realistic. One or two nails may lift in week one. That's normal.
By set #3 you'll be at 14-day wear. By set #5 you'll be at 18-21 days. The learning curve is fast — it's just front-loaded.
What Pros Wish Beginners Knew
Three things that aren't in most tutorials:
- Less gel beats more gel. Beginner instinct is to load the brush. Pro instinct is to use the smallest bead that covers the nail. Thin sets last longer than thick sets because the cure penetrates fully.
- The free-edge cap is non-negotiable. Run your brush along the underside of your free edge after the top layer. Without this, the tip wears out in week two.
- Cuticle oil daily after. Builder gel doesn't care about cuticle oil — your natural nail underneath does. Daily oil keeps the bond between gel and natural nail flexible.
For the diagnostic guides on what goes wrong, see cracking fixes, lifting fixes, and why builder gel is sticky.
When (and How) to Take It Off
Plan removal before your first set sits two weeks. The fastest safe protocol:
- File 80 percent of the bulk down with the coarse side
- Soak each finger in acetone-saturated cotton wrapped in foil (15-20 min)
- Push softened gel off with the wooden pusher
- Buff lightly, cuticle oil
Total time: 25-30 minutes. Most of it hands-off while soaking.
For the no-drill walkthrough, see how to remove builder gel without drill. For the full protocol, how to remove builder gel.
Read next
How to Remove Builder Gel at Home Safely: 3 Methods Compared (2026)
Three methods to remove builder gel — file-and-soak, file-only, and salon e-file — compared on time, safety, and nail-health impact. Plus a detailed step-by-step for the safest at-home method.
Continue readingA Short FAQ
First time using builder gel — what's the most important thing to get right? Apex placement (the thick point sits one-third back from the free edge) and no-skin-contact discipline. Everything else is recoverable.
Will my first time using builder gel ruin my natural nails? Only if you peel the set off. File + soak removal is safe. Peeling pulls the top layer of the nail off with the gel.
Why is my builder gel sticky after I cure it? That's the inhibition layer — wipe it with alcohol on a lint-free wipe. Every gel does this. See why builder gel is sticky for the full explanation.
How long should my first set take? 90-120 minutes is realistic. Pros do 45-60 minute sets. You'll get faster with practice.
Can I do my dominant hand first time? Try non-dominant hand first. Your non-dominant hand has to do the precise work on your dominant hand — easier to do it once you've practiced on the simpler hand.
After Set #1
If set #1 went OK, set #2 is where you'll start refining. Things to focus on next round:
- Consistency across all 10 nails (set #1 will look like 10 different nails)
- Apex placement getting repeatable
- Smaller beads
- Adding the free-edge cap deliberately
The full strategic learning curve is mapped at how to do builder gel nails — read that before set #2.
You can also browse builder gel nails ideas for inspiration on what to try once your technique is solid.
For the broader system context — what builder gel is, where it sits in the gel family, and which adjacent skills to learn next — see the Builder Gel Atlas. And the project homepage has the latest product picks pinned at the top.
Final Notes from Sara
Your first time using builder gel will not be your best work. That's the design — set #1 exists to teach you what your specific weak point is. Mine was the apex (too far back, every time). Yours might be bead size, or curing thumbs with the rest of the hand, or skin contact at the cuticle.
The trick is to do set #2 within a week or two of set #1, while the mistakes are fresh. Wait three months and you'll re-learn the same mistakes the hard way.
The five-set curve is real. Most beginners are at salon-adjacent results by set #5. Almost nobody is there at set #1 — and that's fine.
Last updated May 2026. This article uses AI assistance for research and structure; the walkthrough comes from teaching first-time DIY clients and from my own first set (which was, predictably, a mess).