Use This Page
Editor Picks — Amazon
Top picks for builder gel step by step at home
Curated from current Amazon ratings and review counts.

modelones Builder Nail Gel, 7-in-One Clear Builder for Nails, LED Lamp Cured Color Rubber Base Gel Polish Coat Strengthener Thickening Extension Rhinestone Glue in a Bottle for DIY Home Salon Gifts
$7.64

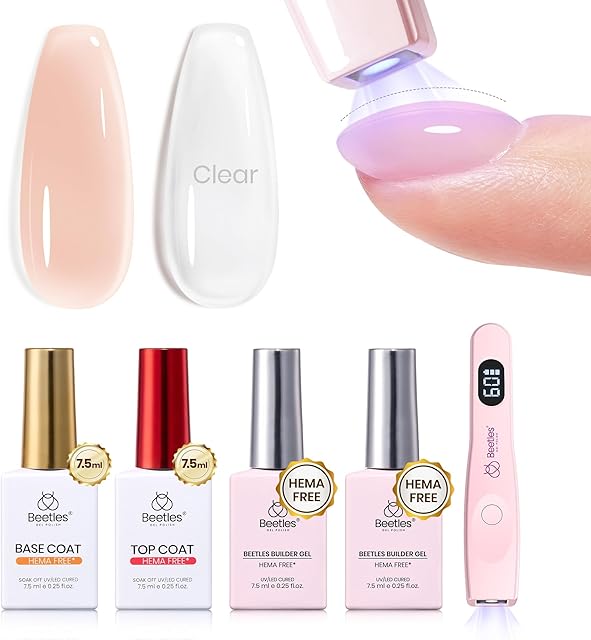
Beetles Builder Gel Low Heat,0.5 oz Clear Gel Builder for Natural Nails Building Apex & Strengthener Extension with Detachable Liner Nail Brush for Beginner DIY Salon at Home Gifts,UV&LED Lamp Needed
$9.99

Beetles 3D Gel Nail Art, 2 oz Non-Sticky Clear 3D Sculpting Gel for Nail Art, Molding & Carving Glue,Builder Extension Gel with Dual Forms, Beginner-Friendly DIY UV Nails,Pastel Playland
$16.99

Orly Builder In A Bottle Soak-Off Sculpting Gel For Quick Nail Extension, Repair And Strengthening | Long-Lasting Builder Gel With Brush-On Application | Salon-Quality Nails At Home (18ml)
$17.99
Scroll →
This is the scannable version. Keep it open on your phone while you work. Builder gel step by step at home in 12 numbered steps, plus a pre-flight checklist and the exact lamp times that beginners get wrong. If you want the long beginner walkthrough with hand-holding, that's at first time using builder gel. If you want the technical reference manual, that's how to use builder gel.
This page is the in-between: precise enough to use, short enough to follow without scrolling.
Pre-Flight Checklist
Run this list out loud before you sit down. Missing items = paused set = sticky disasters.
- 48 W+ LED lamp, plugged in
- Base coat
- Builder gel (clear, soak-off, brush-on bottle)
- Top coat
- 100/180-grit file
- 220-grit buffer
- Wooden cuticle pusher
- 91 percent isopropyl alcohol
- Lint-free wipes (NOT cotton balls — they shed)
- Cuticle oil
- Optional: nail forms if extending past free edge (skip on first set)
If you're missing the lamp, alcohol, or lint-free wipes, stop. Those three you cannot improvise.
The Twelve Steps
1. Wash hands
Soap and water. Dry completely. No lotion. No hand cream.
2. Push cuticles
Wooden pusher only. Light pressure. Push back, then gently scrape any cuticle film off the nail plate.
3. Light buff
220-grit buffer over the whole nail plate. Aim for a matte, shineless surface. Do NOT buff aggressively — you're removing the top oil layer, not thinning the nail.
4. Alcohol wipe
91 percent isopropyl on a lint-free wipe. Wipe each nail once. Don't re-touch the nail surface with your fingers after this.
5. Base coat
Thin layer over the whole nail. Cure 30 seconds.
6. First gel bead — middle of nail
Small bead (smaller than you think). Drop it in the middle of the nail. Don't try to spread it from the cuticle.
7. Push gel to cuticle, then walls, then free edge
Brush direction: cuticle (leave 1 mm gap), sidewall, sidewall, free edge. Smaller motions. Tilt finger down so gravity pulls gel away from cuticle.
8. Build the apex
Add a second tiny bead at the apex point — one-third back from the free edge, dead center. This is the structural high point. Without it, the set cracks at the tip.
9. Cap the free edge
Run the brush along the underside of the free edge. This seals the tip. Skipping this is the #1 cause of week-two tip wear.
10. Cure
60 seconds for fingers. 90 seconds for thumbs (cure separately).
11. Top coat
Thin layer over the whole nail. Cure 60 seconds.
12. Wipe + oil
Alcohol-wipe the sticky inhibition layer off each nail. Apply cuticle oil to every cuticle. Massage.
Done.
Lamp Times That Actually Matter
These are the numbers beginners get wrong:
| Layer | Fingers | Thumbs |
|---|---|---|
| Base coat | 30 sec | 60 sec |
| Builder layer | 60 sec | 90 sec |
| Top coat | 60 sec | 90 sec |
Why thumbs are different: thumb geometry under the lamp means the gel sits at a worse angle relative to the bulbs. Same cure time = under-cured thumb. Always cure thumbs alone, hand flat, palm up, with the thumb pointing straight at the bulbs.
If you suspect undercure, see builder gel not curing for the full diagnostic.
What to Buy if You Don't Have a Kit Yet
Beginner-friendly builder gel kits that include lamp + gel + base/top + file:

Modelones Builder Nail Gel 3-Pack with Top Coat
$13.29
Beetles Builder Gel Nails Kit HEMA-Free 8-in-1
$21.99

Makartt Clear Gel Builder Kit
Under $25
For the full kit decision tree by price and skill level, see best builder gel kits and best builder gel for beginners.
Common Snags (Skim Before You Start)
- Gel touches skin. Wipe with alcohol immediately, BEFORE you cure. Cured gel against skin is the leading trigger for HEMA dermatitis — see the American Academy of Dermatology acrylate-allergy reference.
- Bead too big and flooding. Smaller bead next time. Work in small motions.
- Brush dragging gel up when lifting. Press brush flat, then lift straight up.
- Top coat looks streaky. It's a thin layer — that's normal. Cure resolves it.
- Inhibition layer feels weird. That sticky residue is supposed to be there. Wipe with alcohol. See why builder gel is sticky.
After You Cure
The set is done. Two things matter for wear time:
- Cuticle oil daily. Keeps the natural nail flexible underneath the cured gel. Without oil, the gel-nail bond gets brittle.
- No peeling. When you're ready to remove, file + soak — never peel. Peeling pulls layers off the natural nail.
Removal Plan (Read Before Your Set Hits Week 2)
The whole reason you can do this at home safely is the soak-off removal protocol:
- Coarse-file 80 percent of the bulk
- Acetone-soaked cotton + foil per finger, 15-20 min
- Push softened gel off with wooden pusher
- Buff + cuticle oil
Total ~25-30 min, mostly hands-off. Full walkthrough: how to remove builder gel. No-drill version: how to remove builder gel without drill.
Read next
How to Remove Builder Gel at Home Safely: 3 Methods Compared (2026)
Three methods to remove builder gel — file-and-soak, file-only, and salon e-file — compared on time, safety, and nail-health impact. Plus a detailed step-by-step for the safest at-home method.
Continue readingWorkspace Setup Notes
A few setup details that aren't on most "step by step" lists but matter:
- Surface. Work on a hard, flat surface — not a sofa or bed. Your wrist needs to rest level for steady bead placement.
- Light overhead. Position a desk lamp or overhead light so you can see the nail surface clearly. The cure lamp is NOT a work light — you'll mis-judge bead size if you rely on it.
- Hair pulled back. Loose hair brushing across nails between cure stages is the most underrated cause of a flawed set.
- Pets in another room. A cat jumping on the table during minute 22 of your set is the kind of thing that makes you accidentally cure gel onto skin.
These don't sound like step-by-step items but they save the set as much as the application technique does.
What "Step by Step" Skips
Most builder gel step by step at home tutorials skip three things that beginners ALWAYS need:
Skip 1 — Pre-application bead practice
Before your first set, pull beads onto a nail wheel ($5 plastic training tips on Amazon). Practice bead size and brush motion ten times on the wheel. Skills transfer directly to real nails. This 10-minute investment saves 30 minutes of fumbling on set 1.
Skip 2 — Per-hand sequencing
Right-handed beginners should do the LEFT hand first. Then your dominant hand (right) does the precise work on your weaker hand (left). When you flip to doing the right hand with your left, you'll be glad you saved the harder coordination challenge for after your hand was warmed up.
Left-handed: reverse this. Do right hand first.
Skip 3 — The 24-hour aftercare window
The first 24 hours after a fresh set, the cured gel is finishing its full crosslink. Avoid:
- Hot showers (heat softens the bond temporarily)
- Acetone exposure
- Heavy hand-washing with harsh soaps
- Picking at the surface
Cuticle oil daily starts now and continues for the life of the set.
Sizing the Bead Correctly
Bead size is the single most important application skill. Reference points:
| Application area | Bead size |
|---|---|
| Base coat | None — brush dabs only |
| Builder gel — first layer | Small lentil-sized |
| Builder gel — apex build | Tiny rice-grain-sized (added second) |
| Top coat | Small lentil-sized |
If you pulled a pea-sized bead, it's too big. Wipe excess back into the bottle with the brush.
Pro Habits Worth Stealing
Three habits pros use that beginners can copy from day 1:
- Brush wipe between bottles. Wipe the brush on the bottle rim every dip so the bead size stays consistent.
- Cure the lamp on the table first. Run the cure timer with the lamp on the table for 3-5 seconds before putting your hand in. This warms up the bulbs and avoids first-second cure delay.
- Re-position between cures. Between curing the right hand and the left, take 30 seconds to stretch, re-position the lamp, and reset. Rushing the second hand is when mistakes stack.
Where to Go After Set #1
Once you've done your first set:
- For the strategic learning curve (sets 1 through 5), see how to do builder gel nails.
- For the deeper companion that explains what your hands are actually doing, see first time using builder gel.
- For mistake diagnostics, see builder gel mistakes to avoid.
- For inspiration on shapes and looks, see builder gel nails ideas.
- For the broader system context, see the Builder Gel Atlas.
- And the project homepage keeps the current product picks pinned.
FAQ
Builder gel step by step at home — how long does it take? First set: 90-120 minutes. By set #5, 60-75 minutes. The compressed version on this page assumes some practice — true beginners should budget extra.
Can I do builder gel step by step at home without a lamp? No. Builder gel requires UV/LED light to cure. If you want a no-lamp option, that's a different product (cyanoacrylate-based) and a different technique entirely.
Builder gel step by step at home — do I need extensions? No. Overlays (no added length) are the recommended first-set format. Extensions add forms and sculpting skills that beginners shouldn't try on set 1.
What if I make a mistake mid-application? If gel touches skin, wipe with alcohol BEFORE curing. If bead is too big, wipe excess back. If apex is wrong, push gel toward correct position before curing. Once final-cured, most mistakes require file-down or full removal to fix.
Why do my nails feel sticky after I follow the step by step? That's the inhibition layer — supposed to be there. Wipe with alcohol on a lint-free wipe. See why builder gel is sticky.
How often should I do a fresh set vs a fill? Fresh set every 4-6 weeks, with one fill at the 2-3 week mark in between. The fill protocol is at how to fill builder gel.
Last updated May 2026. This article uses AI assistance for research and structure; the step list reflects the workflow I teach to first-time clients.