Why This List Exists
Editor Picks — Amazon
Top picks for what nobody tells you about builder gel
Curated from current Amazon ratings and review counts.

modelones Builder Nail Gel, 7-in-One Clear Builder for Nails, LED Lamp Cured Color Rubber Base Gel Polish Coat Strengthener Thickening Extension Rhinestone Glue in a Bottle for DIY Home Salon Gifts
$7.64

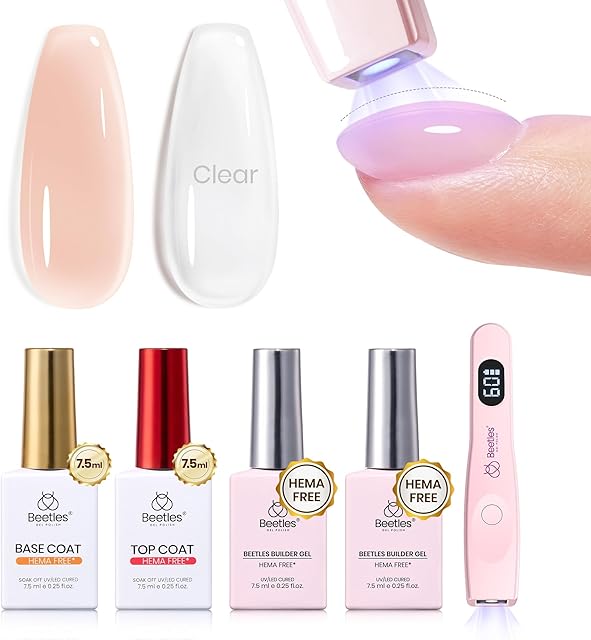
Beetles Builder Gel for Nails-Cover Nude Translucent 8 in 1 Nail Thickening Strengthening Building Instant Apex for Beginner DIY Salon at Home,Natural Nude Builder Nail Gel, UV & LED Lamp Cured Needed
$8.99
Scroll →
Tutorials tell you how to apply builder gel. Product pages tell you which bottle is best. Almost nobody tells you what it's actually like to live with builder gel over months and years — the small frustrations, the long-term tradeoffs, the costs nobody factors into a "DIY is cheaper than salon" calculation.
I've been doing my own builder gel since 2022 and teaching DIY clients since 2024. What nobody tells you about builder gel is the substrate of those years — the things I would have wanted in a single document before set 1, instead of learning each one slowly.
Twelve items. Not a tutorial. Not a buying guide. The actual texture of the thing.
1. Your Lamp Will Outlive Three Bottles of Gel
The lamp is the part everybody worries about. Wattage, wavelength coverage, dual UV/LED, timer settings — pages of debate. In practice, a $30-50 lamp at 48 W+ will cure every bottle of builder gel you buy for the next 3-5 years.
What actually changes is the gel. You'll go through bottles. Each one teaches you something — different viscosity, different self-leveling speed, different feel on the brush. The lamp is the constant. The gel is the variable.
The implication: don't spend $150 on the lamp and $15 on the gel. Reverse it. Get a solid 48 W lamp for $30-50 and invest the rest in trying different gels until you find your formula.
For lamp + gel kit picks, see best builder gel kits.
2. The Second Bottle of Gel Matters More Than the First
Everyone optimizes the first bottle — research, comparison videos, asking friends. Then they buy it, learn on it, and somewhere around 60-70 percent used they're already running thin.
The second bottle is the one that matters. By the time you buy it, you've done 8-15 sets on the first bottle and you know what YOU need:
- Faster self-leveling because your bead control isn't there yet
- Higher viscosity because you keep flooding the cuticle
- Pinker undertone because your natural nail beds are pale
- HEMA-free because your skin reacted around set 12
The first bottle is your education. The second bottle is your real choice.
So: don't agonize over bottle #1 too long. Pick a forgiving one and use it to learn what you actually want. Then make the informed pick for bottle #2.

Modelones Builder Nail Gel 3-Pack with Top Coat
$13.29
3. The HEMA Risk Is Real and Cumulative
This is the most underdiscussed part of consumer builder gel. HEMA (2-hydroxyethyl methacrylate) is in most builder gels and is one of the main acrylate compounds that can cause contact sensitization over repeated skin exposure.
You will not react on set 1. You probably won't react on set 5. The sensitization builds slowly. By set 20-40, if your application discipline is sloppy (gel touching skin at the cuticle and sidewalls), you might start noticing:
- Redness around cuticles 4-12 hours after a fresh application
- Itching at the cuticle line
- Tiny blisters on the side of your finger near the nail wall
- Reaction to OTHER acrylates (dental work, adhesive bandages, glasses frames)
Once sensitized, the reaction is often lifelong and can extend to acrylates beyond builder gel. The American Academy of Dermatology's acrylate-allergy resource covers the mechanism and the cross-reactivity in detail.
The protective practice is no-skin-contact during application — leave a deliberate 1 mm gap at cuticle, sidewalls, and under the free edge. The HEMA-free formulas reduce but don't eliminate the risk (they often substitute HEMA with other acrylates that have similar mechanisms).
If you're skin-sensitive or already react to other adhesives, start HEMA-free from set 1:
Beetles Builder Gel Nails Kit HEMA-Free 8-in-1
$21.99
Full HEMA-free breakdown: best HEMA-free builder gel.
4. Removal Is the Skill That Matters More Than Application
Application failures look bad (lumpy nails, uneven thickness, color mismatch) but they're cosmetic. The set still wears. You learn for next time.
Removal failures damage your natural nails for weeks. A peeled-off lifted gel takes the top layer of the natural nail with it. That nail grows out thin, ridged, and tender for 4-6 weeks. Stack three bad removals in a row and your nails are visibly damaged.
The protocol that saves your nails:
- File 80 percent of the bulk off (5-10 min)
- Acetone-saturated cotton + foil per finger (15-20 min soak)
- Push softened gel off with wooden pusher — NEVER scrape
- Buff lightly, cuticle oil
Total 25-30 minutes. Mostly hands-off while soaking. See how to remove builder gel and how to remove builder gel without drill.
Read next
How to Remove Builder Gel at Home Safely: 3 Methods Compared (2026)
Three methods to remove builder gel — file-and-soak, file-only, and salon e-file — compared on time, safety, and nail-health impact. Plus a detailed step-by-step for the safest at-home method.
Continue reading5. Cuticle Oil Is the Single Biggest Lever for Wear Time
People obsess over base coat brands, top coat brands, cure times. Then skip cuticle oil for 18 days and wonder why their set cracked.
Cuticle oil isn't for the gel — it's for the natural nail underneath. The natural nail flexes thousands of times a day. If it dehydrates and gets brittle, the gel-to-nail bond becomes rigid. Rigid bonds crack at week 2. Flexible bonds last 3+ weeks.
Jojoba oil works. So does any cuticle oil. Daily application, 30 seconds. This is the single biggest lever for extending wear time and the most consistently skipped step in DIY.
6. Thumb Cures Are Different and Most People Get Them Wrong
Thumb geometry under the lamp is different from finger geometry. The thumb sits at a wider angle to the bulbs. The gel surface is at a less optimal cure position. Same lamp time = under-cured thumb.
You can't see this. The thumb LOOKS cured. It FEELS cured. Then both thumbs lift simultaneously around day 7-10 because the gel underneath was never fully crosslinked.
The fix: cure thumbs separately. Hand flat, palm up, thumb pointing straight at the lamp's bulbs. 90 seconds (vs 60 for fingers) for each layer.
This is the single most common cause of "I followed every step and my thumbs lifted" stories. See builder gel not curing for the full diagnostic.
7. Builder Gel Is Light-Sensitive in Ways That Surprise Beginners
Builder gel bottles slowly cure inside the bottle if exposed to ambient light. Sunlight is the worst. Strong LED desk lamps are nearly as bad. Even window-light over weeks degrades the bottle.
Symptoms of partially-cured bottle gel:
- Viscosity goes up — gel becomes harder to spread
- Brush feels gummy
- Self-leveling slows or stops
- Eventually the brush won't lift from the bottle cleanly
Once a bottle is partially cured inside, you can't reverse it. The whole bottle is on a slow countdown to unusable.
The fix is just storage discipline. Closed drawer or opaque box. Never on a sunny windowsill. Never under a task lamp.
I learned this on a $40 bottle of pro gel that I left on a bathroom counter for three weeks. Bottle was useless. Money gone.
8. The "30 Minute Set" in Videos Is Not Real for Beginners
Every salon video and influencer tutorial shows a clean 30-minute set. That's a pro at full speed on a familiar client.
Real beginner times:
- Set 1: 90-120 minutes
- Set 3: 75-90 minutes
- Set 5: 60-75 minutes
- Set 10+: 45-60 minutes
Pros doing fresh sets are at 30-45 minutes. You will not be at 30 minutes for at least your first year of regular sets.
This matters because beginners who plan a 30-minute Sunday-evening set get caught with sticky gel and bedtime an hour away. Plan double.
For the realistic learning curve over sets 1 through 5, see how to do builder gel nails and first time using builder gel.
9. "Self-Leveling" Means Different Things in Different Formulas
Self-leveling is a marketing word that describes how aggressively the gel smooths itself out before cure. It varies wildly.
| Self-leveling style | Behavior | Best for |
|---|---|---|
| Aggressive (water-thin) | Spreads on its own; almost impossible to apex | Total beginners on overlays |
| Medium | Smooths brush strokes in 20-30 sec; holds apex if shaped | Most DIY use |
| Firm | Stays where you put it; needs sculpting; best apex control | Extensions, pros |
Beginner instinct is to want aggressive self-leveling (less work). The trap: aggressive self-leveling formulas often spread INTO the cuticle area if you don't tilt the finger correctly. Medium self-leveling is usually the right floor for first-time users.
Full self-leveling breakdown: best self-leveling builder gel.
10. The Real Year-1 Cost Is Higher Than the Kit Price
The $35 starter kit is the entry ticket, not the total. Real year-1 DIY costs:
- Starter kit (lamp + gel + base/top + file): $35-80
- Replacement builder gel bottle (you'll need 1-2 in year 1): $15-30 each
- 91 percent isopropyl alcohol: $4
- Lint-free wipes: $8
- Wooden cuticle pushers: $5
- Cuticle oil: $10
- Acetone for removal: $8
- Cotton + foil for removal: $5
- Replacement files when worn: $10
Total realistic year-1: $90-160 depending on how many sets you do.
That's still vastly cheaper than salon ($850-2550 for the same year), but it's not the $35 the starter-kit headline suggests.
For the full kit decision tree, see best builder gel kits.
11. Builder Gel Sets Look Different in Photos Than in Person
The 4K-zoom photo of an influencer's perfect builder gel set is doing 3 things you can't replicate in front of your own eyes:
- Macro lens flattens depth — surface unevenness disappears in the photo but you'll see it from a foot away
- Ring light evens color — color mismatches and brush strokes vanish under perfect ring-light coverage
- The set is hours old, not days — the photo is taken right after the final cure. By day 5, every set looks less perfect than at hour 0
Your own set, viewed in normal light, will look like a 60-70 percent version of a salon photo even when it's structurally just as good. This is the photo gap that makes beginners feel like they did worse than they actually did.
The honest test: compare your set to a salon-done set IN PERSON, not to influencer photos.
For realistic examples, see builder gel nails before and after.
12. Most Builder Gel Sets Fail at the Junction, Not the Surface
Sets rarely fail because the gel itself broke. They fail at one of three junctions:
| Junction | Failure mode | Cause |
|---|---|---|
| Gel ↔ natural nail (cuticle area) | Lifting | Skipped prep; thumb undercure; cuticle film |
| Gel ↔ natural nail (free edge) | Tip wear, chips | Skipped free-edge cap; thin tip |
| Old gel ↔ new gel (in fills) | Seam splits | Hard seam, no feathering blend |
Almost every builder gel failure is a junction failure. The cured gel itself is robust — it's the bond at the boundary that gives way.
Implications:
- Prep matters more than product
- Free-edge cap matters more than top coat brand
- Blend technique on fills matters more than gel matching
This is the through-line of every troubleshooting page on this site: cracking fixes, lifting fixes, not-curing diagnosis, why gel stays sticky.
A Short Personal History
I started doing my own builder gel in 2022 after a $90 salon set lifted in 9 days and the salon refused to redo it. I bought a $25 kit on Amazon, did my first set badly, and within 3 months had done 8 sets and figured out about half of what's on this page.
The other half came from teaching DIY clients in 2024-2025. Watching 50+ people do their first sets revealed which mistakes are universal and which are personal. The universal ones became this page.
I still do my own builder gel. I'm on bottle #14 of various formulas. The lamp from set 1 still works. I've never had a salon redo a set. I've also never been to a salon since.
What I Wish I'd Known on Day 1
If you forced me to compress this into three sentences for a friend buying their first kit:
- The lamp is a one-time purchase; the gel is where to experiment.
- Skin contact at the cuticle is the long-term risk, not the short-term mess.
- Removal is the skill that protects your nails — never peel.
Everything else is recoverable through practice.
Where to Go From Here
If you're brand new and haven't done a set yet:
- First time using builder gel — honest walkthrough
- Builder gel step by step at home — scannable companion
- Best builder gel for beginners — kit picks
If you've done 1-3 sets and want to improve:
- Builder gel mistakes to avoid — diagnostics
- How to fill builder gel — fills double your wear value
- How to do builder gel nails — strategic learning curve
If you're trying to choose between systems:
For the broader system context, the Builder Gel Atlas. For the project's current product picks pinned at the top, the homepage.
FAQ
What nobody tells you about builder gel that's most important? The HEMA-related skin sensitization risk. It's cumulative, often lifelong once developed, and rarely covered in beginner tutorials. Apply with no-skin-contact discipline from set 1.
What's the biggest hidden cost of DIY builder gel? Replacement bottles. Year-1 reality is 1-2 replacement bottles beyond the starter kit, plus consumables (alcohol, wipes, oil, acetone). Real year-1 cost: $90-160 vs the $35 kit headline.
Why do my builder gel sets fail at week 2 instead of week 3? Almost always one of three things: thumbs cured with the rest of the hand (undercure), cuticle prep skipped (lifting from base), or daily cuticle oil neglected (rigid bond cracks). Address those three first.
Is builder gel worth it long-term? For people doing 1+ sets per month, yes — DIY is dramatically cheaper than salon and the learning curve plateaus at 5-10 sets. For people doing 1-2 sets per year, professional service might be a better value because the gear sits unused.
Final Notes from Sara
The list above isn't exhaustive — it's the 12 items I think matter most. Other lists would emphasize different things (some pros would put apex placement higher; some sensitive-skin users would put HEMA at #1 instead of #3).
The point isn't to memorize a ranking. It's to know that a tutorial showing "how to apply builder gel" is teaching you maybe 10 percent of what makes a set work. The other 90 percent is the texture of doing this — lamp wattage matters, storage matters, skin contact matters, fills matter, removal matters more than application.
Read this list before you buy your first kit if you can. If you've already bought it, read it before set 2. Either way, your set #5 will be better for having read it than not.
Last updated May 2026. This article uses AI assistance for research and structure; the twelve items are my actual running list from 2022-2026 of things I would have wanted handed to me at the start.